Salta al contenuto principale

Sony Vaio SVE171C11L Speaker Replacement

Cosa ti serve

  1. Sony Vaio SVE171C11L Speaker Replacement, Battery: passo 1, immagine 1 di 1
    • Turn the laptop over so its underside is facing upwards and visible.

  2. Sony Vaio SVE171C11L Speaker Replacement: passo 2, immagine 1 di 1
    • Once you flip the laptop over, make sure the right tab is pushed upwards to unlock it.

    • Use your left hand to push up the left tab to release the battery.

  3. Sony Vaio SVE171C11L Speaker Replacement: passo 3, immagine 1 di 1
    • After the battery is released, locate the small gap where the battery and the shell meet. Then lift the gap up and rotate the battery up and away from yourself.

  4. Sony Vaio SVE171C11L Speaker Replacement: passo 4, immagine 1 di 1
    • Pull the battery away.

  5. Sony Vaio SVE171C11L Speaker Replacement, Hard Drive: passo 5, immagine 1 di 1
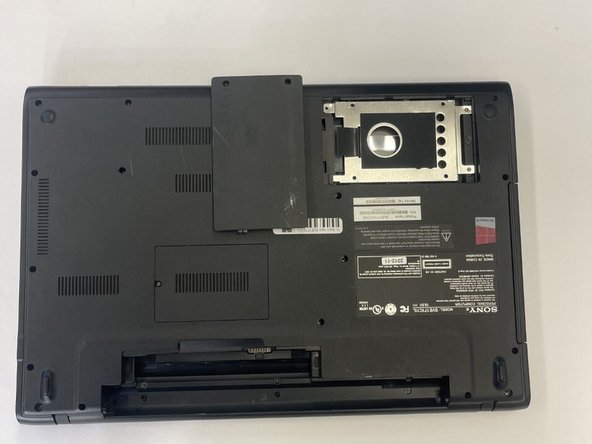
    • Use a Phillips #00 screwdriver to remove the two screws that secure the hard drive cover.

  6. Sony Vaio SVE171C11L Speaker Replacement: passo 6, immagine 1 di 2 Sony Vaio SVE171C11L Speaker Replacement: passo 6, immagine 2 di 2
    • After the screw have been removed, pop the hard drive cover open.

  7. Sony Vaio SVE171C11L Speaker Replacement: passo 7, immagine 1 di 1
    • Use a Phillips #00 screwdriver to remove the 3 screws that secure the hard drive.

  8. Sony Vaio SVE171C11L Speaker Replacement: passo 8, immagine 1 di 1
    • When finished removing the screws, use your fingers to hold the blue ribbon attached from the hard drive to remove it from laptop

  9. Sony Vaio SVE171C11L Speaker Replacement, Speaker: passo 9, immagine 1 di 2 Sony Vaio SVE171C11L Speaker Replacement, Speaker: passo 9, immagine 2 di 2
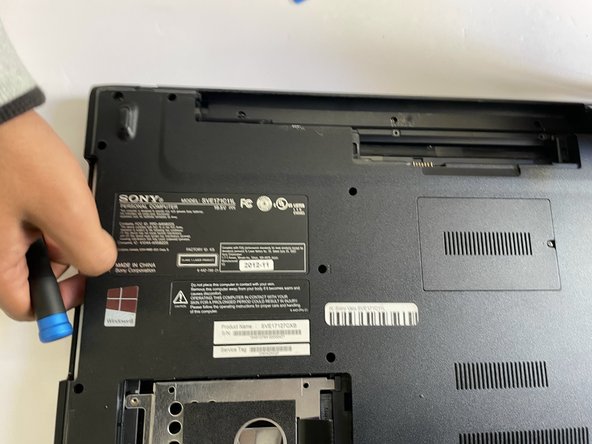
    • Remove the eleven 3mm flathead screws that surround the back panel.

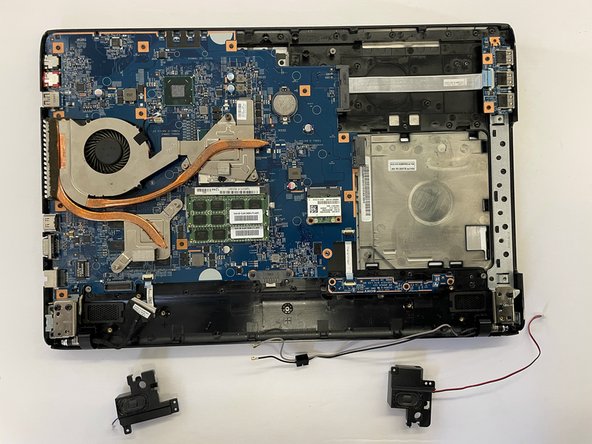
    • Remove the back cover.

  10. Sony Vaio SVE171C11L Speaker Replacement: passo 10, immagine 1 di 1
    • On the left speaker, unplug the cable that is in the way so you can remove the left speaker safely.

  11. Sony Vaio SVE171C11L Speaker Replacement: passo 11, immagine 1 di 1
    • Remove the single screw at the bottom of the speaker

  12. Sony Vaio SVE171C11L Speaker Replacement: passo 12, immagine 1 di 1
    • Remove the 2 black scews that at the top of the speaker.

  13. Sony Vaio SVE171C11L Speaker Replacement: passo 13, immagine 1 di 2 Sony Vaio SVE171C11L Speaker Replacement: passo 13, immagine 2 di 2
    • Carefully remove the speaker. Keep watch no wiring is in the way.

    • Do this to both sides to remove the second speaker.

Conclusione

To reassemble your device, follow these instructions in reverse order.

Team

CSU Los Angeles, Team 6-3, Adachi Fall 2022 Membro di CSU Los Angeles, Team 6-3, Adachi Fall 2022

CSULA-ADACHI-F22S6G3

3 Membri

12 Guide realizzate

0 Commenti

Aggiungi Commento

Visualizza Statistiche:

Ultime 24 Ore: 1

Ultimi 7 Giorni: 1

Ultimi 30 Giorni: 3

Tutti i Tempi: 100