Salta al contenuto principale

Sony Vaio PCG-61411L Optical Disc Drive Replacement

Cosa ti serve

  1. Sony Vaio PCG-61411L Optical Disc Drive Replacement, Battery: passo 1, immagine 1 di 3 Sony Vaio PCG-61411L Optical Disc Drive Replacement, Battery: passo 1, immagine 2 di 3 Sony Vaio PCG-61411L Optical Disc Drive Replacement, Battery: passo 1, immagine 3 di 3
    • Be sure to disconnect the device charger and power down the device before beginning.

    • Turn the device over onto its back, where the battery is at the top of the device. Slide the "lock" switch to the right.

  2. Sony Vaio PCG-61411L Optical Disc Drive Replacement: passo 2, immagine 1 di 3 Sony Vaio PCG-61411L Optical Disc Drive Replacement: passo 2, immagine 2 di 3 Sony Vaio PCG-61411L Optical Disc Drive Replacement: passo 2, immagine 3 di 3
    • Slide the "release" switch to the left and gently lift the battery up to remove it.

    • Completely remove the battery from the device.

  3. Sony Vaio PCG-61411L Optical Disc Drive Replacement, Hard Drive: passo 3, immagine 1 di 1
    • The hard drive panel is located in the bottom right corner of the device.

  4. Sony Vaio PCG-61411L Optical Disc Drive Replacement: passo 4, immagine 1 di 2 Sony Vaio PCG-61411L Optical Disc Drive Replacement: passo 4, immagine 2 di 2
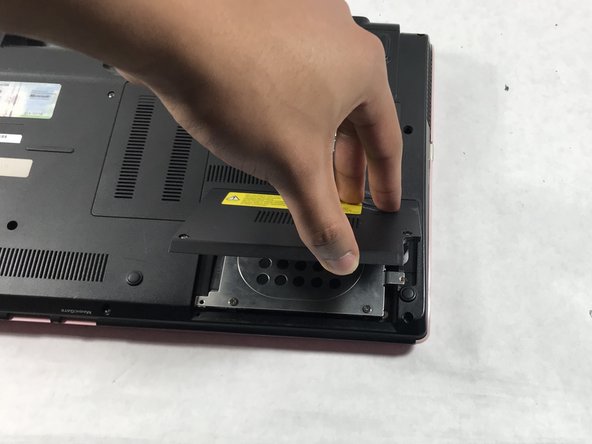
    • Using the PH #0 screwdriver, unscrew the two 6.5mm screws located in the bottom left and middle right of the panel. The screws remain in the panels.

    • Remove the panel by pulling it up towards yourself.

  5. Sony Vaio PCG-61411L Optical Disc Drive Replacement: passo 5, immagine 1 di 3 Sony Vaio PCG-61411L Optical Disc Drive Replacement: passo 5, immagine 2 di 3 Sony Vaio PCG-61411L Optical Disc Drive Replacement: passo 5, immagine 3 di 3
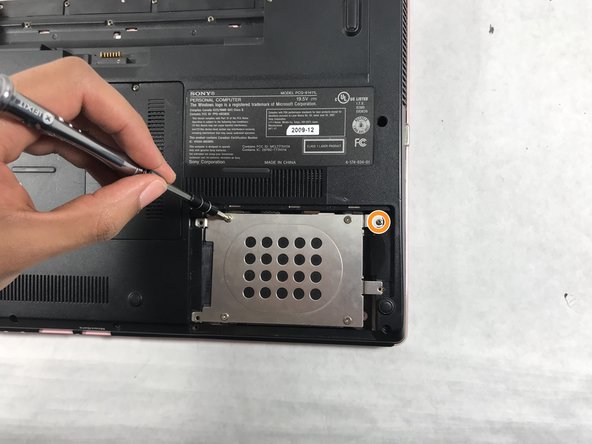
    • Using a PH0 screwdriver, remove the four 3mm silver screws located in the external hard drive cover.

    • Using a PH00 screwdriver, remove the final 3mm black screw located in the top right section of the hard drive cover.

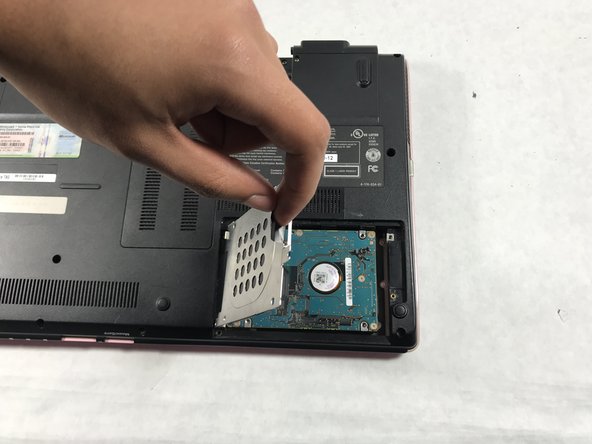
    • Carefully remove the silver hard drive cover.

  6. Sony Vaio PCG-61411L Optical Disc Drive Replacement: passo 6, immagine 1 di 3 Sony Vaio PCG-61411L Optical Disc Drive Replacement: passo 6, immagine 2 di 3 Sony Vaio PCG-61411L Optical Disc Drive Replacement: passo 6, immagine 3 di 3
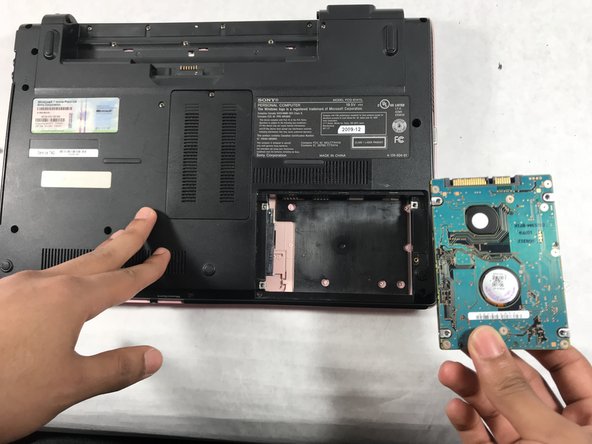
    • Detach the hard drive by disconnecting it from the motherboard, pulling it gently from left to right.

  7. Sony Vaio PCG-61411L Optical Disc Drive Replacement, Optical Disc Drive: passo 7, immagine 1 di 2 Sony Vaio PCG-61411L Optical Disc Drive Replacement, Optical Disc Drive: passo 7, immagine 2 di 2
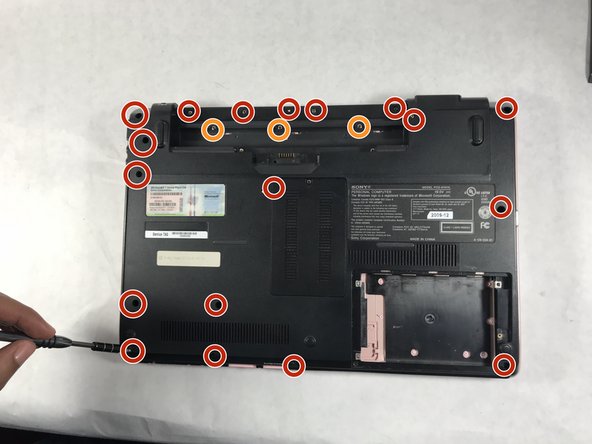
    • Remove the 5mm screws with the PH0 screwdriver.

    • Remove the 3mm screws with the PH0 screwdriver.

  8. Sony Vaio PCG-61411L Optical Disc Drive Replacement: passo 8, immagine 1 di 2 Sony Vaio PCG-61411L Optical Disc Drive Replacement: passo 8, immagine 2 di 2
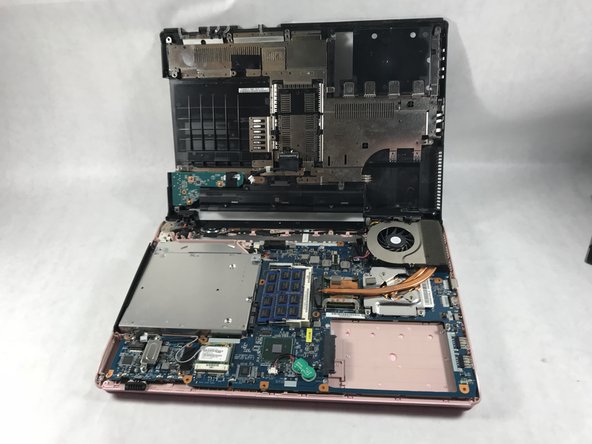
    • Lift the backplate from bottom right and left corner and remove it from the laptop.

  9. Sony Vaio PCG-61411L Optical Disc Drive Replacement: passo 9, immagine 1 di 2 Sony Vaio PCG-61411L Optical Disc Drive Replacement: passo 9, immagine 2 di 2
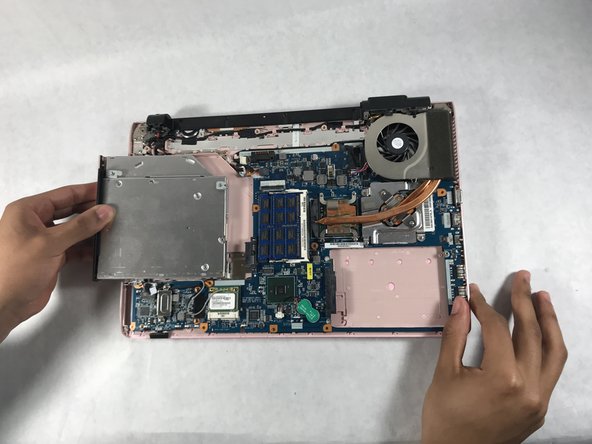
    • Slide your finger from the right of the optical disc and pull the optical disc from right to left.

Conclusione

To reassemble your device, follow these instructions in reverse order.

0 Commenti

Aggiungi Commento

Visualizza Statistiche:

Ultime 24 Ore: 0

Ultimi 7 Giorni: 2

Ultimi 30 Giorni: 10

Tutti i Tempi: 564