Questa versione può contenere modifiche errate. Passa all'ultima istantanea verificata.
Cosa ti serve
-
Questo passaggio è privo di traduzione. Aiuta a tradurlo
-
Turn the laptop over and orient it as shown.
-
-
Questo passaggio è privo di traduzione. Aiuta a tradurlo
-
Remove the battery by pinching the two lock tabs towards the center.
-
Next, lift up on the battery to remove it.
-
-
Questo passaggio è privo di traduzione. Aiuta a tradurlo
-
Using a Phillips #00 screwdriver, remove the twenty-two 5.6 mm screws from the back of the laptop.
-
-
Questo passaggio è privo di traduzione. Aiuta a tradurlo
-
Now, remove the small covers from the back of the case.
-
Using a Phillips #00 screwdriver, unscrew the three 5.6 mm screws from the covers (one screw on the RAM cover [middle] and two screws on the Hard Drive cover [bottom right]).
-
Then, lift up on and remove these covers as shown in the third image.
-
-
Questo passaggio è privo di traduzione. Aiuta a tradurlo
-
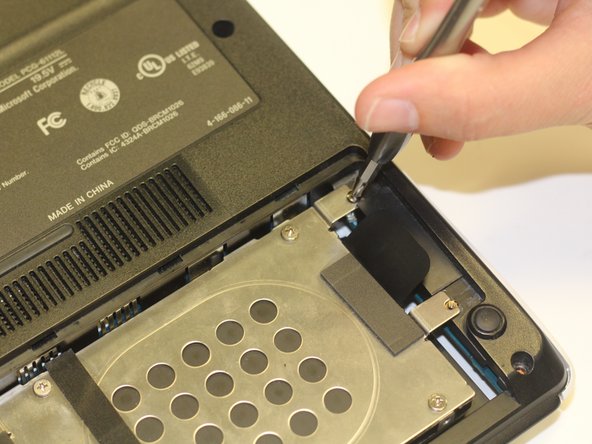
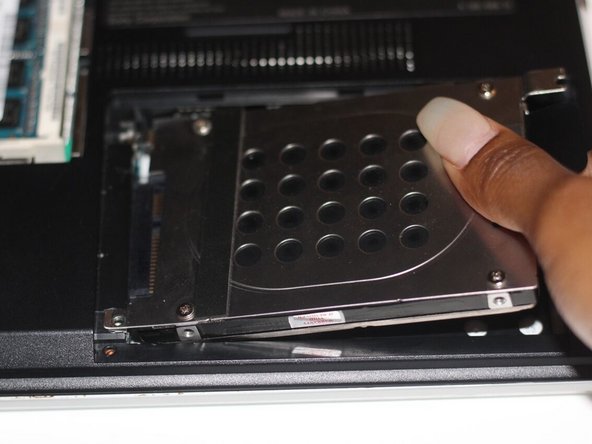
Remove the hard drive.
-
Using a Phillips #00 screwdriver, unscrew the two remaining 4.9 mm screws holding the hard drive into place.
-
Next, lift up and pull outwards to release the hard drive from its socket.
-
-
Questo passaggio è privo di traduzione. Aiuta a tradurlo
-
Using your fingers, grasp the black tab and lightly pull up on the ribbon cable to detach it from the motherboard.
-
-
Questo passaggio è privo di traduzione. Aiuta a tradurlo
-
After proper removal of all necessary screws, gently lift up on the back case to remove it.
-
-
-
Questo passaggio è privo di traduzione. Aiuta a tradurlo
-
Locate the fan (top-right corner of the computer).
-
Using a Phillips #00 screwdriver, unscrew the six 2.7 mm screws that secure the fan to the motherboard.
-
-
Questo passaggio è privo di traduzione. Aiuta a tradurlo
-
Using a Japanese Industrial Standard #00 screwdriver, unscrew four 3.7 mm screws located on the casing of the fan.
-
-
Questo passaggio è privo di traduzione. Aiuta a tradurlo
-
Using your fingers, grasp the white tab and firmly, yet gently, pull up on the wire to disconnect it from the motherboard.
-
-
Questo passaggio è privo di traduzione. Aiuta a tradurlo
-
Using your fingers, grasp the white and black wires connected to the wifi card. Pull up on these wires until they release from the card. Do not be afraid to use some force.
-
-
Questo passaggio è privo di traduzione. Aiuta a tradurlo
-
Using the Phillips #00 screwdriver, unscrew the two 4.9 mm screws that connect the WiFi card to the motherboard.
-
-
Questo passaggio è privo di traduzione. Aiuta a tradurlo
-
Using your fingers, lightly grasp the wifi card and firmly pull up and out on the card in order to release the wifi card from its socket.
-
-
Questo passaggio è privo di traduzione. Aiuta a tradurlo
-
With your hand, grasp the side of the DVD/CD drive and gently pull it out of the socket, disconnecting it from the motherboard.
-
-
Questo passaggio è privo di traduzione. Aiuta a tradurlo
-
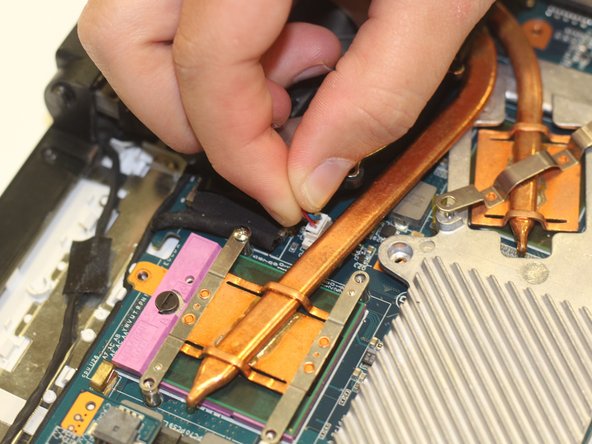
Using your fingers, grasp the three ribbon cable attachments (pictured) and gently pull on them to disconnect them from the motherboard.
-
-
Questo passaggio è privo di traduzione. Aiuta a tradurlo
-
Repeat the previous step for the two remaining ribbon cables (one is located by the fan, while the other is located by the CD/DVD drive).
-
-
Questo passaggio è privo di traduzione. Aiuta a tradurlo
-
Using the Phillips #00 screwdriver, remove the three 4.9 mm screws depicted here.
-
Next, using your fingers, lift up on this metal piece and remove it from the motherboard.
-
-
Questo passaggio è privo di traduzione. Aiuta a tradurlo
-
Using the Phillips #00 screwdriver, unscrew the two 4.9 mm screws depicted here.
-
Next, remove the metal cover to expose the bluetooth card.
-
Gently fit the flat end of a spudger under the edge of the bluetooth card. Then, lightly pry up on this edge to release the card from the motherboard. (Refer to the third image)
-
-
Questo passaggio è privo di traduzione. Aiuta a tradurlo
-
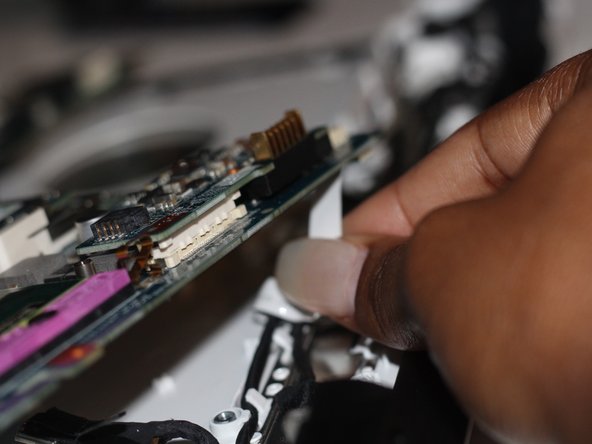
Gently lift up on the now free motherboard.
-
Detach the two ribbon cables that connect the motherboard to the keyboard. To do this, use your fingers to gently pull on the cables until they disconnect.
-


Annulla: non ho completato questa guida.
Un'altra persona ha completato questa guida.
Team

University of Alabama, Team S3-G9, Bedsole Spring 2018 Membro di University of Alabama, Team S3-G9, Bedsole Spring 2018
UA-BEDSOLE-S18S3G9
3 Membri
12 Guide realizzate