Salta al contenuto principale

Sony Vaio Fit SVF15N26CXB RAM Replacement

Cosa ti serve

  1. Sony Vaio Fit SVF15N26CXB RAM Replacement, Battery: passo 1, immagine 1 di 2 Sony Vaio Fit SVF15N26CXB RAM Replacement, Battery: passo 1, immagine 2 di 2
    • Remove the following ten screws from the bottom case of the laptop:

    • Two 6.5mm Phillips #00 Phillips screws.

    • Four 8.95mm Phillips #00 screws.

    • Four 6.25mm Phillips #00 screws.

    • The screws may be hidden underneath a rubber foot that can be removed with a spudger.

  2. Sony Vaio Fit SVF15N26CXB RAM Replacement: passo 2, immagine 1 di 2 Sony Vaio Fit SVF15N26CXB RAM Replacement: passo 2, immagine 2 di 2
    • Use a plastic opening tool to separate the bottom cover from the laptop.

    • Lift the lower cover and pull away from the laptop.

  3. Sony Vaio Fit SVF15N26CXB RAM Replacement: passo 3, immagine 1 di 3 Sony Vaio Fit SVF15N26CXB RAM Replacement: passo 3, immagine 2 di 3 Sony Vaio Fit SVF15N26CXB RAM Replacement: passo 3, immagine 3 di 3
    • Remove the eight Phillips #00 screws from the battery:

    • Six 4.65mm screws.

    • Two 4.65mm screws.

  4. Sony Vaio Fit SVF15N26CXB RAM Replacement: passo 4, immagine 1 di 1
    • Lift the battery up and pull it out of the laptop.

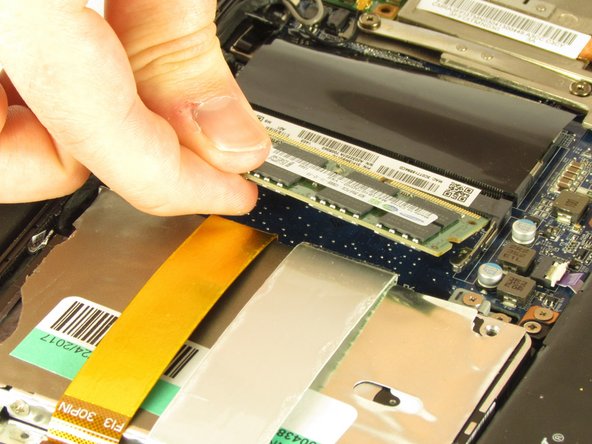
  5. Sony Vaio Fit SVF15N26CXB RAM Replacement, RAM: passo 5, immagine 1 di 2 Sony Vaio Fit SVF15N26CXB RAM Replacement, RAM: passo 5, immagine 2 di 2
    • Gently push the silver heads outwards on either side of the RAM chip to release it from the slot.

    • Pull the RAM chip gently out of the slot.

Conclusione

To reassemble your device, follow these instructions in reverse order.

Un'altra persona ha completato questa guida.

Team

USF Tampa, Team S2-G4, Nance Spring 2018 Membro di USF Tampa, Team S2-G4, Nance Spring 2018

USFT-NANCE-S18S2G4

4 Membri

12 Guide realizzate

0 Commenti

Aggiungi Commento

Visualizza Statistiche:

Ultime 24 Ore: 1

Ultimi 7 Giorni: 3

Ultimi 30 Giorni: 9

Tutti i Tempi: 654