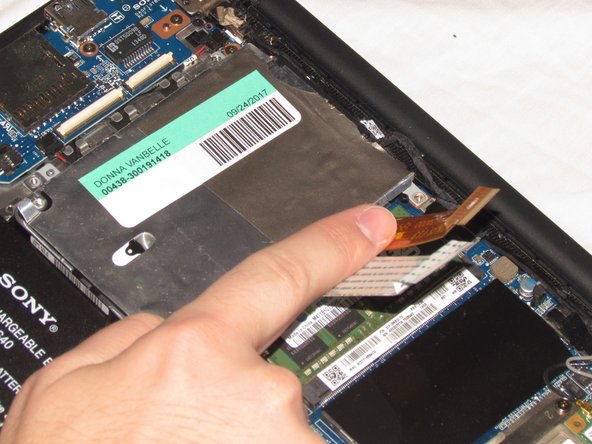
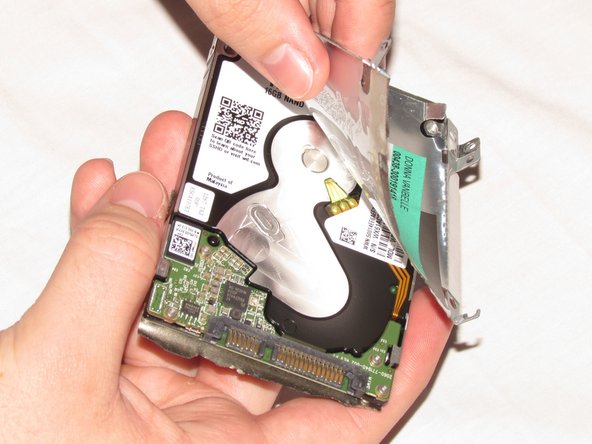
Salta al contenuto principale

Sony Vaio Fit SVF15N26CXB Hard Drive Replacement

Cosa ti serve

  1. Sony Vaio Fit SVF15N26CXB Hard Drive Replacement, Battery: passo 1, immagine 1 di 2 Sony Vaio Fit SVF15N26CXB Hard Drive Replacement, Battery: passo 1, immagine 2 di 2
    • Remove the following ten screws from the bottom case of the laptop:

    • Two 6.5mm Phillips #00 Phillips screws.

    • Four 8.95mm Phillips #00 screws.

    • Four 6.25mm Phillips #00 screws.

    • The screws may be hidden underneath a rubber foot that can be removed with a spudger.

  2. Sony Vaio Fit SVF15N26CXB Hard Drive Replacement: passo 2, immagine 1 di 2 Sony Vaio Fit SVF15N26CXB Hard Drive Replacement: passo 2, immagine 2 di 2
    • Use a plastic opening tool to separate the bottom cover from the laptop.

    • Lift the lower cover and pull away from the laptop.

  3. Sony Vaio Fit SVF15N26CXB Hard Drive Replacement: passo 3, immagine 1 di 3 Sony Vaio Fit SVF15N26CXB Hard Drive Replacement: passo 3, immagine 2 di 3 Sony Vaio Fit SVF15N26CXB Hard Drive Replacement: passo 3, immagine 3 di 3
    • Remove the eight Phillips #00 screws from the battery:

    • Six 4.65mm screws.

    • Two 4.65mm screws.

  4. Sony Vaio Fit SVF15N26CXB Hard Drive Replacement: passo 4, immagine 1 di 1
    • Lift the battery up and pull it out of the laptop.

  5. Sony Vaio Fit SVF15N26CXB Hard Drive Replacement, Hard Drive: passo 5, immagine 1 di 2 Sony Vaio Fit SVF15N26CXB Hard Drive Replacement, Hard Drive: passo 5, immagine 2 di 2
    • Remove the four 3.20mm Phillips #00 screws from the hard drive.

  6. Sony Vaio Fit SVF15N26CXB Hard Drive Replacement: passo 6, immagine 1 di 3 Sony Vaio Fit SVF15N26CXB Hard Drive Replacement: passo 6, immagine 2 di 3 Sony Vaio Fit SVF15N26CXB Hard Drive Replacement: passo 6, immagine 3 di 3
    • Use a spudger to flip up the black latch on the ZIF connectors.

    • Pull the ribbon cables out of the ZIF connectors and fold them over the hard drive.

    • Disconnect the hard drive and remove.

  7. Sony Vaio Fit SVF15N26CXB Hard Drive Replacement: passo 7, immagine 1 di 2 Sony Vaio Fit SVF15N26CXB Hard Drive Replacement: passo 7, immagine 2 di 2
    • Remove the four 3.70mm Phillips #00 screws from the hard drive mounting case.

    • Carefully peel foil tray off of hard drive.

Conclusione

To reassemble your device, follow these instructions in reverse order.

Altre 2 persone hanno completato questa guida.

Team

USF Tampa, Team S2-G4, Nance Spring 2018 Membro di USF Tampa, Team S2-G4, Nance Spring 2018

USFT-NANCE-S18S2G4

4 Membri

12 Guide realizzate

0 Commenti

Aggiungi Commento

Visualizza Statistiche:

Ultime 24 Ore: 0

Ultimi 7 Giorni: 4

Ultimi 30 Giorni: 8

Tutti i Tempi: 1,149