Salta al contenuto principale

Sony VAIO SVE14AJ16L RAM Replacement

Cosa ti serve

  1. Sony VAIO SVE14AJ16L RAM Replacement, RAM: passo 1, immagine 1 di 1
    • Turn your laptop off before starting.

    • Turn the laptop upside down onto the closed lid so that the bottom is facing you.

  2. Sony VAIO SVE14AJ16L RAM Replacement: passo 2, immagine 1 di 2 Sony VAIO SVE14AJ16L RAM Replacement: passo 2, immagine 2 di 2
    • Locate and remove the lone screw on the RAM cover with a Phillips #0 head screw driver.

    • Carefully pry the RAM cover up.

    • There will be some resistance, so use strength and not speed to remove the cover.

  3. Sony VAIO SVE14AJ16L RAM Replacement: passo 3, immagine 1 di 3 Sony VAIO SVE14AJ16L RAM Replacement: passo 3, immagine 2 di 3 Sony VAIO SVE14AJ16L RAM Replacement: passo 3, immagine 3 di 3
    Attrezzo utilizzato in questo passaggio:
    iFixit Opening Tool
    $1.99
    Compra
    • With the cover removed, peel back the black protective plastic to expose one of the two RAM sticks.

    • Make sure not to touch any part of the blue board itself, and only handle the stick from it's edges.

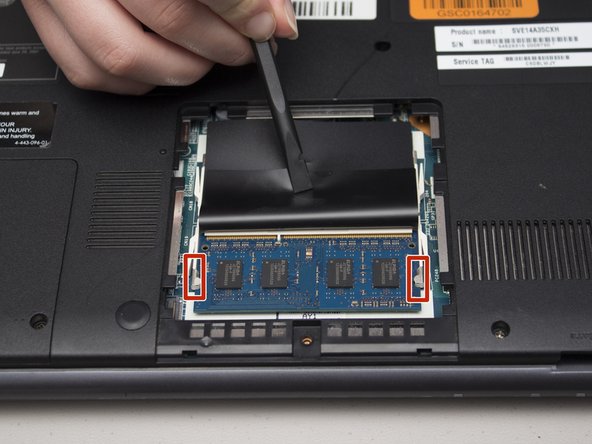
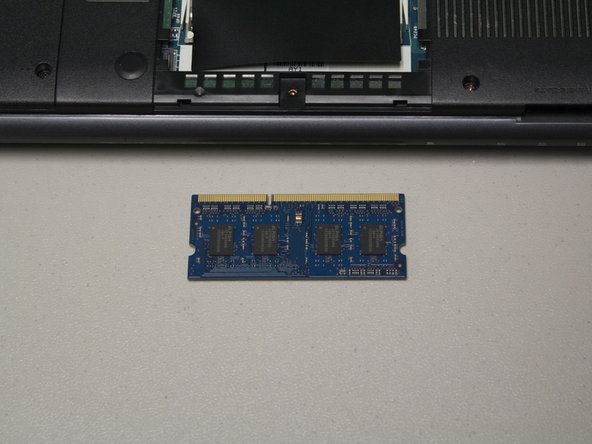
    • Gently, but firmly push back the two side anchors that hold in the RAM using either an iFixit Opening Tool or your fingernails.

  4. Sony VAIO SVE14AJ16L RAM Replacement: passo 4, immagine 1 di 2 Sony VAIO SVE14AJ16L RAM Replacement: passo 4, immagine 2 di 2
    • Once both anchors are released from the RAM stick, the stick will spring up at an angle

    • Finally, carefully pull the RAM stick away from the laptop at the same angle it is sitting at.

Conclusione

To reassemble your device, follow these instructions in reverse order.

0 Commenti

Aggiungi Commento

Visualizza Statistiche:

Ultime 24 Ore: 0

Ultimi 7 Giorni: 1

Ultimi 30 Giorni: 3

Tutti i Tempi: 534