Salta al contenuto principale

Sony SRS-XE200 Charging Port Replacement

Cosa ti serve

  1. Sony SRS-XE200 Charging Port Replacement, Speaker Assembly: passo 1, immagine 1 di 2 Sony SRS-XE200 Charging Port Replacement, Speaker Assembly: passo 1, immagine 2 di 2
    • Pry the outer cover of the speaker from the body using a spudger.

    • A clicking noise can be heard as the cover is detaching.

  2. Sony SRS-XE200 Charging Port Replacement: passo 2, immagine 1 di 1
    • Pry the rubber cap away from the body of the speaker using a spudger.

  3. Sony SRS-XE200 Charging Port Replacement: passo 3, immagine 1 di 2 Sony SRS-XE200 Charging Port Replacement: passo 3, immagine 2 di 2
    • Remove the eight 1 mm screws that connect the motherboard case and the speaker case with a Phillips #1 screwdriver.

    • Remove the four 0.8 mm screws that connect the motherboard case and the speaker case with a Phillips #1 screwdriver.

  4. Sony SRS-XE200 Charging Port Replacement: passo 4, immagine 1 di 2 Sony SRS-XE200 Charging Port Replacement: passo 4, immagine 2 di 2
    • Unplug the colored wires from the motherboard to detach the speaker assembly.

  5. Sony SRS-XE200 Charging Port Replacement, Battery: passo 5, immagine 1 di 3 Sony SRS-XE200 Charging Port Replacement, Battery: passo 5, immagine 2 di 3 Sony SRS-XE200 Charging Port Replacement, Battery: passo 5, immagine 3 di 3
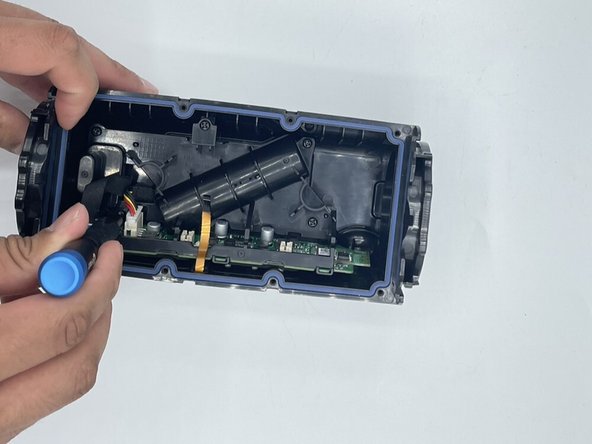
    • Remove the five 1 mm screws connecting the motherboard to the case with a Phillips #1 screwdriver.

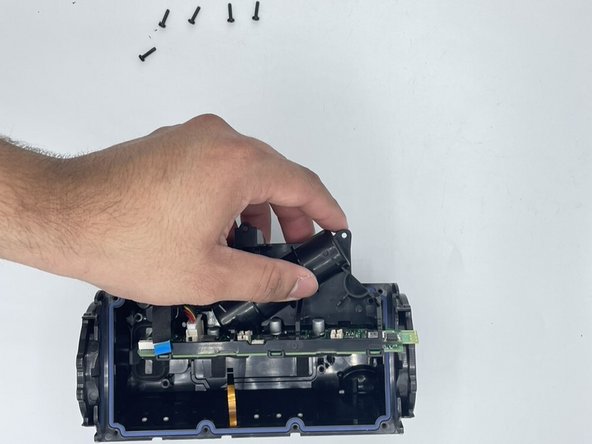
    • Separate the motherboard from the case.

  6. Sony SRS-XE200 Charging Port Replacement: passo 6, immagine 1 di 3 Sony SRS-XE200 Charging Port Replacement: passo 6, immagine 2 di 3 Sony SRS-XE200 Charging Port Replacement: passo 6, immagine 3 di 3
    • Remove the battery from the battery holder with a nylon spudger.

    • Unplug the battery from the motherboard.

  7. Sony SRS-XE200 Charging Port Replacement, Charging Port: passo 7, immagine 1 di 2 Sony SRS-XE200 Charging Port Replacement, Charging Port: passo 7, immagine 2 di 2
    • Remove the charging port.

Conclusione

To reassemble your device, follow these instructions in reverse order.

0 Commenti

Aggiungi Commento

Visualizza Statistiche:

Ultime 24 Ore: 2

Ultimi 7 Giorni: 15

Ultimi 30 Giorni: 56

Tutti i Tempi: 406