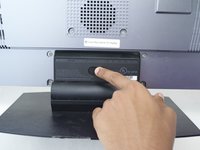
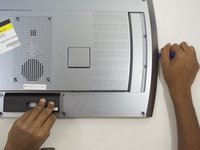
Salta al contenuto principale

Sony PlayStation 3D Display Indicator Light Bar Replacement

Cosa ti serve

  1. Sony PlayStation 3D Display Indicator Light Bar Replacement, Rear Case: passo 1, immagine 1 di 2 Sony PlayStation 3D Display Indicator Light Bar Replacement, Rear Case: passo 1, immagine 2 di 2
    • Remove the base by pushing in the button and sliding out the unit.

  2. Sony PlayStation 3D Display Indicator Light Bar Replacement: passo 2, immagine 1 di 3 Sony PlayStation 3D Display Indicator Light Bar Replacement: passo 2, immagine 2 di 3 Sony PlayStation 3D Display Indicator Light Bar Replacement: passo 2, immagine 3 di 3
    • Remove USB port cover from back plate with a metal spudger.

    • This will prevent the cover from falling under the back plate once it is removed.

  3. Sony PlayStation 3D Display Indicator Light Bar Replacement: passo 3, immagine 1 di 2 Sony PlayStation 3D Display Indicator Light Bar Replacement: passo 3, immagine 2 di 2
    • With the Phillips #02 screwdriver, remove the six 6 mm length x 6 mm head screws from the back plate.

    • With the Phillips #02 screwdriver, remove the ten 6 mm length x 8 mm head screws from the back plate.

    • These screws have different threads and need to be kept separate.

  4. Sony PlayStation 3D Display Indicator Light Bar Replacement: passo 4, immagine 1 di 3 Sony PlayStation 3D Display Indicator Light Bar Replacement: passo 4, immagine 2 di 3 Sony PlayStation 3D Display Indicator Light Bar Replacement: passo 4, immagine 3 di 3
    • Remove back plate with a plastic opening tool by slowing prying around the entire plate.

    • Be gentle to avoid breaking the plastic clips which hold the plate.

    • Once separated the plate easily lifts off.

  5. Sony PlayStation 3D Display Indicator Light Bar Replacement, Indicator Light Bar: passo 5, immagine 1 di 3 Sony PlayStation 3D Display Indicator Light Bar Replacement, Indicator Light Bar: passo 5, immagine 2 di 3 Sony PlayStation 3D Display Indicator Light Bar Replacement, Indicator Light Bar: passo 5, immagine 3 di 3
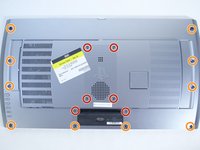
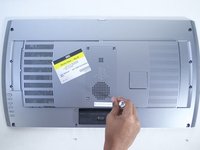
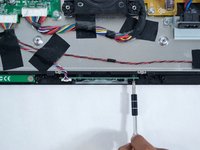
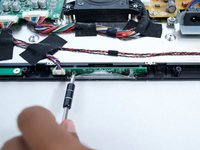
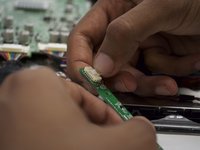
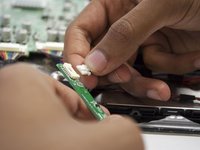
    • With the Phillips #02 screwdriver, remove the two 5mm length x 5mm head screws located on the left and right side of the light bar board.

  6. Sony PlayStation 3D Display Indicator Light Bar Replacement: passo 6, immagine 1 di 2 Sony PlayStation 3D Display Indicator Light Bar Replacement: passo 6, immagine 2 di 2
    • Remove the light bar by depressing the tab on the white data connector.

Conclusione

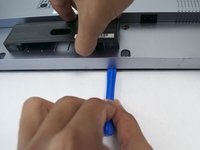
To reassemble your device, follow these instructions in reverse order.

Un'altra persona ha completato questa guida.

Kyle Franck

Membro da: 10/01/15

257 Reputazione

1 Guida realizzata

Team

Cal Poly, Team 12-16, Maness Fall 2015 Membro di Cal Poly, Team 12-16, Maness Fall 2015

CPSU-MANESS-F15S12G16

4 Membri

8 Guide realizzate

0 Commenti

Aggiungi Commento

Visualizza Statistiche:

Ultime 24 Ore: 0

Ultimi 7 Giorni: 0

Ultimi 30 Giorni: 1

Tutti i Tempi: 542