Questa versione può contenere modifiche errate. Passa all'ultima istantanea verificata.
Cosa ti serve
-
Questo passaggio è privo di traduzione. Aiuta a tradurlo
-
Using a Phillips #00 screwdriver, remove the four 14mm screws from the underside of the device.
-
-
Questo passaggio è privo di traduzione. Aiuta a tradurlo
-
Using the opening tool, gently pry the top portion from the side section of your device.
-
-
Questo passaggio è privo di traduzione. Aiuta a tradurlo
-
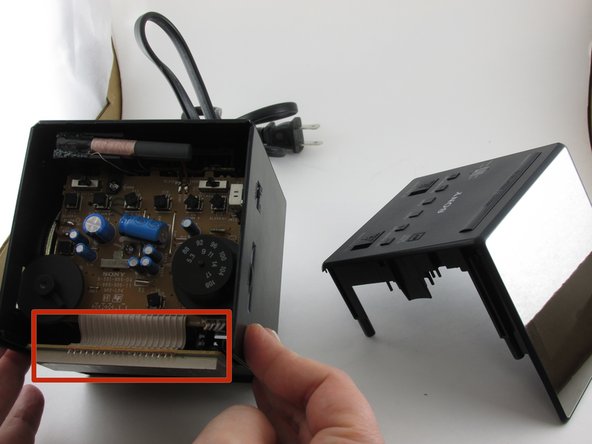
Gently pull the top of the clock away from the rest of the device.
-
-
-
Questo passaggio è privo di traduzione. Aiuta a tradurlo
-
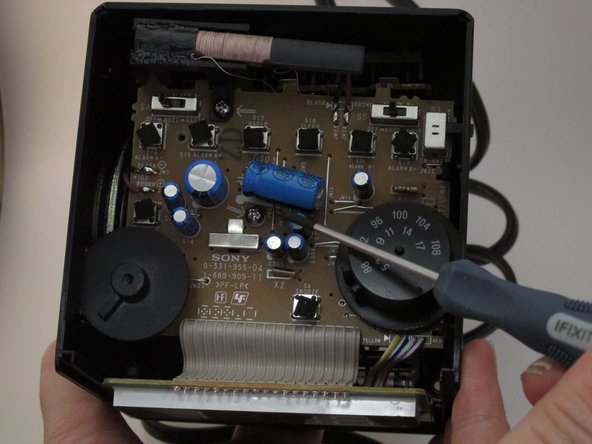
Using the Phillips #00 screwdriver, remove the two 14mm screws from the top of the motherboard.
-
-
Questo passaggio è privo di traduzione. Aiuta a tradurlo
-
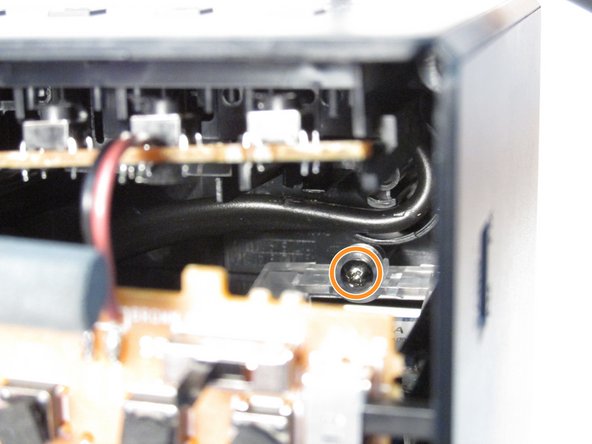
Remove the Phillips #00 screw from the bottom of the white and blue box.
-
Remove the Phillips #00 screw from behind the white and blue box.
-
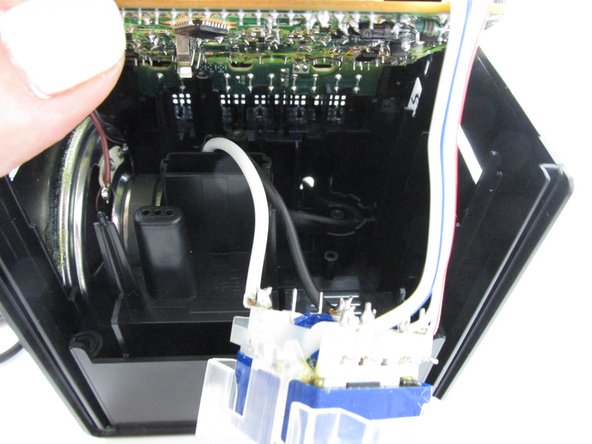
After unscrewing the white box, gently pull it out. This will allow for more room to access the speaker.
-
-
Questo passaggio è privo di traduzione. Aiuta a tradurlo
-
To separate the motherboard completely, you can cut the red and black wires that are attached to the speaker. This will allow you to access the speaker fully.
-
-
Questo passaggio è privo di traduzione. Aiuta a tradurlo
-
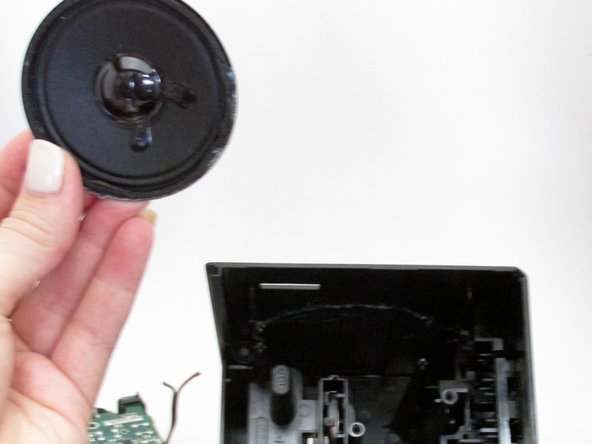
Use the plastic opening tool and the spudger to separate the speaker from the device by tracing its outline and loosening the glue.
-


Annulla: non ho completato questa guida.
Un'altra persona ha completato questa guida.

Team

University of Kentucky Louisville, Team 1-5, Rountree Winter 2015 Membro di University of Kentucky Louisville, Team 1-5, Rountree Winter 2015
LOUISVILLE-ROUNTREE-W15S1G5
3 Membri
5 Guide realizzate