Salta al contenuto principale

Sony Ericsson xPeria Active Screen Replacement

Cosa ti serve

  1. Sony Ericsson xPeria Active Screen Replacement, Remove the back cover.: passo 1, immagine 1 di 3 Sony Ericsson xPeria Active Screen Replacement, Remove the back cover.: passo 1, immagine 2 di 3 Sony Ericsson xPeria Active Screen Replacement, Remove the back cover.: passo 1, immagine 3 di 3
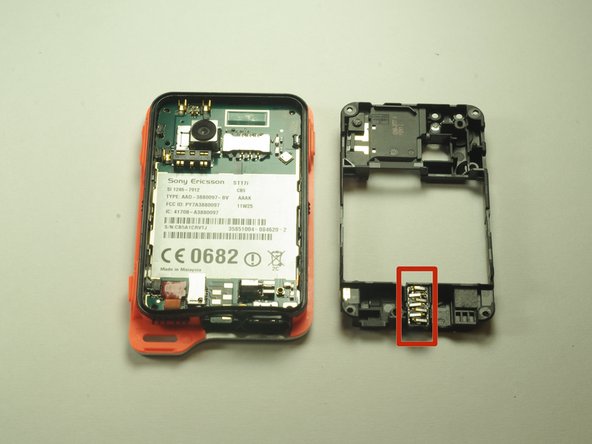
    • Open the flaps and remove the back cover using the plastic opening device.

  2. Sony Ericsson xPeria Active Screen Replacement, Remove inside plastic battery cover.: passo 2, immagine 1 di 2 Sony Ericsson xPeria Active Screen Replacement, Remove inside plastic battery cover.: passo 2, immagine 2 di 2
    • Remove the battery shield with the plastic opening device.

  3. Sony Ericsson xPeria Active Screen Replacement, Remove the battery: passo 3, immagine 1 di 2 Sony Ericsson xPeria Active Screen Replacement, Remove the battery: passo 3, immagine 2 di 2
    • Remove the battery.

  4. Sony Ericsson xPeria Active Screen Replacement, Unfastening The Motherboard Cover: passo 4, immagine 1 di 1
    • Unscrew the 5mm screws with the T5 head.

    • Unscrew the 6mm screw with the T6 head.

  5. Sony Ericsson xPeria Active Screen Replacement, Removing The Motherboard Cover: passo 5, immagine 1 di 2 Sony Ericsson xPeria Active Screen Replacement, Removing The Motherboard Cover: passo 5, immagine 2 di 2
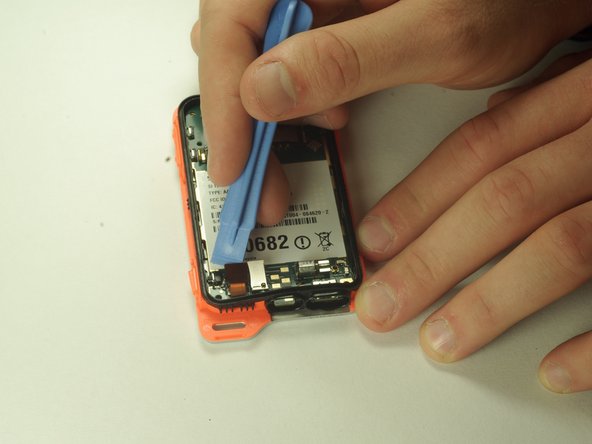
    • Remove the black cover with the plastic opening tool.

    • Remove the headphone jack from its slot.

  6. Sony Ericsson xPeria Active Screen Replacement, Screen: passo 6, immagine 1 di 2 Sony Ericsson xPeria Active Screen Replacement, Screen: passo 6, immagine 2 di 2
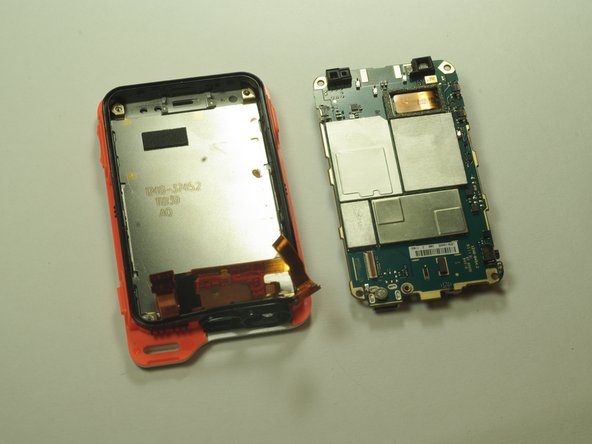
    • Unplug the power cable by carefully prying it away from the motherboard.

  7. Sony Ericsson xPeria Active Screen Replacement: passo 7, immagine 1 di 2 Sony Ericsson xPeria Active Screen Replacement: passo 7, immagine 2 di 2
    • Remove the power strip on the back side of the motherboard.

  8. Sony Ericsson xPeria Active Screen Replacement, Remove back screen shield: passo 8, immagine 1 di 2 Sony Ericsson xPeria Active Screen Replacement, Remove back screen shield: passo 8, immagine 2 di 2
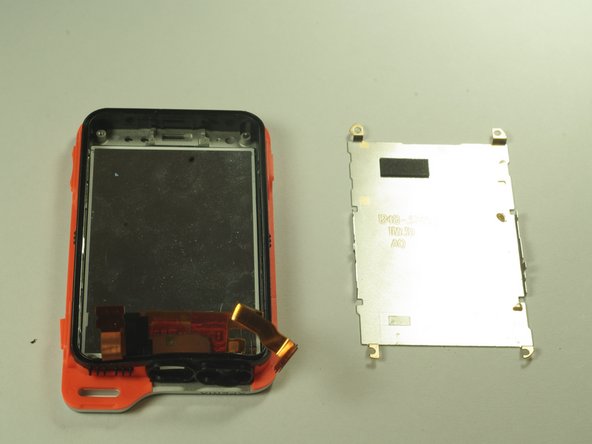
    • Remove the shield.

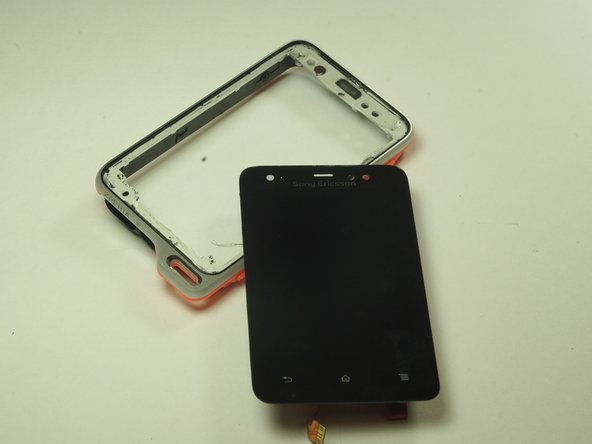
  9. Sony Ericsson xPeria Active Screen Replacement, Remove the screen module: passo 9, immagine 1 di 2 Sony Ericsson xPeria Active Screen Replacement, Remove the screen module: passo 9, immagine 2 di 2
    • Push the screen through the front of the case, gently.

    • It may be a little tough, just work your way around the edges of the screen until it separates from the main case.

Conclusione

To reassemble your device, follow these instructions in reverse order.

Altre 5 persone hanno completato questa guida.

Alex Tobin

Membro da: 10/06/14

406 Reputazione

3 Guide realizzate

Team

USF Tampa, Team 14-5, Leahy Fall 2014 Membro di USF Tampa, Team 14-5, Leahy Fall 2014

USFT-LEAHY-F14S14G5

3 Membri

5 Guide realizzate

Un commento

hi can you add explain

abdnour master2 - Replica

Aggiungi Commento

Visualizza Statistiche:

Ultime 24 Ore: 1

Ultimi 7 Giorni: 3

Ultimi 30 Giorni: 11

Tutti i Tempi: 2,336