Salta al contenuto principale

Sony Ericsson W200i Back Case Replacement

Cosa ti serve

  1. Sony Ericsson W200i Back Case Replacement, Disassembling Sony Ericsson W200i Battery: passo 1, immagine 1 di 2 Sony Ericsson W200i Back Case Replacement, Disassembling Sony Ericsson W200i Battery: passo 1, immagine 2 di 2
    • Slide the battery cover up and off the phone.

  2. Sony Ericsson W200i Back Case Replacement: passo 2, immagine 1 di 2 Sony Ericsson W200i Back Case Replacement: passo 2, immagine 2 di 2
    • Pop the battery out of its slot by lifting it up.

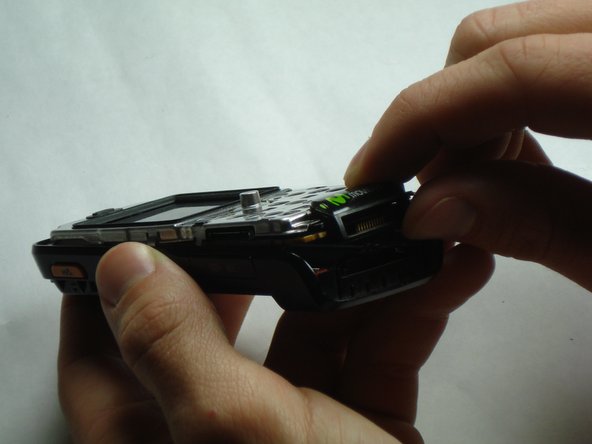
  3. Sony Ericsson W200i Back Case Replacement, Front Case: passo 3, immagine 1 di 3 Sony Ericsson W200i Back Case Replacement, Front Case: passo 3, immagine 2 di 3 Sony Ericsson W200i Back Case Replacement, Front Case: passo 3, immagine 3 di 3
    • Insert the plastic opening tool in between the front case and the back case.

    • Apply downward pressure to make the case lift upwards, thus popping the front case off.

    • Use caution when removing the front case. It may seem stuck but just ease it out.

  4. Sony Ericsson W200i Back Case Replacement, Core: passo 4, immagine 1 di 2 Sony Ericsson W200i Back Case Replacement, Core: passo 4, immagine 2 di 2
    • Remove the 4 screws in the corners of the front of the phone using a T6 screwdriver.

    • Note that the top 2 screws are silver and the bottom 2 screws are black.

  5. Sony Ericsson W200i Back Case Replacement: passo 5, immagine 1 di 3 Sony Ericsson W200i Back Case Replacement: passo 5, immagine 2 di 3 Sony Ericsson W200i Back Case Replacement: passo 5, immagine 3 di 3
    • There is a black tab in the top left corner holding the core in place.

    • Remove the core by pulling straight up to prevent breaking the tab.

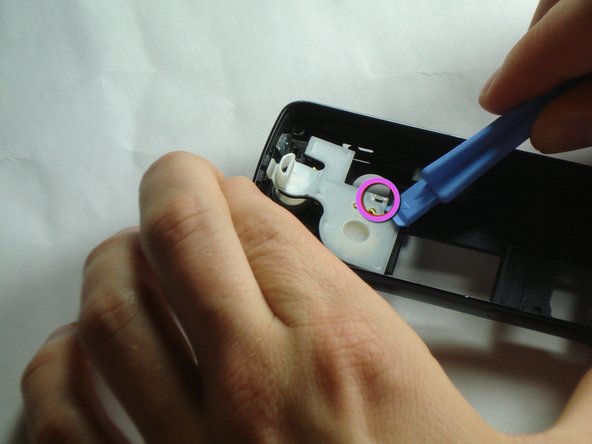
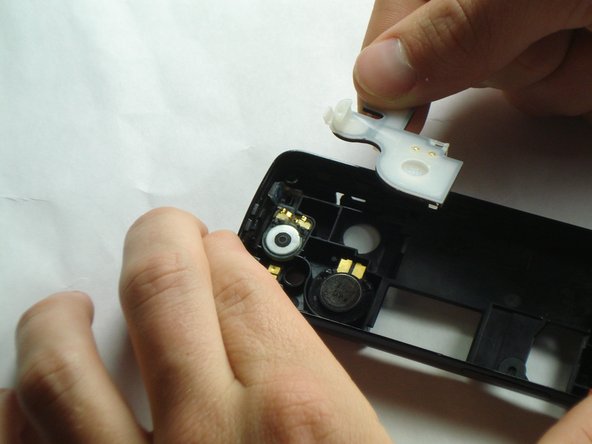
  6. Sony Ericsson W200i Back Case Replacement, Back Case: passo 6, immagine 1 di 3 Sony Ericsson W200i Back Case Replacement, Back Case: passo 6, immagine 2 di 3 Sony Ericsson W200i Back Case Replacement, Back Case: passo 6, immagine 3 di 3
    • Pull back on the indicated tab of the white plastic cover to unhook it from the top of the phone.

    • Using the plastic opening tool, undo the indicated clip on the bottom of the white plastic cover.

    • Remove the white plastic cover.

Conclusione

To reassemble your device, put removed pieces into the new back casing, then follow the steps in reverse order.

Team

Cal Poly, Team 14-10, Forte Winter 2011 Membro di Cal Poly, Team 14-10, Forte Winter 2011

CPSU-FORTE-W11S14G10

5 Membri

16 Guide realizzate

0 Commenti

Aggiungi Commento

Visualizza Statistiche:

Ultime 24 Ore: 0

Ultimi 7 Giorni: 2

Ultimi 30 Giorni: 4

Tutti i Tempi: 3,641