Salta al contenuto principale

Sony DVP-NS325 Power Supply Board Replacement

Cosa ti serve

  1. Sony DVP-NS325 Power Supply Board Replacement, Outer Case: passo 1, immagine 1 di 3 Sony DVP-NS325 Power Supply Board Replacement, Outer Case: passo 1, immagine 2 di 3 Sony DVP-NS325 Power Supply Board Replacement, Outer Case: passo 1, immagine 3 di 3
    • Use a Phillips screwdriver to unscrew the five screws.

  2. Sony DVP-NS325 Power Supply Board Replacement: passo 2, immagine 1 di 3 Sony DVP-NS325 Power Supply Board Replacement: passo 2, immagine 2 di 3 Sony DVP-NS325 Power Supply Board Replacement: passo 2, immagine 3 di 3
    • Use the Philips screwdriver to remove the screws located on the sides and the back.

    • Not shown are the right side screw and the middle screw.

  3. Sony DVP-NS325 Power Supply Board Replacement: passo 3, immagine 1 di 1
    • Use a spudger to separate the case from the chassis.

    • Remove the case.

  4. Sony DVP-NS325 Power Supply Board Replacement, Power Cable: passo 4, immagine 1 di 2 Sony DVP-NS325 Power Supply Board Replacement, Power Cable: passo 4, immagine 2 di 2
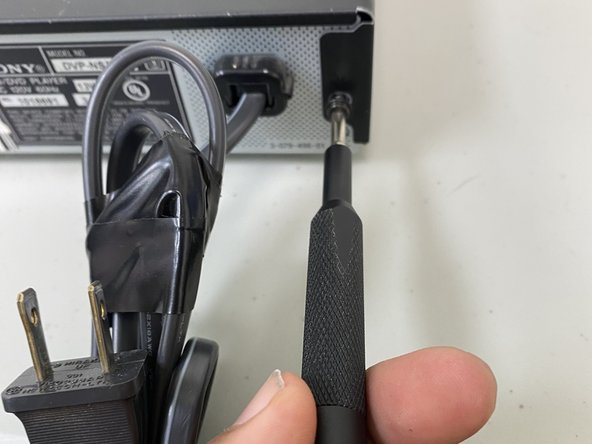
    • Unscrew all screws using a Phillips screwdriver removing the outer case to access the power cable.

  5. Sony DVP-NS325 Power Supply Board Replacement: passo 5, immagine 1 di 2 Sony DVP-NS325 Power Supply Board Replacement: passo 5, immagine 2 di 2
    • Using a finger, press down on the clip to remove the connector for the cable.

  6. Sony DVP-NS325 Power Supply Board Replacement: passo 6, immagine 1 di 1
    • Using two fingers, press in both the top and bottom clips to release the holder for the power cable to remove the cable completely.

  7. Sony DVP-NS325 Power Supply Board Replacement: passo 7, immagine 1 di 1
    • Pull the cable out of the case to fully replace the cable.

  8. Sony DVP-NS325 Power Supply Board Replacement, Power Supply Board: passo 8, immagine 1 di 2 Sony DVP-NS325 Power Supply Board Replacement, Power Supply Board: passo 8, immagine 2 di 2
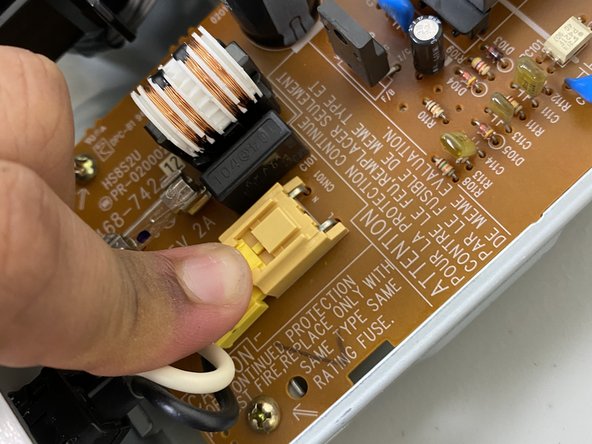
    • Remove the wire connected to the motherboard by pulling the wire upwards.

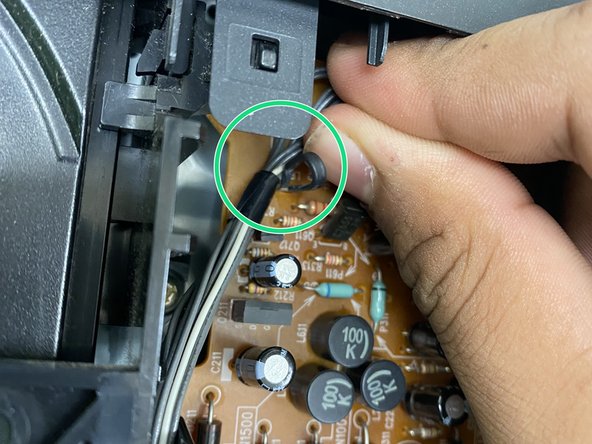
    • Move the black holder piece out of the way in order to fully remove the wire from the area.

  9. Sony DVP-NS325 Power Supply Board Replacement: passo 9, immagine 1 di 1
    • Using a Phillips screwdriver, remove the four screws holding the motherboard in place.

    • There are three screws not shown all located on the corners of the motherboard.

  10. Sony DVP-NS325 Power Supply Board Replacement: passo 10, immagine 1 di 1
    • Remove the power supply board.

Conclusione

To reassemble your device, follow these instructions in reverse order.

0 Commenti

Aggiungi Commento

Visualizza Statistiche:

Ultime 24 Ore: 0

Ultimi 7 Giorni: 2

Ultimi 30 Giorni: 10

Tutti i Tempi: 50