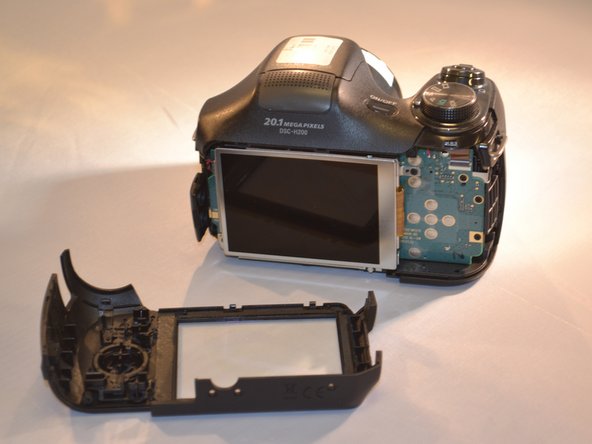
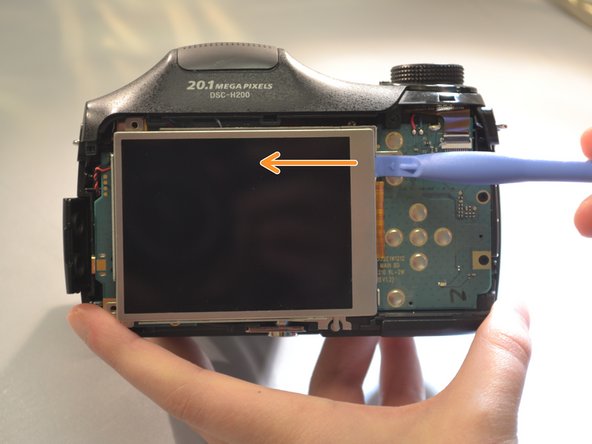
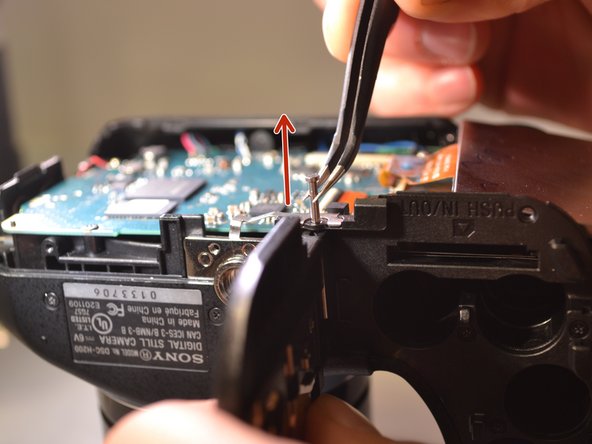
Salta al contenuto principale

Sony Cyber-shot DSC-H200 SD Door Replacement

Cosa ti serve

  1. Sony Cyber-shot DSC-H200 SD Door Replacement, SD Door: passo 1, immagine 1 di 2 Sony Cyber-shot DSC-H200 SD Door Replacement, SD Door: passo 1, immagine 2 di 2
    • Using a screwdriver, remove four 6mm screws located on the back panel.

  2. Sony Cyber-shot DSC-H200 SD Door Replacement: passo 2, immagine 1 di 1
    • Using a screwdriver, remove the two 6mm screws on the bottom.

    • Using a screwdriver, remove the four 3mm screws on the bottom.

  3. Sony Cyber-shot DSC-H200 SD Door Replacement: passo 3, immagine 1 di 1
    • Open the SD Door, unscrew and remove the single 6mm screw closest to "PUSH IN/OUT" under the SD card slot.

  4. Sony Cyber-shot DSC-H200 SD Door Replacement: passo 4, immagine 1 di 2 Sony Cyber-shot DSC-H200 SD Door Replacement: passo 4, immagine 2 di 2
    • Using the blue plastic opening tools, remove the back panel (the LCD and motherboard are exposed).

  5. Sony Cyber-shot DSC-H200 SD Door Replacement: passo 5, immagine 1 di 2 Sony Cyber-shot DSC-H200 SD Door Replacement: passo 5, immagine 2 di 2
    • Using a screwdriver, remove the three 4mm screws that attach the LCD to the camera motherboard (The LCD is contained in a holding plate, attached to the motherboard with a ribbon cable).

    • Using the blue plastic opening tool remove the LCD Screen from the motherboard.

  6. Sony Cyber-shot DSC-H200 SD Door Replacement: passo 6, immagine 1 di 1
    • Using a screwdriver, remove the single 4mm screw at the bottom of the holding plate.

  7. Sony Cyber-shot DSC-H200 SD Door Replacement: passo 7, immagine 1 di 1
    • Lift the holding plate away from the motherboard and set aside (the pin attaching the door to the body is now accessible).

  8. Sony Cyber-shot DSC-H200 SD Door Replacement: passo 8, immagine 1 di 2 Sony Cyber-shot DSC-H200 SD Door Replacement: passo 8, immagine 2 di 2
    • Using tweezers remove the pin that attaches the door to the body.

  9. Sony Cyber-shot DSC-H200 SD Door Replacement: passo 9, immagine 1 di 1
    • Remove the door.

Conclusione

To reassemble your device, follow these instructions in reverse order.

Un'altra persona ha completato questa guida.

0 Commenti

Aggiungi Commento

Visualizza Statistiche:

Ultime 24 Ore: 0

Ultimi 7 Giorni: 0

Ultimi 30 Giorni: 5

Tutti i Tempi: 1,542