Salta al contenuto principale

Sony Cyber-Shot DSC-W830 LCD Replacement

Cosa ti serve

  1. Sony Cyber-Shot DSC-W830 LCD Replacement, Battery: passo 1, immagine 1 di 1
    • Slide the lock at the bottom of the camera to "Open".

    • The door to the battery pack is spring loaded.

  2. Sony Cyber-Shot DSC-W830 LCD Replacement: passo 2, immagine 1 di 1
    • Slide the blue clip up and away from the battery.

  3. Sony Cyber-Shot DSC-W830 LCD Replacement: passo 3, immagine 1 di 1
    • Remove the battery.

  4. Sony Cyber-Shot DSC-W830 LCD Replacement, Front and Back Panel: passo 4, immagine 1 di 3 Sony Cyber-Shot DSC-W830 LCD Replacement, Front and Back Panel: passo 4, immagine 2 di 3 Sony Cyber-Shot DSC-W830 LCD Replacement, Front and Back Panel: passo 4, immagine 3 di 3
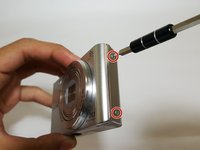
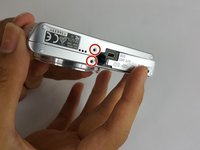
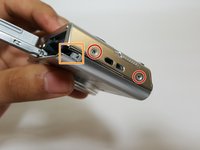
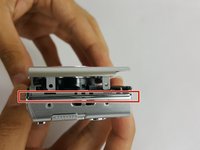
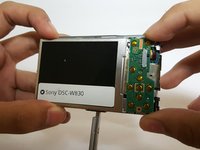
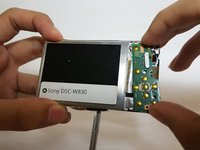
    • Remove the six 3.5mm Phillips #000 screws.

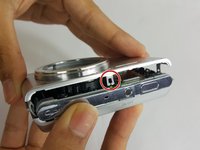
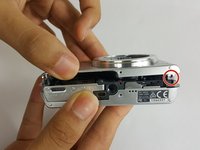
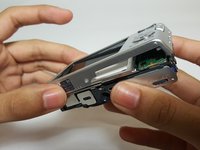
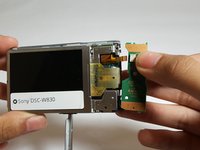
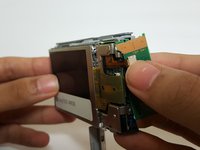
    • Rotate the lock away from the camera.

  5. Sony Cyber-Shot DSC-W830 LCD Replacement: passo 5, immagine 1 di 3 Sony Cyber-Shot DSC-W830 LCD Replacement: passo 5, immagine 2 di 3 Sony Cyber-Shot DSC-W830 LCD Replacement: passo 5, immagine 3 di 3
    • Pry the device open with the plastic opening tool.

    • There are two clips that help prevent the front panel from separating.

  6. Sony Cyber-Shot DSC-W830 LCD Replacement: passo 6, immagine 1 di 3 Sony Cyber-Shot DSC-W830 LCD Replacement: passo 6, immagine 2 di 3 Sony Cyber-Shot DSC-W830 LCD Replacement: passo 6, immagine 3 di 3
    • Remove the two plastic spacers between the front and the back panels.

    • The spacers may fall out when removing the panels.

    • Carefully remove the back panel.

  7. Sony Cyber-Shot DSC-W830 LCD Replacement, Button Board: passo 7, immagine 1 di 2 Sony Cyber-Shot DSC-W830 LCD Replacement, Button Board: passo 7, immagine 2 di 2
    • Gently release the button board from the clips.

    • Be careful when lifting the button board; the ribbon cable will still be attached.

  8. Sony Cyber-Shot DSC-W830 LCD Replacement: passo 8, immagine 1 di 2 Sony Cyber-Shot DSC-W830 LCD Replacement: passo 8, immagine 2 di 2
    • Disconnect the no-fuss ribbon cable by gently pulling it out of the button board.

  9. Sony Cyber-Shot DSC-W830 LCD Replacement, LCD: passo 9, immagine 1 di 2 Sony Cyber-Shot DSC-W830 LCD Replacement, LCD: passo 9, immagine 2 di 2
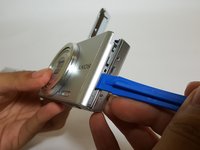
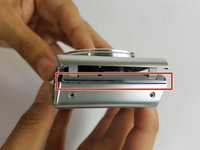
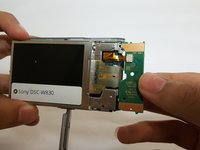
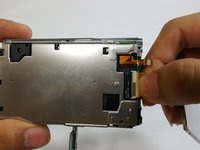
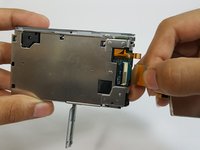
    • Push the bottom right corner of the LCD screen out and slide it to the right to release it from the clips.

    • Be careful when lifting the LCD screen; the ribbon cable will still be attached.

  10. Sony Cyber-Shot DSC-W830 LCD Replacement: passo 10, immagine 1 di 2 Sony Cyber-Shot DSC-W830 LCD Replacement: passo 10, immagine 2 di 2
    • Grasp the no-fuss ribbon cable and gently pull it out from the motherboard.

Conclusione

To reassemble your device, follow these instructions in reverse order.

Altre 4 persone hanno completato questa guida.

Team

USF Tampa, Team 17-1, Blackwell Fall 2016 Membro di USF Tampa, Team 17-1, Blackwell Fall 2016

USFT-BLACKWELL-F16S17G1

4 Membri

6 Guide realizzate

5 Commenti

hii

plaz help me

tajbhatnagar - Replica

Sony Cyber-Shot DSC-W830 LCD ……WowObjects LCD Display Screen For SONY DSC-W150 same hai ya different hai

tajbhatnagar - Replica

Hi I need a one DSC w810 display how much. ?

How can contact you ?

Tamil Varshitha - Replica

Sony dsc s2000 model camera need

Display & lens unit

Tamil Varshitha - Replica

Aggiungi Commento

Visualizza Statistiche:

Ultime 24 Ore: 0

Ultimi 7 Giorni: 13

Ultimi 30 Giorni: 37

Tutti i Tempi: 4,190