Salta al contenuto principale

Sony CPF-IP001 Power Cord Replacement

Cosa ti serve

  1. Sony CPF-IP001 Power Cord Replacement, Subwoofer Housing Disassembly: passo 1, immagine 1 di 2 Sony CPF-IP001 Power Cord Replacement, Subwoofer Housing Disassembly: passo 1, immagine 2 di 2
    • Remove fourteen 8 mm Phillips #2 screws from the bottom of the subwoofer.

    • Once all of the screws are removed, the cover can be taken off using a metal spudger.

  2. Sony CPF-IP001 Power Cord Replacement: passo 2, immagine 1 di 2 Sony CPF-IP001 Power Cord Replacement: passo 2, immagine 2 di 2
    • Remove eight 14 mm Phillips #2 screws holding the circuit board in place.

    • Using the plastic opening tool, carefully remove the circuit board.

    • There will be 3 wires connected to the opposite side of the circuit board. Be careful not to pull the board out of the device too far and damage these wires.

  3. Sony CPF-IP001 Power Cord Replacement: passo 3, immagine 1 di 2 Sony CPF-IP001 Power Cord Replacement: passo 3, immagine 2 di 2
    • Remove the first of the three wires by squeezing the clip and pulling it out.

    • After disconnecting the first wire, the two attached wires can be more easily accessed.

  4. Sony CPF-IP001 Power Cord Replacement: passo 4, immagine 1 di 3 Sony CPF-IP001 Power Cord Replacement: passo 4, immagine 2 di 3 Sony CPF-IP001 Power Cord Replacement: passo 4, immagine 3 di 3
    • Remove the wire furthest to the left by squeezing the clip and pulling it out.

    • Detach the third wire by carefully using the tweezers.

    • The circuit board is now completely detached and can be set aside.

  5. Sony CPF-IP001 Power Cord Replacement: passo 5, immagine 1 di 2 Sony CPF-IP001 Power Cord Replacement: passo 5, immagine 2 di 2
    • Remove six 8 mm Phillips #2 screws.

    • Slide the side panel with the power cord out from the housing.

    • The side panel with the power cord will come out as a whole unit with the subwoofer air tunnel.

  6. Sony CPF-IP001 Power Cord Replacement, Power Cord: passo 6, immagine 1 di 2 Sony CPF-IP001 Power Cord Replacement, Power Cord: passo 6, immagine 2 di 2
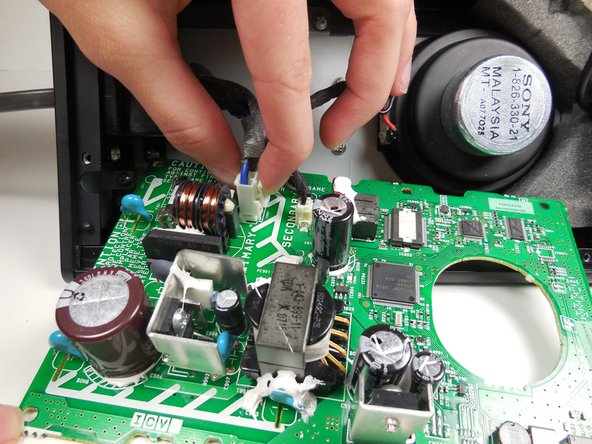
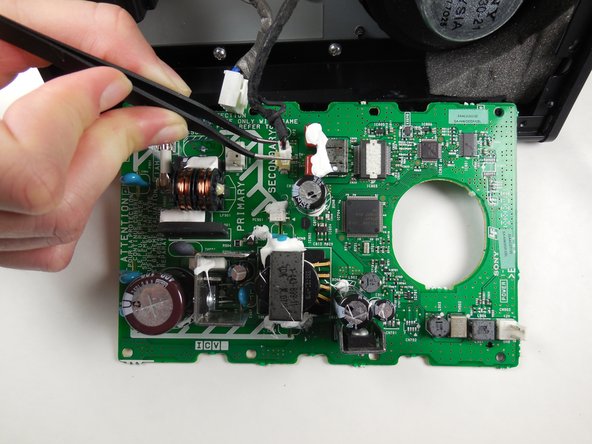
    • Remove four 8 mm Phillips #2 screws.

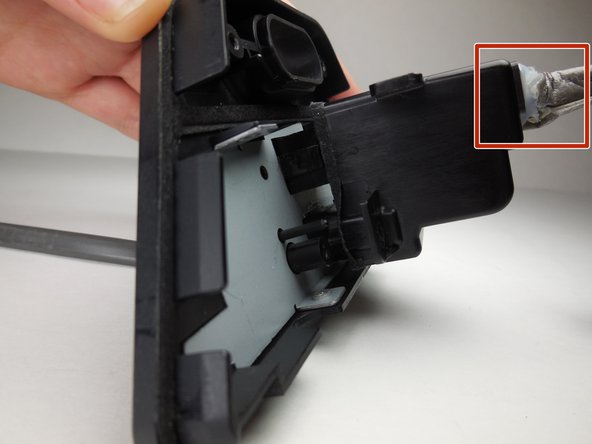
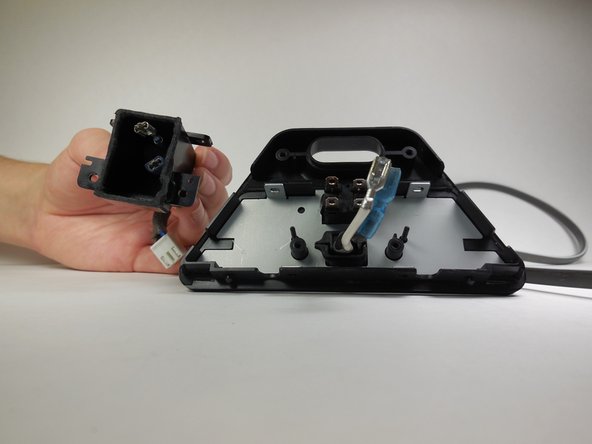
    • Detach the air tube from the side panel.

  7. Sony CPF-IP001 Power Cord Replacement: passo 7, immagine 1 di 2 Sony CPF-IP001 Power Cord Replacement: passo 7, immagine 2 di 2
    • Begin to pry the power cord cover unit from the side panel using a metal spudger.

    • Feed the wires that come out of the side panel through the glue and into the power cord cover unit to get the cover farther away from the side panel.

  8. Sony CPF-IP001 Power Cord Replacement: passo 8, immagine 1 di 2 Sony CPF-IP001 Power Cord Replacement: passo 8, immagine 2 di 2
    • Using a metal spudger, disconnect the four spade connectors that are connected to the power button and the power cord.

  9. Sony CPF-IP001 Power Cord Replacement: passo 9, immagine 1 di 2 Sony CPF-IP001 Power Cord Replacement: passo 9, immagine 2 di 2
    • Using a metal spudger, press the tab on top of the power cord and push the power cord through the side panel.

    • Once through, the clip connected to the power cord will open up and a new power cord can be put in place.

Conclusione

To reassemble your device, follow these instructions in reverse order.

Mike Bolton

Membro da: 04/14/15

473 Reputazione

4 Guide realizzate

Team

Cal Poly, Team 6-14, Maness Spring 2015 Membro di Cal Poly, Team 6-14, Maness Spring 2015

CPSU-MANESS-S15S6G14

4 Membri

8 Guide realizzate

0 Commenti

Aggiungi Commento

Visualizza Statistiche:

Ultime 24 Ore: 0

Ultimi 7 Giorni: 0

Ultimi 30 Giorni: 1

Tutti i Tempi: 393