Salta al contenuto principale

Sony BDP-BX620 Motherboard Replacement

Cosa ti serve

  1. Sony BDP-BX620 Motherboard Replacement, Outer Cover: passo 1, immagine 1 di 2 Sony BDP-BX620 Motherboard Replacement, Outer Cover: passo 1, immagine 2 di 2
    • Power on the device, eject the disk tray, and power off the device.

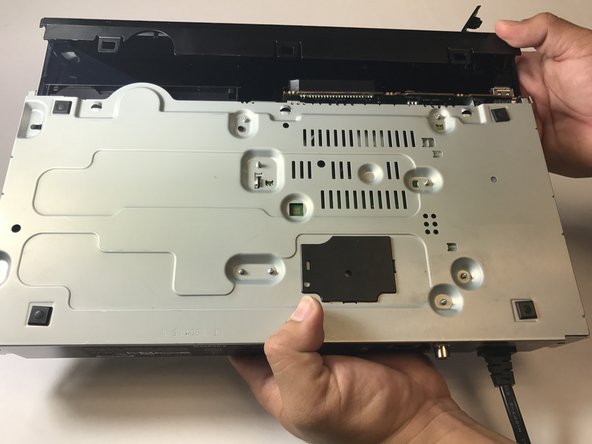
    • Turn the device over.

    • Lightly apply downward pressure on the black covering on the disk tray until it comes off.

    • Caution, applying too much pressure can break the black covering.

  2. Sony BDP-BX620 Motherboard Replacement: passo 2, immagine 1 di 2 Sony BDP-BX620 Motherboard Replacement: passo 2, immagine 2 di 2
    • Turn the device around.

    • Using a Phillips screw driver, remove the screws on both ends of the device circled red in the image.

    • Slide the side covers on either side towards the back of the device.

    • There is a back cover on either side of the device.

  3. Sony BDP-BX620 Motherboard Replacement: passo 3, immagine 1 di 3 Sony BDP-BX620 Motherboard Replacement: passo 3, immagine 2 di 3 Sony BDP-BX620 Motherboard Replacement: passo 3, immagine 3 di 3
    • This step might require someone to help unclasping the plastic clips.

    • Turn the device so that the bottom is facing up.

    • In the bottom, unclip the three plastic clips circled in red.

    • On either side, unclip the plastic clip circled in red

    • Slide the black covering forwards to remove.

    • All five clips have to be unclasped for the covering to be removed.

    • Careful not to break the plastic clips when putting it back on.

  4. Sony BDP-BX620 Motherboard Replacement, Power Module: passo 4, immagine 1 di 1
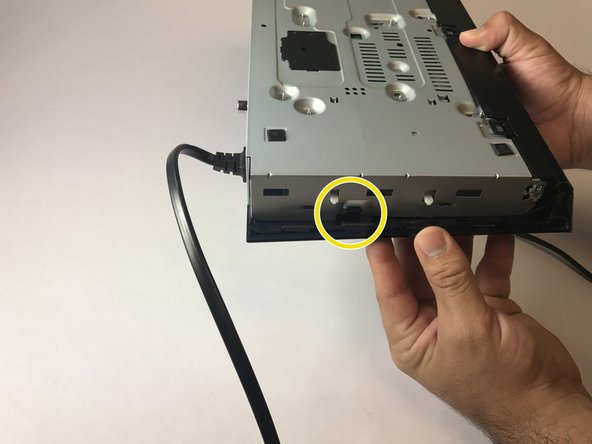
    • Gently pull on up on the power cord to unlatch it from the metal body of the device.

  5. Sony BDP-BX620 Motherboard Replacement: passo 5, immagine 1 di 1
    • Remove the cable connecting the Power Port to the Motherboard by pulling up.

    • It may be difficult to remove. Pull from the plastic part and not the wiring to prevent the wiring from breaking.

  6. Sony BDP-BX620 Motherboard Replacement: passo 6, immagine 1 di 1
    • Remove both screws using the Phillips screw driver.

  7. Sony BDP-BX620 Motherboard Replacement: passo 7, immagine 1 di 1
    • Lift the Power Module up from the side. See picture.

    • Pull up and away to remove the Power Module

  8. Sony BDP-BX620 Motherboard Replacement, Motherboard: passo 8, immagine 1 di 3 Sony BDP-BX620 Motherboard Replacement, Motherboard: passo 8, immagine 2 di 3 Sony BDP-BX620 Motherboard Replacement, Motherboard: passo 8, immagine 3 di 3
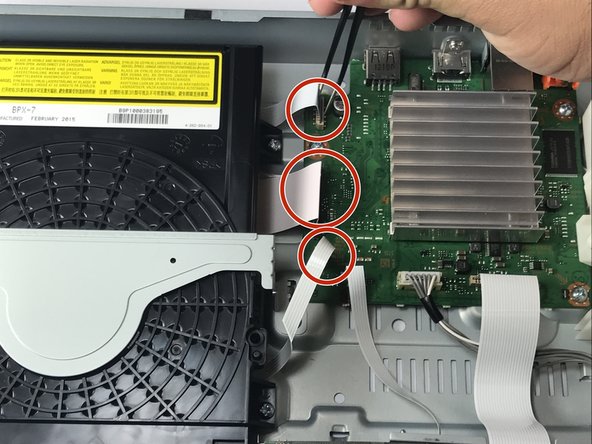
    • Remove the white ribbon cables connecting the motherboard to the display. The thick white ribbon cable in the middle needs the release button to be pressed down to allow it to come loose.

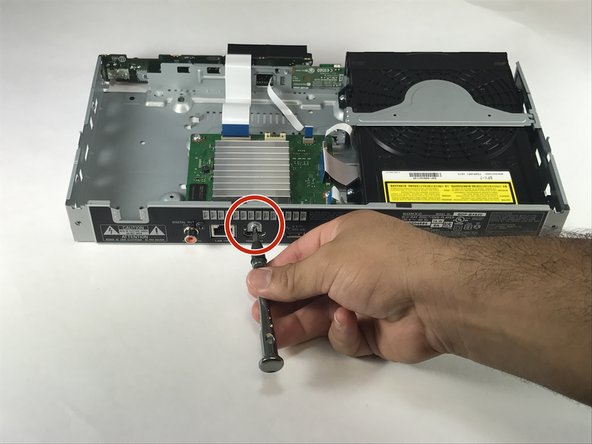
    • Remove the white ribbon cables connecting the motherboard to the disk drive. Be careful to not use too much force to not tear the cables.

  9. Sony BDP-BX620 Motherboard Replacement: passo 9, immagine 1 di 2 Sony BDP-BX620 Motherboard Replacement: passo 9, immagine 2 di 2
    • Once the ribbon cables are removed, remove the three screws holding the motherboard to the base of the player.

    • Finally remove the screw from the back of the player holding the motherboard in place.

Conclusione

To reassemble your device, follow these instructions in reverse order.

Un'altra persona ha completato questa guida.

Benjamin

Membro da: 09/12/16

92 Reputazione

1 Guida realizzata

Team

USF Tampa, Team 1-6, Lacy Fall 2016 Membro di USF Tampa, Team 1-6, Lacy Fall 2016

USFT-LACY-F16S1G6

4 Membri

6 Guide realizzate

Un commento

OK, but here’s the next step. I’m trying to get to the CPU now under that aluminum fin cooling plate. However, I can’t for the life of me find how to unhook those 4 hooks holding it down on the CPU. Any suggestions? Preferably without having to buy equipment, but if I must, what should I get?

danthemanyankeefan - Replica

Aggiungi Commento

Visualizza Statistiche:

Ultime 24 Ore: 0

Ultimi 7 Giorni: 0

Ultimi 30 Giorni: 3

Tutti i Tempi: 259