Salta al contenuto principale

Sony BDP-BX520 Motherboard Replacement

Cosa ti serve

  1. Sony BDP-BX520 Motherboard Replacement, Disc Tray Cover: passo 1, immagine 1 di 1
    • Plug in the Blu-Ray player, then press the power button, making sure the Blu-Ray player is powered on.

    • Press the eject button on either the top of the Blu-Ray player or on the remote to open the disc tray.

  2. Sony BDP-BX520 Motherboard Replacement: passo 2, immagine 1 di 1
    • Grab the sides of the disc tray cover and carefully pull each side upwards, starting with the left side. This will unhook the cover from the tray.

  3. Sony BDP-BX520 Motherboard Replacement: passo 3, immagine 1 di 1
    • Close the disc tray, then power off and unplug the Blu-Ray player.

  4. Sony BDP-BX520 Motherboard Replacement, Top Case: passo 4, immagine 1 di 1
    • Locate the three 8 mm screws on the back of the Blu-Ray player.

    • Using the Phillips #2 screwdriver, unscrew each of the screws and set them aside.

  5. Sony BDP-BX520 Motherboard Replacement: passo 5, immagine 1 di 2 Sony BDP-BX520 Motherboard Replacement: passo 5, immagine 2 di 2
    • Gently pull the top case back to remove it from the Blu-Ray player.

  6. Sony BDP-BX520 Motherboard Replacement, Front Panel: passo 6, immagine 1 di 1
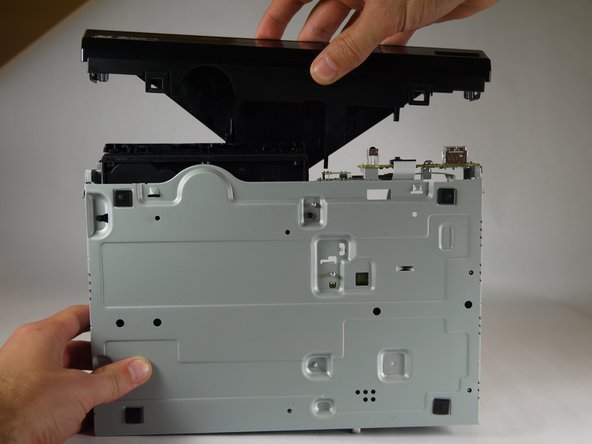
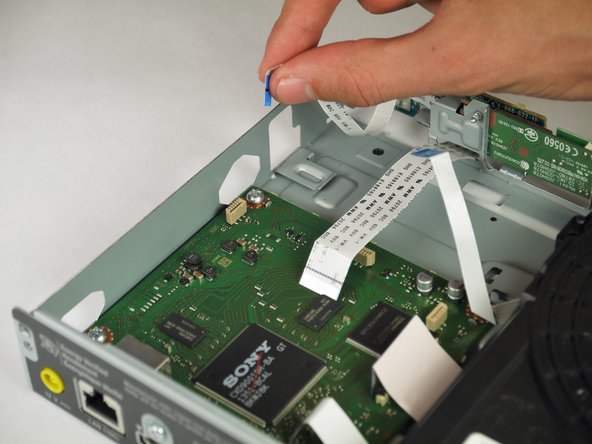
    • Insert the nylon or metal spudger under the clip on the side near the front of the device. Lift the clip so it is free from the device.

    • Lifting these clips may require you to hold one clip open while you move on to the next clip.

  7. Sony BDP-BX520 Motherboard Replacement: passo 7, immagine 1 di 1
    • Flip device over so the bottom faces you.

    • Insert the nylon or metal spudger and lift the two clips on the bottom of the device.

  8. Sony BDP-BX520 Motherboard Replacement: passo 8, immagine 1 di 1
    • Lift the clip on the opposite side of the device with the nylon or metal spudger.

  9. Sony BDP-BX520 Motherboard Replacement: passo 9, immagine 1 di 2 Sony BDP-BX520 Motherboard Replacement: passo 9, immagine 2 di 2
    • Grasp the front case firmly and lift from the rest of the device.

    • Lifting may require some force.

  10. Sony BDP-BX520 Motherboard Replacement, Motherboard: passo 10, immagine 1 di 2 Sony BDP-BX520 Motherboard Replacement, Motherboard: passo 10, immagine 2 di 2
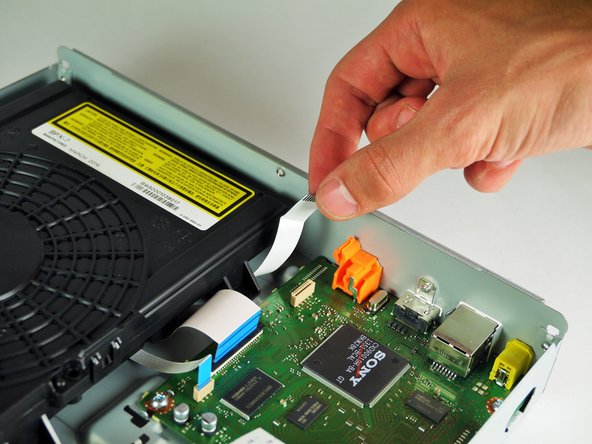
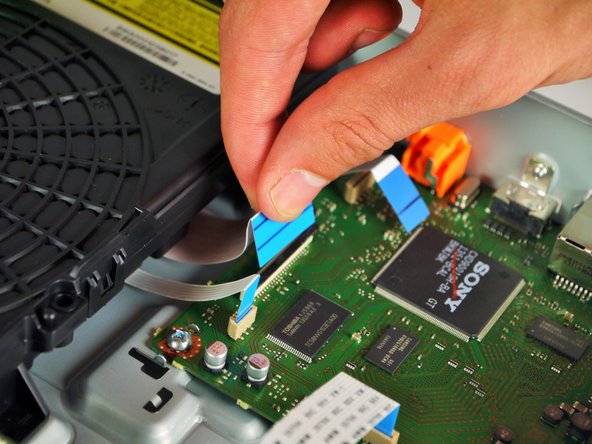
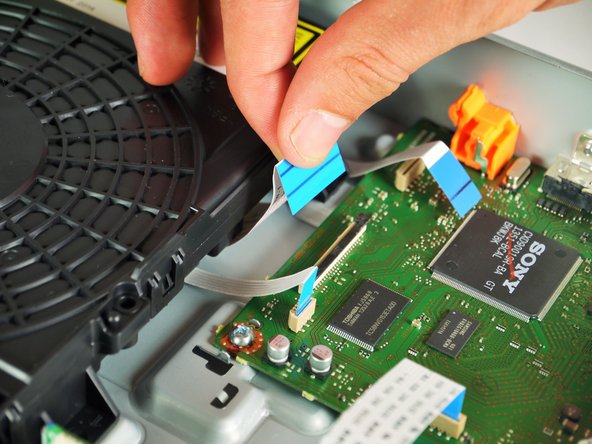
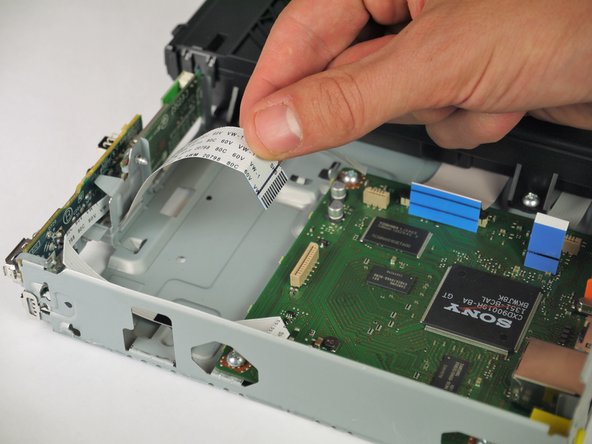
    • Remove the medium ribbon cable connecting the disc drive to the motherboard by lifting it out of its slot with your fingers.

    • It might take some force to lift the ribbon out, so be careful as to not damage the ribbon or the board.

  11. Sony BDP-BX520 Motherboard Replacement: passo 11, immagine 1 di 3 Sony BDP-BX520 Motherboard Replacement: passo 11, immagine 2 di 3 Sony BDP-BX520 Motherboard Replacement: passo 11, immagine 3 di 3
    • With the tweezers, remove the large ribbon cable by grabbing the black part of the connector and gently lifting up on each side.

    • Grab the ribbon with your hand and lift it out of the connector.

  12. Sony BDP-BX520 Motherboard Replacement: passo 12, immagine 1 di 2 Sony BDP-BX520 Motherboard Replacement: passo 12, immagine 2 di 2
    • Grab the small ribbon cable and pull up to disconnect.

    • Like the medium ribbon cable, removing the small cable may require some force, so be careful as to not damage the cable or the motherboard.

  13. Sony BDP-BX520 Motherboard Replacement: passo 13, immagine 1 di 2 Sony BDP-BX520 Motherboard Replacement: passo 13, immagine 2 di 2
    • Remove the large, white ribbon cable connecting the motherboard to the port board (the larger of the two on the side nearest the front of the player) by lifting it out of its connector.

  14. Sony BDP-BX520 Motherboard Replacement: passo 14, immagine 1 di 2 Sony BDP-BX520 Motherboard Replacement: passo 14, immagine 2 di 2
    • Lift up the white ribbon cable connecting the Bluetooth board to the motherboard (the smaller of the two on the front side of the motherboard) to remove it.

  15. Sony BDP-BX520 Motherboard Replacement: passo 15, immagine 1 di 1
    • Remove the black, 1 cm screw to the upper right of the coaxial port using a PH2 screwdriver bit.

  16. Sony BDP-BX520 Motherboard Replacement: passo 16, immagine 1 di 1
    • Remove the silver, 5 mm screw above the HDMI port with a PH2 screwdriver bit.

  17. Sony BDP-BX520 Motherboard Replacement: passo 17, immagine 1 di 1
    • Remove the three screws holding the motherboard in the case.

  18. Sony BDP-BX520 Motherboard Replacement: passo 18, immagine 1 di 2 Sony BDP-BX520 Motherboard Replacement: passo 18, immagine 2 di 2
    • Hold the motherboard exclusively by its sides as to not short it out or damage it irreparably.

    • Slide the motherboard towards the front while lifting to remove.

Conclusione

To reassemble your device, follow these instructions in reverse order.

Altre 5 persone hanno completato questa guida.

Carley Thomas

Membro da: 02/02/15

249 Reputazione

1 Guida realizzata

Team

Cal Poly, Team 8-41, Amido Winter 2015 Membro di Cal Poly, Team 8-41, Amido Winter 2015

CPSU-AMIDO-W15S8G41

4 Membri

8 Guide realizzate

2 Commenti

Hi,

Can you help me identify the SoC on this unit? It seems to be a Sony/Mediatek CXD90018R but i cant find any documentation about it (CPU arch, GPU, Pinout etc).

Thank you

J da Costa - Replica

Hii Carley, do you know if it is possible to switch the circuit board to use 110v instead of 220v?

J R Padrón - Replica

Aggiungi Commento

Visualizza Statistiche:

Ultime 24 Ore: 0

Ultimi 7 Giorni: 0

Ultimi 30 Giorni: 7

Tutti i Tempi: 2,399