Salta al contenuto principale

Questa guida ha delle modifiche più recenti. Passa all'ultima versione non verificata.

Sony Alpha 6000 Screen Replacement

Guida Archiviata
Questa guida è mantenuta solo per scopi storici. Usa la versione aggiornata della guida per eseguire la riparazione.

Cosa ti serve

  1. Sony Alpha 6000 Screen Replacement, Battery: passo 1, immagine 1 di 1
    • Make sure the camera is turned off by turning the switch to OFF.

  2. Sony Alpha 6000 Screen Replacement: passo 2, immagine 1 di 1
    • Flip the camera around to access the battery compartment.

    • Slide the battery compartment lock to the left to unlock it.

  3. Sony Alpha 6000 Screen Replacement: passo 3, immagine 1 di 1
    • Locate the blue latch that holds the battery in.

  4. Sony Alpha 6000 Screen Replacement: passo 4, immagine 1 di 1
    • Push the latch back to release battery.

  5. Sony Alpha 6000 Screen Replacement: passo 5, immagine 1 di 1
    • The battery can now be taken out of its compartment.

  6. Sony Alpha 6000 Screen Replacement, Screen: passo 6, immagine 1 di 2 Sony Alpha 6000 Screen Replacement, Screen: passo 6, immagine 2 di 2
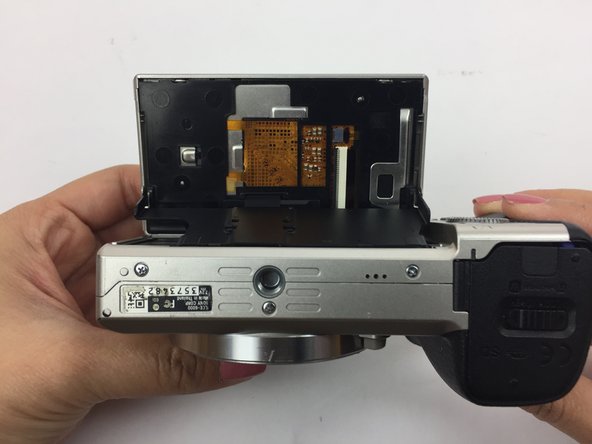
    • Locate and unscrew the two 3 mm screws on the bottom of the screen.

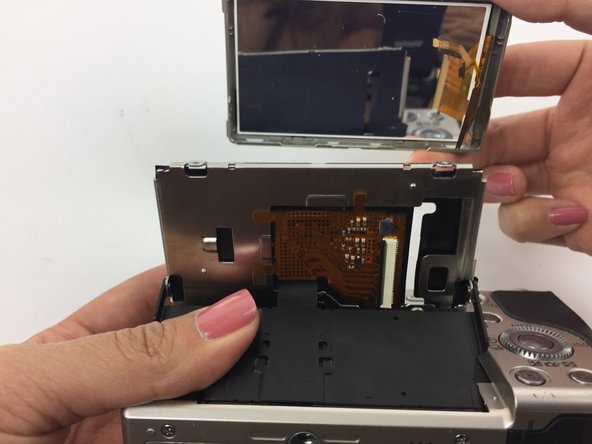
    • Pull the screen out from the top to reveal the two screws behind the screen; unscrew the two 3 mm screws.

  7. Sony Alpha 6000 Screen Replacement: passo 7, immagine 1 di 3 Sony Alpha 6000 Screen Replacement: passo 7, immagine 2 di 3 Sony Alpha 6000 Screen Replacement: passo 7, immagine 3 di 3
    • Flip the screen so it is facing up and then have the bottom of the camera facing yourself.

    • Using a spudger, remove the larger back panel.

    • Flip the camera right side up and pull back the screen.

    • Remove the smaller black panel on the back of the screen.

  8. Sony Alpha 6000 Screen Replacement: passo 8, immagine 1 di 2 Sony Alpha 6000 Screen Replacement: passo 8, immagine 2 di 2
    • Locate the small "H" shaped clip on the back of the screen.

    • Remove the clip with tweezers

  9. Sony Alpha 6000 Screen Replacement: passo 9, immagine 1 di 3 Sony Alpha 6000 Screen Replacement: passo 9, immagine 2 di 3 Sony Alpha 6000 Screen Replacement: passo 9, immagine 3 di 3
    • Flip the screen back so it is facing up and then have the bottom of the camera facing you. The yellow circuit board should now be exposed.

    • Hold down the yellow circuit board that the ribbon cables are attached to.

    • Using tweezers, remove the smaller ribbon cable. This may require extra force that could damage the ribbon cable.

  10. Sony Alpha 6000 Screen Replacement: passo 10, immagine 1 di 2 Sony Alpha 6000 Screen Replacement: passo 10, immagine 2 di 2
    • Remove the larger ribbon cable. This may require extra force that could damage the ribbon cable.

  11. Sony Alpha 6000 Screen Replacement: passo 11, immagine 1 di 2 Sony Alpha 6000 Screen Replacement: passo 11, immagine 2 di 2
    • Using a plastic opening tool, separate the silver panel from the actual screen.

    • Carefully slide the ribbon cables through the narrow opening to fully remove the screen.

Conclusione

Now your screen is ready to be replaced! To reassemble your device, follow these instructions in reverse order.

Un'altra persona ha completato questa guida.

Jennifer Vuu

Membro da: 09/30/16

548 Reputazione

3 Guide realizzate

Team

USF Tampa, Team 4-5, Passmore Fall 2016 Membro di USF Tampa, Team 4-5, Passmore Fall 2016

USFT-PASSMORE-F16S4G5

3 Membri

12 Guide realizzate

0 Commenti

Aggiungi Commento

Visualizza Statistiche:

Ultime 24 Ore: 0

Ultimi 7 Giorni: 2

Ultimi 30 Giorni: 6

Tutti i Tempi: 1,342