Salta al contenuto principale

Sony Action Cam HDR-AS15 LCD Screen Replacement

Cosa ti serve

  1. Sony Action Cam HDR-AS15 LCD Screen Replacement, Battery: passo 1, immagine 1 di 1
    • To access the battery, gently pry open the rear cover of the action cam.

  2. Sony Action Cam HDR-AS15 LCD Screen Replacement: passo 2, immagine 1 di 2 Sony Action Cam HDR-AS15 LCD Screen Replacement: passo 2, immagine 2 di 2
    • Using a pair of tweezers, firmly grip the protrusion where the PULL signifies and remove the tray and battery.

  3. Sony Action Cam HDR-AS15 LCD Screen Replacement, Disassembling Sony Action Cam HDR-AS15 Circuit Board: passo 3, immagine 1 di 3 Sony Action Cam HDR-AS15 LCD Screen Replacement, Disassembling Sony Action Cam HDR-AS15 Circuit Board: passo 3, immagine 2 di 3 Sony Action Cam HDR-AS15 LCD Screen Replacement, Disassembling Sony Action Cam HDR-AS15 Circuit Board: passo 3, immagine 3 di 3
    • Open the bottom tab with your finger or a plastic opening tool.

    • Pull the tab out, not up, to remove it completely.

    • Remove the two screws from the device.

    • Use your fingers to remove the plastic plate.

  4. Sony Action Cam HDR-AS15 LCD Screen Replacement: passo 4, immagine 1 di 1
    • Separate the outer casing from the electronics by pushing on one of the ports toward the back end of the case. The electronics should slide right out.

  5. Sony Action Cam HDR-AS15 LCD Screen Replacement: passo 5, immagine 1 di 2 Sony Action Cam HDR-AS15 LCD Screen Replacement: passo 5, immagine 2 di 2
    • Remove the two 6.4 mm screws on the LCD side of the device using a Phillips #00 screwdriver.

    • Flip the LCD display downward to reveal the circuit board.

  6. Sony Action Cam HDR-AS15 LCD Screen Replacement, Clearing the way to the display: passo 6, immagine 1 di 1
    • Remove the pieces of black tape holding in the speaker. Put them aside for re-assembly.

  7. Sony Action Cam HDR-AS15 LCD Screen Replacement, Removing the speaker: passo 7, immagine 1 di 1
    • Pry the speaker out from its slot gently, careful not to rip the wires from the circuit board.

  8. Sony Action Cam HDR-AS15 LCD Screen Replacement, Unplugging the LCD screen: passo 8, immagine 1 di 1
    • A ribbon cable attaches the LCD to the circuit board, this can be removed by gently pulling on the cable as close to the end that attaches to the circuit board as possible.

  9. Sony Action Cam HDR-AS15 LCD Screen Replacement, Preparing to remove the LCD screen: passo 9, immagine 1 di 1
    • Gently remove the metal piece by pulling out to the right on the upper right corner first, and then on the bottom left corner.

  10. Sony Action Cam HDR-AS15 LCD Screen Replacement, Removing the LCD: passo 10, immagine 1 di 2 Sony Action Cam HDR-AS15 LCD Screen Replacement, Removing the LCD: passo 10, immagine 2 di 2
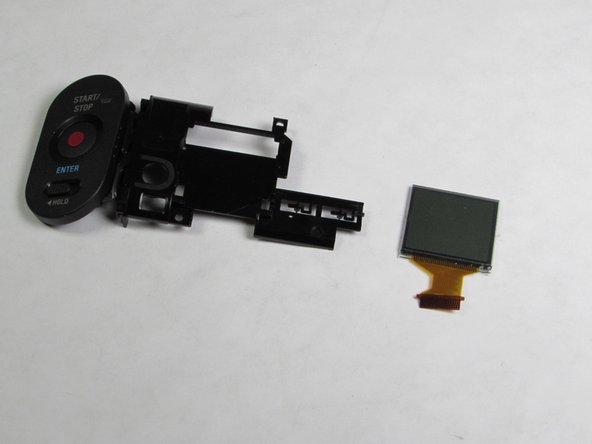
    • Two clips hold in the LCD screen. Bend these back slightly with a plastic tool or with your hands while pushing on the front of the LCD screen so that the clips do not snap back into place

    • After the clips have been undone, use the plastic opening tools to pry out the LCD screen.

Conclusione

To reassemble your device, follow these instructions in reverse order.

Un'altra persona ha completato questa guida.

Dustin

Membro da: 01/13/15

158 Reputazione

1 Guida realizzata

Team

USF Tampa, Team 1-2, Sullivan Winter 2015 Membro di USF Tampa, Team 1-2, Sullivan Winter 2015

USFT-SULLIVAN-W15S1G2

4 Membri

12 Guide realizzate

0 Commenti

Aggiungi Commento

Visualizza Statistiche:

Ultime 24 Ore: 0

Ultimi 7 Giorni: 0

Ultimi 30 Giorni: 3

Tutti i Tempi: 978