Salta al contenuto principale

Sonos Play 1 Motherboard Replacement

Cosa ti serve

  1. Sonos Play 1 Motherboard Replacement, Exterior Screen: passo 1, immagine 1 di 2 Sonos Play 1 Motherboard Replacement, Exterior Screen: passo 1, immagine 2 di 2
    • Remove the rubber footing from the bottom of the device. Pry it up from one end using one of the plastic opening tools.

    • Once you pry open one end, use precision tweezers to remove rubber footing.

  2. Sonos Play 1 Motherboard Replacement: passo 2, immagine 1 di 2 Sonos Play 1 Motherboard Replacement: passo 2, immagine 2 di 2
    • Using a metal spudger, pry open a corner of the adhesive tape.

    • Use precision tweezers to remove the adhesive tape.

  3. Sonos Play 1 Motherboard Replacement: passo 3, immagine 1 di 2 Sonos Play 1 Motherboard Replacement: passo 3, immagine 2 di 2
    • Remove the four 10 mm Torx security #10 screws that hold the base together.

    • Remove the base by lifting it vertically away from the bulk of the device.

  4. Sonos Play 1 Motherboard Replacement: passo 4, immagine 1 di 2 Sonos Play 1 Motherboard Replacement: passo 4, immagine 2 di 2
    • Remove the 10 mm Torx security #10 screw that holds down the exterior screen.

    • Using precision tweezers, remove the metal bracket.

  5. Sonos Play 1 Motherboard Replacement: passo 5, immagine 1 di 1
    • Remove the exterior screen by lifting it away from the bulk of the device.

  6. Sonos Play 1 Motherboard Replacement, Sonos Play 1 Top Cover Disassembly: passo 6, immagine 1 di 1
    • Remove the four 9 mm Torx Security #9 head screws. There are two on each side.

  7. Sonos Play 1 Motherboard Replacement: passo 7, immagine 1 di 3 Sonos Play 1 Motherboard Replacement: passo 7, immagine 2 di 3 Sonos Play 1 Motherboard Replacement: passo 7, immagine 3 di 3
    • Using a plastic opening tool, pry open the top cap containing the power and volume button.

    • Vertically remove the top cap.

    • Be sure to not jerk the top cap when removing , as to not damage the cable linking the switchboard to the motherboard.

  8. Sonos Play 1 Motherboard Replacement: passo 8, immagine 1 di 2 Sonos Play 1 Motherboard Replacement: passo 8, immagine 2 di 2
    • Using a plastic opening tool, pry open the circuit flap.

    • Once flap is loosened, use your hand to remove the circuit wire.

  9. Sonos Play 1 Motherboard Replacement, Disassembling Sonos Play 1 Rear Housing Cover: passo 9, immagine 1 di 2 Sonos Play 1 Motherboard Replacement, Disassembling Sonos Play 1 Rear Housing Cover: passo 9, immagine 2 di 2
    • Using a plastic opening tool, remove the grey tape from both sides of the device.

  10. Sonos Play 1 Motherboard Replacement: passo 10, immagine 1 di 2 Sonos Play 1 Motherboard Replacement: passo 10, immagine 2 di 2
    • Remove the six 9 mm Torx #9 screws.

    • Using a plastic opening tool, detach the rear housing cover from the housing.

    • Try not to jerk the rear housing cover, as its wires are still connected to delicate electronics.

  11. Sonos Play 1 Motherboard Replacement: passo 11, immagine 1 di 2 Sonos Play 1 Motherboard Replacement: passo 11, immagine 2 di 2
    • Using tweezers, grip the connector fixed to the motherboard's audio cable.

    • While pulling on the connector, detach the cable by pressing the connectors release.

  12. Sonos Play 1 Motherboard Replacement: passo 12, immagine 1 di 1
    • Using your fingers, grip the connector fixed to the motherboards power cable and detach it.

    • You will now be able to remove the rear housing cover.

  13. Sonos Play 1 Motherboard Replacement, Motherboard: passo 13, immagine 1 di 2 Sonos Play 1 Motherboard Replacement, Motherboard: passo 13, immagine 2 di 2
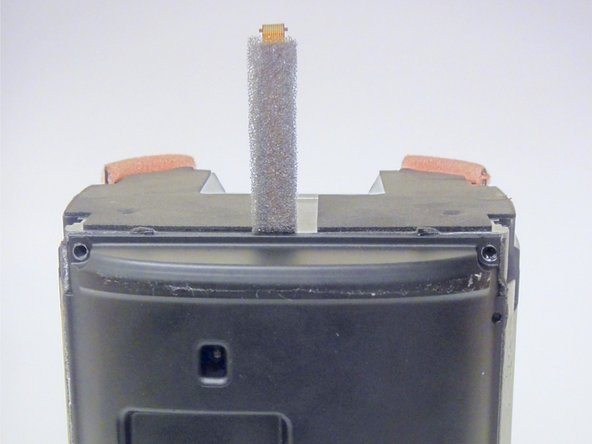
    • Remove the two 6 mm Torx #6 screws securing the communications board to the motherboard.

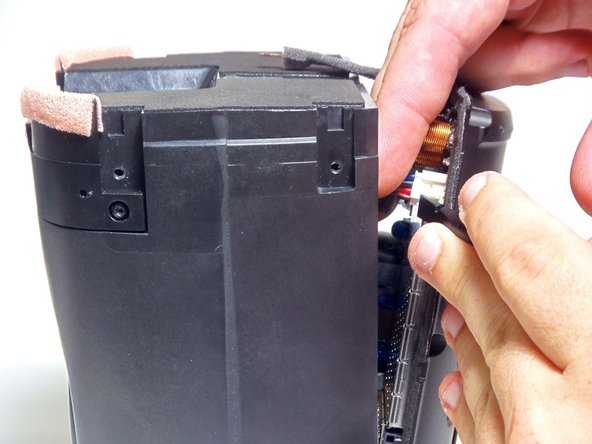
    • Using your fingers, detach and remove the communications board from the motherboard.

    • Be sure to keep the communications board parallel to the motherboard when removing as to prevent damage to the connector.

  14. Sonos Play 1 Motherboard Replacement: passo 14, immagine 1 di 2 Sonos Play 1 Motherboard Replacement: passo 14, immagine 2 di 2
    • Remove the six 10 mm Torx #10 screws fastening the motherboard to the rear housing cover.

    • Using a plastic opening tool, remove the motherboard from the rear housing cover.

Conclusione

To reassemble your device, follow these instructions in reverse order.

Altre 7 persone hanno completato questa guida.

Margarita

Membro da: 09/03/15

180 Reputazione

1 Guida realizzata

Team

USF Tampa, Team 8-4, Eyestone Fall 2015 Membro di USF Tampa, Team 8-4, Eyestone Fall 2015

USFT-EYESTONE-F15S8G4

4 Membri

16 Guide realizzate

15 Commenti

Where do you get these replacement parts from - not directly from Sonos I understand.

iou_james - Replica

…by the way I am looking for a new motherboard for a Sonos Play1 unit.

iou_james - Replica

On a Play 1 r524 and r525 are blown. What are these.and how do I get replacements

houser_m.d - Replica

Same here. r524 and r525 look blown. Have you been able to identify their values? Did you find any further damage? Have you been able to repair it?

Oliver Krause -

The parts has 1R00 printed on them. 1R= 1 Ohm resistor. You can open an old electronic gadget or look at an old PC-motherboard and see if you find one there. It’s normally hard find surface mounted resistors in local stores…

Patrick Tollgren lazarov -

Aggiungi Commento

Visualizza Statistiche:

Ultime 24 Ore: 7

Ultimi 7 Giorni: 44

Ultimi 30 Giorni: 222

Tutti i Tempi: 19,668