Salta al contenuto principale

Sol Republic Deck Bluetooth Button Replacement

Cosa ti serve

  1. Sol Republic Deck Bluetooth Button Replacement, Bluetooth Button: passo 1, immagine 1 di 1
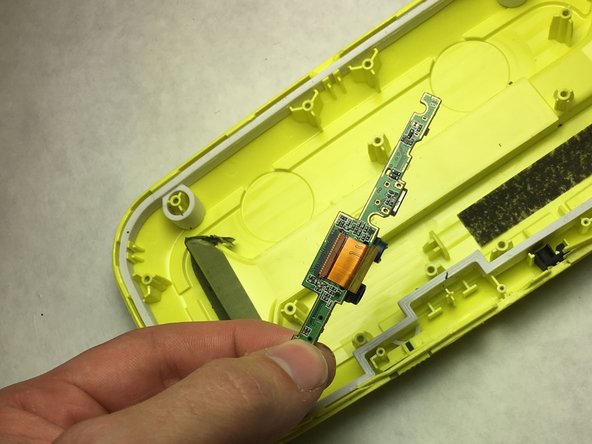
    • With plastic spudger wedge in between the top and bottom casings to force sepearation . Exposing the inside components of the Republic Deck.

  2. Sol Republic Deck Bluetooth Button Replacement: passo 2, immagine 1 di 1
    • Use the screwdriver to unscrew two 3.6mm Phillips #0 screws securing the plastic plate.

  3. Sol Republic Deck Bluetooth Button Replacement: passo 3, immagine 1 di 1
    • Remove the ribbon cable from the circuit board.

  4. Sol Republic Deck Bluetooth Button Replacement: passo 4, immagine 1 di 1
    • Plug in de-soldering kit and wait 3 minutes for the solder to heat up.

    • Use the tip of your soldering iron to heat the old solder unit and apply until it melts.

    • Remove speaker wires connecting the speaker to the circuit board.

  5. Sol Republic Deck Bluetooth Button Replacement: passo 5, immagine 1 di 1
    • Unscrew five 3.6 mm Phillips #0 screws securing the circuit board.

  6. Sol Republic Deck Bluetooth Button Replacement: passo 6, immagine 1 di 1
    • Unscrew fifteen 6.2mm Phillips #0 screws and lift the black plastic plate from the case.

  7. Sol Republic Deck Bluetooth Button Replacement: passo 7, immagine 1 di 2 Sol Republic Deck Bluetooth Button Replacement: passo 7, immagine 2 di 2
    • Remove the three 3.6mm Phillips #0 screws.

    • Remove the circuit board containing the BlueTooth button.

Conclusione

To reassemble your device, follow these instructions in reverse order.

Un'altra persona ha completato questa guida.

Team

IUPUI, Team S3-G1, Baechle Spring 2017 Membro di IUPUI, Team S3-G1, Baechle Spring 2017

IUPUI-BAECHLE-S17S3G1

3 Membri

3 Guide realizzate

0 Commenti

Aggiungi Commento

Visualizza Statistiche:

Ultime 24 Ore: 0

Ultimi 7 Giorni: 0

Ultimi 30 Giorni: 2

Tutti i Tempi: 542