Introduzione
Il SodaStream Source lavora grazie a una batteria di litio a 3V. Se stai riscontrando problemi con l'accensione del tuo apparecchio, o le luci LED non si accendono, la tua batteria potrebbe aver bisogno di essere sostituita. Questo manuale ti guiderà su come rimuovere il tappo di carbonatazione e sostituire la batteria interna.
Cosa ti serve
-
-
Rimuova il contenitore e la bombola di CO2 dall'apparecchio.
-
-
-
Svita le quattro viti da 17,8 mm dalla base inferiore in metallo usando un cacciavite a croce Phillips #1.
-
-
-
-
Tira via la copertura esterna dalla parte anteriore del dispositivo.
We are working on that for the last two hours without succcess. The boytom seems to slide out, but the top is totally stuck.
Hey Robert Coles, I figured it out. It wants to slide out backwards. You’ll notice the bottom wants to come out but the top is stuck. There is a sturdy plastic catch at the top, I managed to dislodge it by inserting a flathead screwdriver and giving it a little twist while pulling the housing away at the same time. I hope this helps! -jt
I have the same problem.
I’m stuck here too. I’ve pulled a lot of things apart but this has got the better of me. I can’t even get the bottom to slide. I love the way his hands are delicately poised to gently lift the back off. I’ve tried pulling so hard I’m frightened of breaking it. Pity. Such a good, well thought out manual otherwise. Stuck on step 3
used two thin wood skewers to break the hold on the top. Slid them in each about 1/2” from the enter. finally released.
Brian’s comment is excellent. The only additional piece of information is that the skewers should be inserted from the back. The catch is in the middle near the back. I inserted from the front which was wrong, but still worked. I left a couple of very fine marks that I think would not happen if inserted from the back.
This step was unnecessary. I was able to slide off the front panel without pulling the outer cover off.
Same for me. Jump to step4/5 first to see if it's even necessary.
jwitt72 -
there might be different variations within the same “model”. in my case (source), i realized that there is a tab at the top of of the housing. i pulled upwards the top of the housing, and was able to slide the housing backwards. there were 2 pairs of tracks on the sides of the housing that i thought they might have latches, but they were only guides to slide the housing. i do not how to share pictures here to show my steps
This step was a real bugger. What helped was sliding a medium putty knife between the top and inner piece. The plastic snap is very near the back. They are right above the small “point” in the centre of the mechanism below it. Takes patience and let the plastic give way in time. I thought for sure I was going to bust it, and then it finally slid out like magic.
This step is only useful if you need to retension the two springs that lift the head and releases the pressure so that you don't have to lift it manually to get the bottle out.
There are definitely different model variations. The outer metal case on my 2013 is split at the bottom as in this guide. The plastic case on my 16/17 is different an has the catch at the top rear as discussed in this thread. A gentle push up with my thumbs was enough to release it.
There is no need for steps 1, 2 and 3. Start at 4, and just remove the two screws from the front square that you push down. Use a tool to firmly pull the cover off and go ahead and replace the battery. Put back the cover, the two screws and you are done!
-
-
-
Svita le due viti da 18,2 mm dalla parte inferiore della copertura anteriore usando un un cacciavite a croce Philips #1.
-
-
-
Tira via con decisione la copertura anteriore.
The plastic spudgers that are supplied for mobile phone or tablet screen removal are perfect for this job. Use 2 - 1 on each side.
Once the 18.2 mm screws are removed, I just pulled the black plastic outer cover a couple mm away from the white plastic internal block on each side to release 4 of the 6 plastic catches, and then rotated upward to release the last 2 plastic catches.
Note for the SodaStream Source model that doesn't have a battery: The contents of the electrical unit will come off along with the cover itself. The connecting wires are short and won't allow removing the cover as shown here. Disassemble carefully so as to not damage the wires.
This model looks slightly different than the one shown in this guide: there are three horizontally placed buttons along the top edge, used to select the degree of carbonation and to start the process. -
-
-
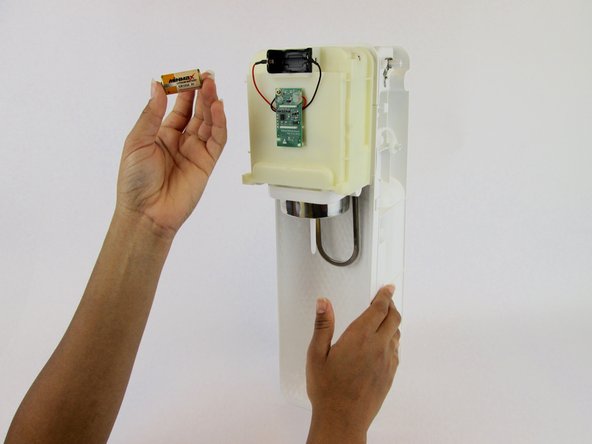
Rimuovi la batteria originale e sostituiscila con una nuova batteria agli ioni di litio da 3 V.
I just changed the battery without step 2 and 3. And it worked great. Thank you so much for the instructions
I agree. I removed the CO² cartridge as a precaution, but had no trouble removing just the front cover per step 2. To get it off, I pushed the cover down slightly to get room for a screwdriver. Then used the screwdriver at the top to move the cover outward just till it moved a small bit. It very little force. Then I pulled it off. Mine was relatively to pop off after that. A very easy fix.
Charlie -
Steps 1, 2 & 3 are unnecessary. Battery needed is CR123A lithium 3V, 1400mAH.
Screw driver PH2, PH1 too small.
I would concur, steps 1, 2, and 3 are totally unnecessary to change the battery.
I was wondering the exact same thing . While its wonderful to see the inner working and see the full teardown thanks op
he or she should mention to take off the front for battery change only skip all steps that don't address the front , or post his specific model number mines 001 and it has a build date of 2019.
Should be right at the top “these model and build dates skip to step 4
Alot of people and even skilled people sometimes have lapses or clumsy moments , extra unnecessary steps , increase the chance of damage
-


Per rimontare il tuo apparecchio, segui queste istruzione in ordine inverso.
Per rimontare il tuo apparecchio, segui queste istruzione in ordine inverso.
Annulla: non ho completato questa guida.
Altre 24 persone hanno completato questa guida.
Un ringraziamento speciale a questi traduttori:
100%

Questi traduttori ci stanno aiutando ad aggiustare il mondo! Vuoi partecipare?
Inizia a tradurre ›
Team

USF Tampa, Team S1-G4, Leahy Spring 2017 Membro di USF Tampa, Team S1-G4, Leahy Spring 2017
USFT-LEAHY-S17S1G4
3 Membri
40 Guide realizzate
20 Commenti
Heel de achterkant hoeft er hiervoor niet af hoor juist de voorkant 2 vijsjes en je kan het voorste deksel er af klikken ;)
Perfectly explained! I was afraid to pull the front cover because it does indeed take a lot of force to pull off!!
its important to note it’s a C123A 3v battery, not the C2 3v as I found out after opening
Where is the best place to find these batteries? Canadian tire?
Its the same battery many many products use usually built in , motherboards used it for years.
Kal Jak -
Staples has the 123A 3v battery
Staples Canada or staples USA?
Kal Jak -
DO NOT DO THIS. It voids your warranty. I was told that would have replaced my machine FREE had I not done this.
Yes, sure. This would only apply if the battery fails during your statutory warranty period e.g. 12 months warranty. In the case of our Sodastream, the battery became dead after 4 - 5 years, this is outside the standard 12 months warranty period. In this situation, there is no risk in performing the battery replacement is there?
Steps 1-3 are unnecessary for changing the battery. Start at step 4. Remove 2 screws. Pry front cover off. Replace battery.
I agree. Steps 1-3 were unnecessary and skip straight to step 4. It was very easy to pop off the top front cover and have direct access to the battery.
You don’t need to pull the back cover off in order to pull the front cover off.
Easily completed - many thanks!
my battery has started leaking and it ate through the plastic of the holder! No wonder it stopped working….. And its -35 outside so I really don’t feel like getting a new battery. Removing the back is completely unnecessary, but was good because mine was FILTHY inside. Its currently drying….
Perfect!! Thank you very much! I could never have done this on my own, but with your instructions I got right the first time! You’re good at this!
Col Sodastream Source non serve smontare tutto, basta svitare 2 viti del coperchio batteria e fare leva per farlo venire via.
Cercate su internet "Replace SodaStream 3V battery".
Steps 2 and 3 are unnecessary.
My machine is overflowing when i put gas
Elaine Anja - Replica
Does this article apply to the Fizzi too?
When I look at my Fizzi (that I bought secondhand), it does not have any black seal like the one shown in this article.
Greg Harrington - Replica
Parts are not specified - why? You would need a replacement circuit board (PCB, not a "chip")/battery holder assembly, if indeed that has failed.
Malcolm Noble - Replica
IMPORTANT! Don’t use Philips screwdriver size PH1, it’s too small and will damage the screws. The correct size is PH2. This goes for all screws on this machine.
Charles Greneby - Replica