Introduzione
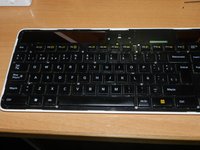
Smontare la tastiera per metà per una pulizia accurata.
Cosa ti serve
-
-
Estrarre con cautela la batteria/batteria con un cacciavite piatto.
-
-
-
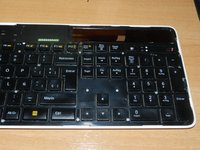
Con un asciugacapelli, scaldare il coperchio e tirarlo lentamente a mano per non romperlo.
-
-
-
-
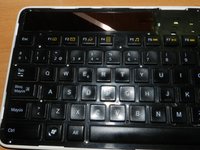
Svitare le 28 viti "PHILIPS", disponendole nell'ordine in cui escono, poiché hanno altezze e diametri diversi.
-
-
-
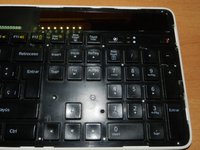
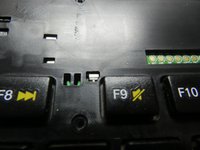
Sollevare con cautela le linguette intorno al corpo della tastiera. Tra i tasti F8 e F9 è presente un'altra linguetta. Per aprirla, sollevatela un po' dal basso e fate leva con il cacciavite, come se doveste avvitarla.
-
-
-
Una volta completati i passaggi sopra descritti, la tastiera sarà smontata per metà.
-


Consigliato per rimuovere lo sporco che rimane tra i tasti e che non può essere facilmente rimosso, è molto facile da fare e con semplici strumenti.
Consigliato per rimuovere lo sporco che rimane tra i tasti e che non può essere facilmente rimosso, è molto facile da fare e con semplici strumenti.
Annulla: non ho completato questa guida.
Altre 5 persone hanno completato questa guida.
Un ringraziamento speciale a questi traduttori:
100%

Andrea Panizzolo ci sta aiutando ad aggiustare il mondo! Vuoi partecipare?
Inizia a tradurre ›
4 Commenti
May I ask if the keyboard was opened with a repair in mind or simply to illustrate the process?
A few keys have stopped being very responsive on my keyboard and I am looking if they can be fixed.
Hi Georgios,
I also had a button that wasn’t working well. This is why I tried to disassemble it. Since these days of confinment I did it again but followed a little more, I can recommend you that you won’t see anything since it is like a laptop keyboard also you also can damage the black label that is very sticked. This 2nd time when I did this process, I melted down one button (the left arrow) and now it is deformed and I had to repair it.
Since the keys mechanism is same as on laptop keyboards, you can try to pull it up by the one side and then the other side with care to don’t damage it.
In my case, the problem was dirty under the button that was sticking the membrane each pushin. I cleaned with alcohol and a small brush and restore it’s functionality.
Muchas gracias por el tuto!!! aunque me da algo de yuyu el tener que despegarlo... pero me veo que me tocará hacerlo, no se pq la F8 me da pulsaciones sola… Una duda… con que lo has vuelto a pegar?
hola,
l primera vez use su propio pegamento recalentando pero la segunda vez, quite que lo que habia original y use cintas finas doble cara. a mi me ha quedado mal pegado. la proxima vez usare cola de contacto como para las pantallas de los moviles. creo que debe de ir mejor