Salta al contenuto principale

SleepTracker Elite Battery Replacement

Cosa ti serve

  1. SleepTracker Elite Battery Replacement, Battery: passo 1, immagine 1 di 3 SleepTracker Elite Battery Replacement, Battery: passo 1, immagine 2 di 3 SleepTracker Elite Battery Replacement, Battery: passo 1, immagine 3 di 3
    • You will need:

    • CR 2032 Battery

    • Philips #0 screwdriver

    • Something to pop the battery out, like a thin spudger, or a #2 slot screwdriver.

  2. SleepTracker Elite Battery Replacement: passo 2, immagine 1 di 2 SleepTracker Elite Battery Replacement: passo 2, immagine 2 di 2
    • Remove these four screws. They're all the same size.

  3. SleepTracker Elite Battery Replacement: passo 3, immagine 1 di 2 SleepTracker Elite Battery Replacement: passo 3, immagine 2 di 2
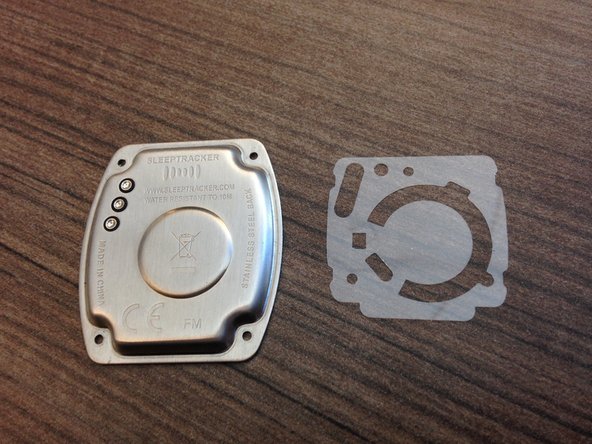
    • Lift off the case back.

    • Underneath, you'll see a sheet of plastic film. It should be possible to remove the battery without removing the film, if you're careful, but I didn't want to risk bending or tearing the plastic.

    • If you do take the plastic off, beware of maneuvering it over the three springs in the upper left, and the small prong that sticks out over the battery. You'll need to be sure to arrange the plastic carefully over these obstructions when re-assembling.

  4. SleepTracker Elite Battery Replacement: passo 4, immagine 1 di 1
    • Insert spudger or flat screwdriver in the notch indicated by the arrow, and lever out the battery.

    • The new battery should insert the same way the old one came out, and snap into place.

Conclusione

To reassemble your device, follow these instructions in reverse order.

Un'altra persona ha completato questa guida.

Mark Boszko

Membro da: 02/02/12

131 Reputazione

1 Guida realizzata

0 Commenti

Aggiungi Commento

Visualizza Statistiche:

Ultime 24 Ore: 1

Ultimi 7 Giorni: 4

Ultimi 30 Giorni: 7

Tutti i Tempi: 1,166