Salta al contenuto principale

SiriusXM Onyx Button Replacement

Cosa ti serve

  1. SiriusXM Onyx Button Replacement, Button: passo 1, immagine 1 di 1
    • Take the iFixit opening tool and place it between the crevice as shown.

  2. SiriusXM Onyx Button Replacement: passo 2, immagine 1 di 2 SiriusXM Onyx Button Replacement: passo 2, immagine 2 di 2
    • Apply pressure to the iFixit opening tool, pushing down until the the plastic casing pops off.

  3. SiriusXM Onyx Button Replacement: passo 3, immagine 1 di 2 SiriusXM Onyx Button Replacement: passo 3, immagine 2 di 2
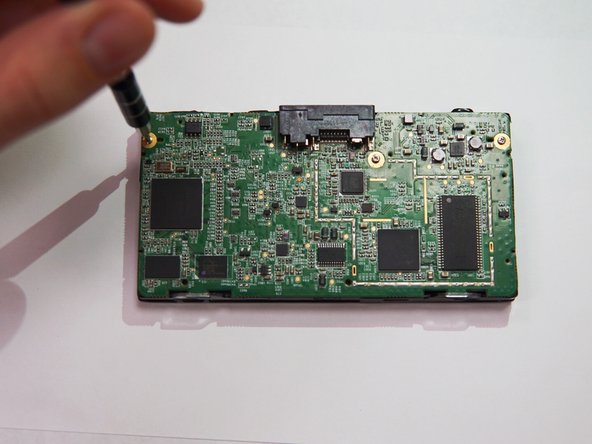
    • The buttons are on the opposite side of the motherboard. To remove the motherboard, use a 0.8~0.9 mm Phillips #00 screwdriver to remove the three screws that attach the motherboard to the front part of the plastic casing.

  4. SiriusXM Onyx Button Replacement: passo 4, immagine 1 di 2 SiriusXM Onyx Button Replacement: passo 4, immagine 2 di 2
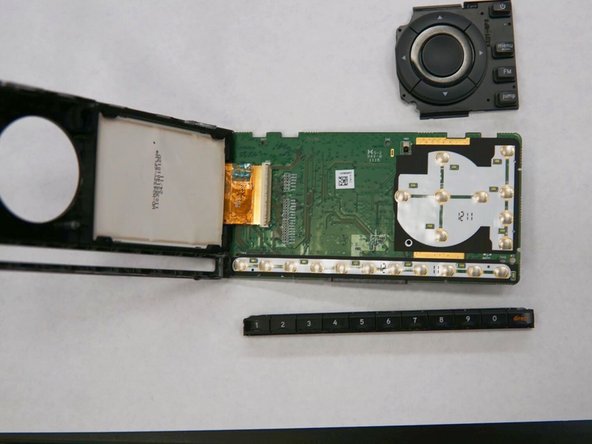
    • The buttons are resting in the corresponding sections of the motherboard, so pull them off.

Conclusione

To reassemble your device, follow these instructions in reverse order.

Un'altra persona ha completato questa guida.

0 Commenti

Aggiungi Commento

Visualizza Statistiche:

Ultime 24 Ore: 0

Ultimi 7 Giorni: 2

Ultimi 30 Giorni: 3

Tutti i Tempi: 228