Introduzione
It may be that only clear water ends up in the drip tray, but no coffee is produced. Two possible causes are shown here.
Note: you can also carry out the test in steps 7 to 9 without opening the appliance. Simply skip steps 1 to 6 first .
Cosa ti serve
-
-
Remove all attachments such as water tank, pulp drawer, brew group.
-
Remove the coffee container lid and take out all the coffee beans.
-
-
-
Lay the machine on its side with the water tank side facing up.
-
The side panel is essentially held on the ground by five strong catches. Pry up the pegs with a strong prying tool. It's pretty difficult and you need a lot of strength.
-
If the catches are loose, you can pull the side panel away from below. But it's still stuck in other places.
-
Use a plastic tool to pry the top cover up a few millimeters and lift off the side panel. Most of the time it's still stuck, especially at the front edge, you have to pull hard.
-
-
-
-
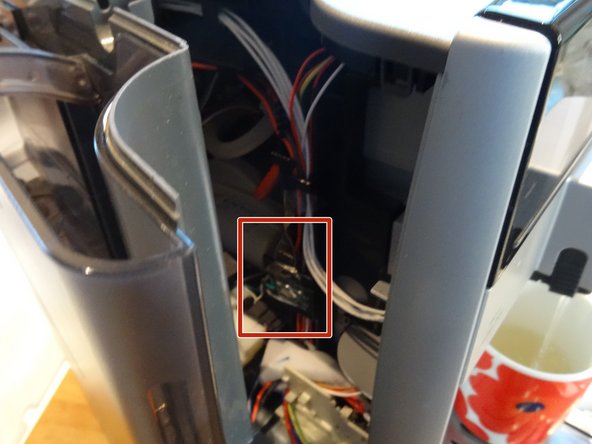
First check whether the water is dripping into the drip tray via the expansion vessel. To see this, you need to trick a sensor:
-
Make an L-shaped strip of cardboard about 5 cm long.
-
Slide the strip into the L-shaped opening at the top left of the drawer for the trester drawer. You should hear the microswitch click, the machine now "thinks" that the drawer is inserted correctly.
-
Insert an absorbent cloth in place of the drawer.
-
-
-
Switch on the machine and wait until it starts rinsing.
-
Observe whether a steady stream of water runs into your cloth. At most, a few drops should come out here.
-
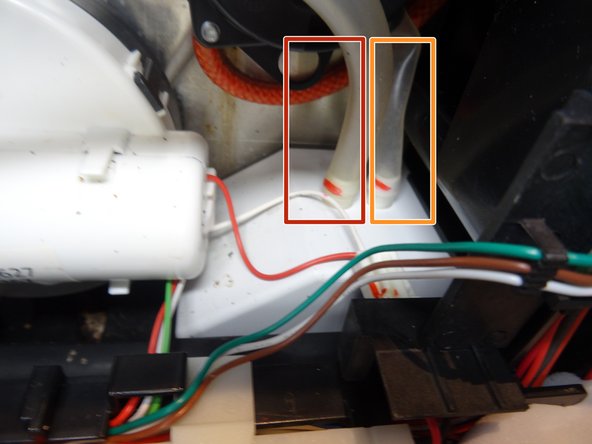
In this case, the water runs out via the expansion tank. There are two valves that lead to the expansion vessel, either of which may be defective.
-
The left hose comes from the pulsation damper/pressure relief valve
-
The right hose comes from the ceramic valve
-
-
-
Start with the pulsation damper/pressure relief valve:
-
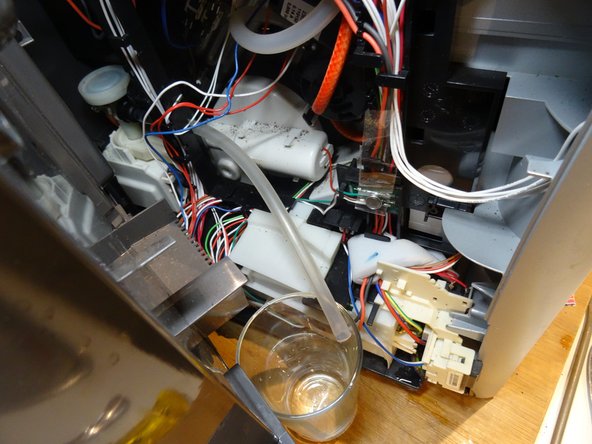
Remove the left hose from the expansion vessel and place its end in a glass of water.
-
Start the machine. If the water now runs into the glass, you have found the culprit: The pressure relief valve. A clogged heater may also be a possibility.
-
You can test the heater by also disconnecting the hose between the heater and the ceramic valve on the valve. Blow into the heater. It should go fairly easily.
-
If the water does not run into the glass, the pressure relief valve is probably OK. If the heater is continuous, the culprit must be the ceramic valve. Here are the instructions for the EQ5 and the EQ6.
-


Work through the steps in reverse order to reassemble your device.
Work through the steps in reverse order to reassemble your device.
Annulla: non ho completato questa guida.
Un'altra persona ha completato questa guida.
Un ringraziamento speciale a questi traduttori:
100%

Questi traduttori ci stanno aiutando ad aggiustare il mondo! Vuoi partecipare?
Inizia a tradurre ›
Team

Repair is War on Entropy Membro di Repair is War on Entropy
Community
25 Membri
1.148 Guide realizzate