Salta al contenuto principale

ShowerDoorDirect Shower Speaker Motherboard Replacement

Cosa ti serve

  1. ShowerDoorDirect Shower Speaker Motherboard Replacement, Battery: passo 1, immagine 1 di 2 ShowerDoorDirect Shower Speaker Motherboard Replacement, Battery: passo 1, immagine 2 di 2
    • Remove the suction pad by pulling the suction out of the slot that it is in.

  2. ShowerDoorDirect Shower Speaker Motherboard Replacement: passo 2, immagine 1 di 1
    • Remove the four 9.09mm Philips #1 screws that hold the 2 pieces of the cover together.

    • Pull apart the two halves.

  3. ShowerDoorDirect Shower Speaker Motherboard Replacement: passo 3, immagine 1 di 1
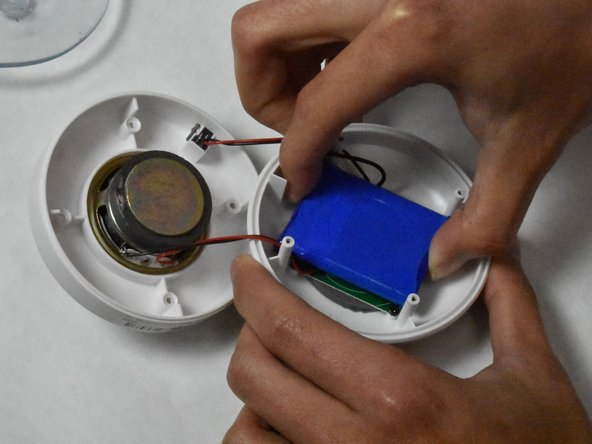
    • Hold the base and pull up on the battery.

  4. ShowerDoorDirect Shower Speaker Motherboard Replacement: passo 4, immagine 1 di 3 ShowerDoorDirect Shower Speaker Motherboard Replacement: passo 4, immagine 2 di 3 ShowerDoorDirect Shower Speaker Motherboard Replacement: passo 4, immagine 3 di 3
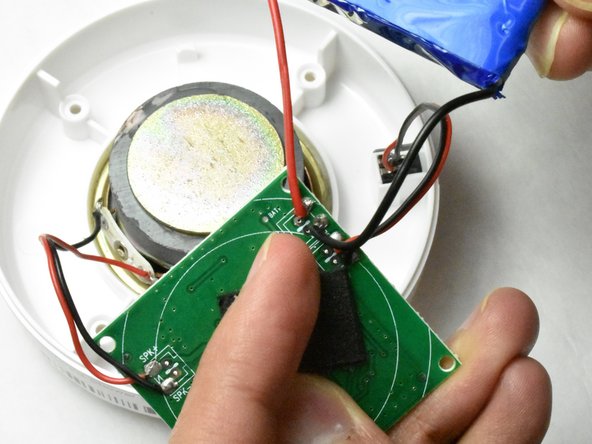
    • Remove the four 5mm Phillips #1 screws from the motherboard.

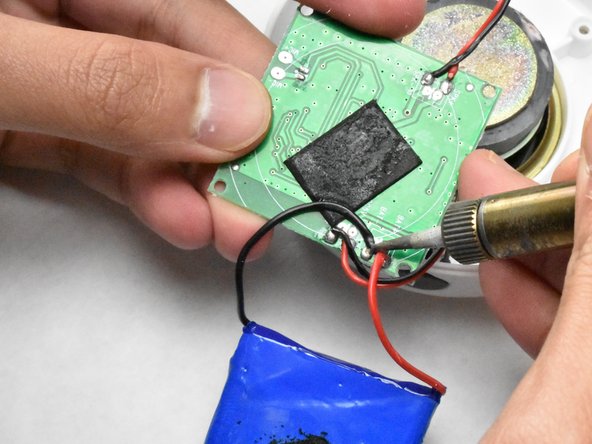
    • Desolder the two wires connecting the battery tp the motherboard.

  5. ShowerDoorDirect Shower Speaker Motherboard Replacement, Motherboard: passo 5, immagine 1 di 1
    • Desolder the four remaining wires that are connected to the motherboard.

Conclusione

To reassemble your device, follow these instructions in reverse order.

Matthew Dunkle

Membro da: 05/21/18

203 Reputazione

2 Guide realizzate

Team

IUPUI, Team S1-G1, Harley Spring 2018 Membro di IUPUI, Team S1-G1, Harley Spring 2018

IUPUI-HARLEY-S18S1G1

7 Membri

6 Guide realizzate

0 Commenti

Aggiungi Commento

Visualizza Statistiche:

Ultime 24 Ore: 0

Ultimi 7 Giorni: 1

Ultimi 30 Giorni: 4

Tutti i Tempi: 341