Salta al contenuto principale

Questa guida ha delle modifiche più recenti. Passa all'ultima versione non verificata.

Shark Rotator Powered Lift-Away Head Nozzle Disassembly

Solo Prerequisita
Questa guida è destinata a essere usata solo come prerequisito per altre guide. Da sola è incompleta.

Cosa ti serve

  1. Shark Rotator Powered Lift-Away Head Nozzle Disassembly, Shark Rotator Powered Lift-Away Head Nozzle Disassembly: passo 1, immagine 1 di 2 Shark Rotator Powered Lift-Away Head Nozzle Disassembly, Shark Rotator Powered Lift-Away Head Nozzle Disassembly: passo 1, immagine 2 di 2
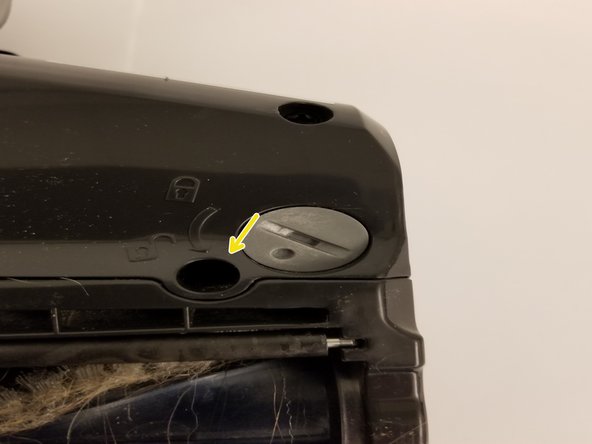
    • Push lift away button and pull the handle up to separate the body from the wand section.

  2. Shark Rotator Powered Lift-Away Head Nozzle Disassembly: passo 2, immagine 1 di 1
    • Push lift away button on the wand then lift up on the top section to separate.

  3. Shark Rotator Powered Lift-Away Head Nozzle Disassembly: passo 3, immagine 1 di 2 Shark Rotator Powered Lift-Away Head Nozzle Disassembly: passo 3, immagine 2 di 2
    • Tilt the wand shaft backwards for convenient.

  4. Shark Rotator Powered Lift-Away Head Nozzle Disassembly: passo 4, immagine 1 di 2 Shark Rotator Powered Lift-Away Head Nozzle Disassembly: passo 4, immagine 2 di 2
    • Lay the head nozzle piece upside down.

    • Locate and rotate the three gray taps to the unlock position.

  5. Shark Rotator Powered Lift-Away Head Nozzle Disassembly: passo 5, immagine 1 di 1
    • With your fingers, pry and pull the brush cage open.

  6. Shark Rotator Powered Lift-Away Head Nozzle Disassembly: passo 6, immagine 1 di 2 Shark Rotator Powered Lift-Away Head Nozzle Disassembly: passo 6, immagine 2 di 2
    • Remove the 13 screws (circled in yellow) using a phillips screwdriver.

    • Be sure to keep track of which screws go into which hole.

    • Remove the one screw (circled in red) that has a Torx head.

    • The Torx screw is hidden under a rubber gasket. Carefully, lift up the gasket without damaging it to access this screw.

  7. Shark Rotator Powered Lift-Away Head Nozzle Disassembly: passo 7, immagine 1 di 1
    • Lift up the top cover now that all of the screws have been removed.

Conclusione

To reassemble your device, follow these instructions in reverse order.

Un'altra persona ha completato questa guida.

Dan lee

Membro da: 09/27/17

101 Reputazione

1 Guida realizzata

Team

Cal Poly, Team S9-G3, Banghart Fall 2017 Membro di Cal Poly, Team S9-G3, Banghart Fall 2017

CPSU-BANGHART-F17S9G3

4 Membri

12 Guide realizzate

0 Commenti

Aggiungi Commento

Visualizza Statistiche:

Ultime 24 Ore: 0

Ultimi 7 Giorni: 2

Ultimi 30 Giorni: 3

Tutti i Tempi: 70