Questa versione può contenere modifiche errate. Passa all'ultima istantanea verificata.
Cosa ti serve
-
Questo passaggio è privo di traduzione. Aiuta a tradurlo
-
Locate the two tabs with white arrows on them. They are located on either side of the brushroll cover.
-
Slide the tabs away from the center of the vacuum to unlock the brushroll cover.
-
Lift the brushroll cover upward.
-
-
Questo passaggio è privo di traduzione. Aiuta a tradurlo
-
Lift the brushroll out by pulling the tab labeled "pull".
-
-
Questo passaggio è privo di traduzione. Aiuta a tradurlo
-
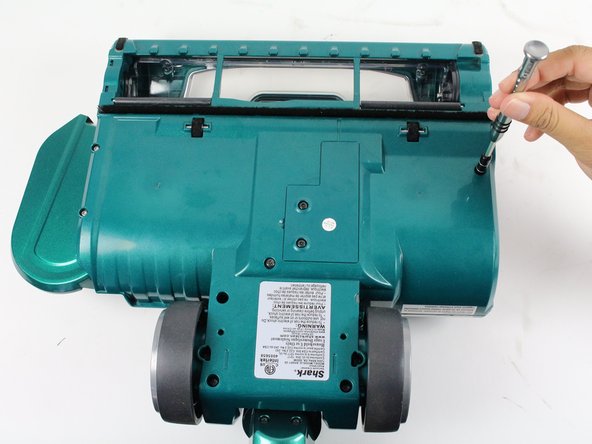
Flip the device over so that the bottom is face up.
-
Remove the eight screws shown by rotating counter-clockwise with a T15 Torx screwdriver.
-
Two 14 mm Torx screws
-
Two 16 mm Torx screws
-
Four 21 mm Torx screws
-
-
Questo passaggio è privo di traduzione. Aiuta a tradurlo
-
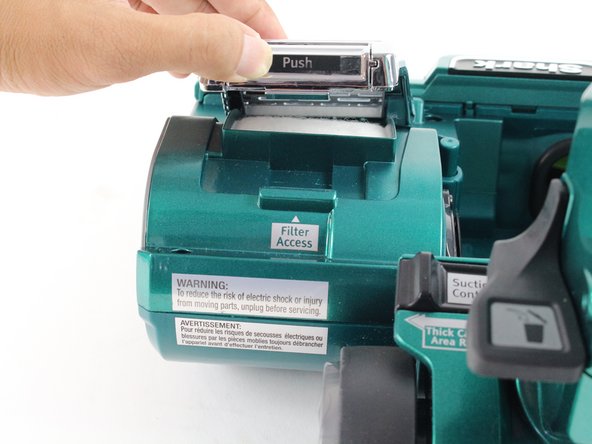
Push inward on the top of the filter grille where it says "Push."
-
Lift the filter grille upward.
-
-
Questo passaggio è privo di traduzione. Aiuta a tradurlo
-
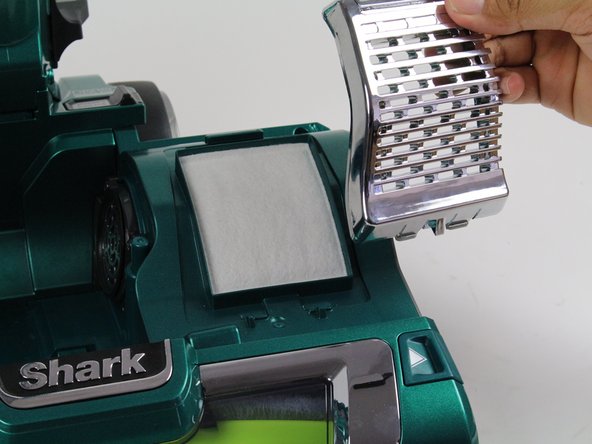
Lift gently and pull the grille up towards you until it releases.
-
-
Questo passaggio è privo di traduzione. Aiuta a tradurlo
-
Remove the four screws by rotating counter-clockwise:
-
One 12 mm screw with a T10 Torx screwdriver
-
Three 14 mm screw with a T15 Torx screwdriver
-
-
-
Questo passaggio è privo di traduzione. Aiuta a tradurlo
-
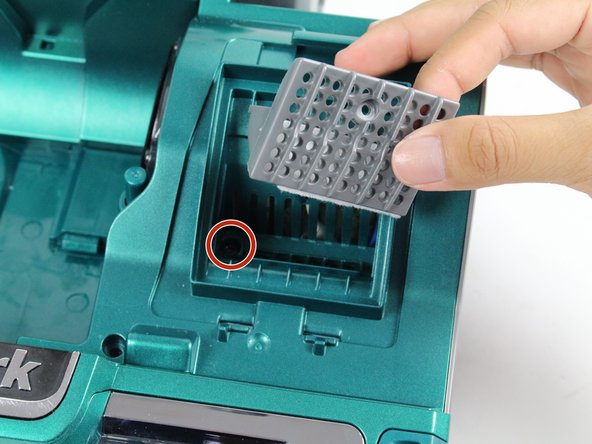
Remove the grey filter plate by simply lifting upward.
-
Remove the 14mm screw by rotating counter clockwise with a T10 Torx screwdriver.
-
-
Questo passaggio è privo di traduzione. Aiuta a tradurlo
-
Remove three 10mm screws by rotating counter-clockwise with a T15 Torx screwdriver.
-
-
Questo passaggio è privo di traduzione. Aiuta a tradurlo
-
Remove the airpath grille from the side of the motor compartment by pulling out and away from the attached area.
-
-
Questo passaggio è privo di traduzione. Aiuta a tradurlo
-
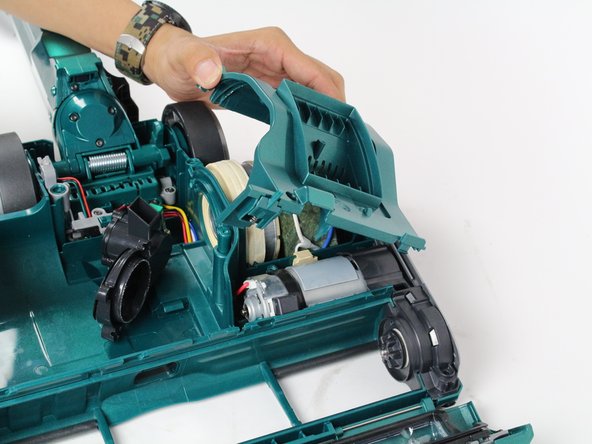
Remove the motor compartment panel by lifting up and away from the device.
-
-
Questo passaggio è privo di traduzione. Aiuta a tradurlo
-
Remove one 14mm screw by rotating counter-clockwise with a T15 Torx screwdriver.
-
-
Questo passaggio è privo di traduzione. Aiuta a tradurlo
-
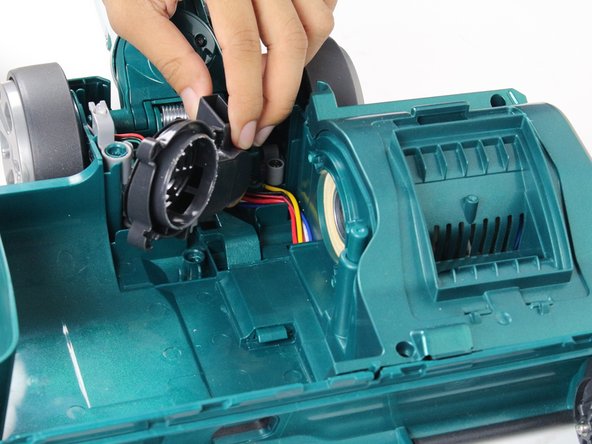
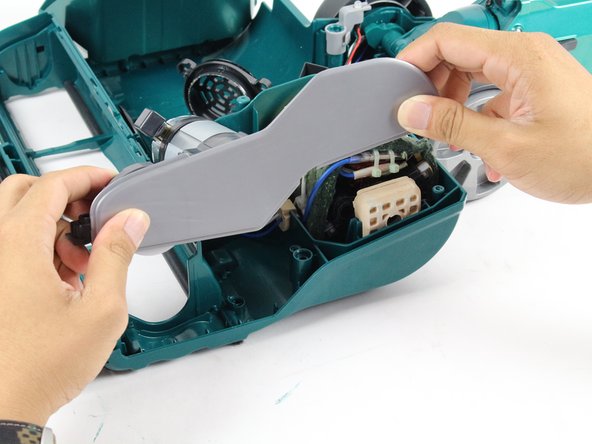
Disconnect the motor side panel by lifting the motor and panel up and out.
-
-
Questo passaggio è privo di traduzione. Aiuta a tradurlo
-
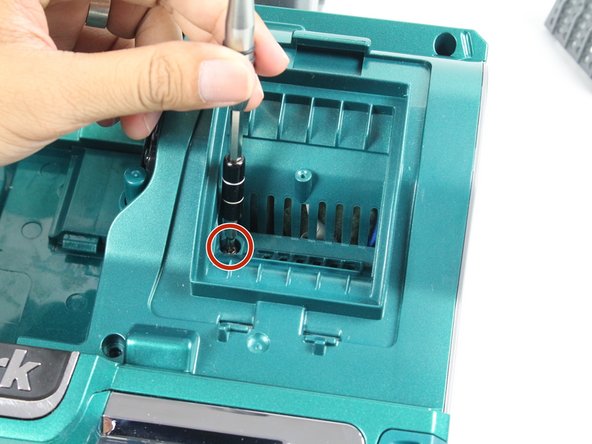
Remove one 9mm screw by rotating counter-clockwise with a Phillips #2 screwdriver.
-
-
Questo passaggio è privo di traduzione. Aiuta a tradurlo
-
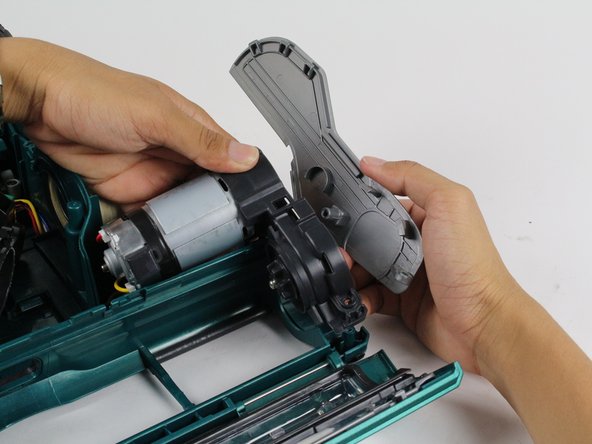
Remove the side panel by pulling the panel out and away from the motor.
-
-
Questo passaggio è privo di traduzione. Aiuta a tradurlo
-
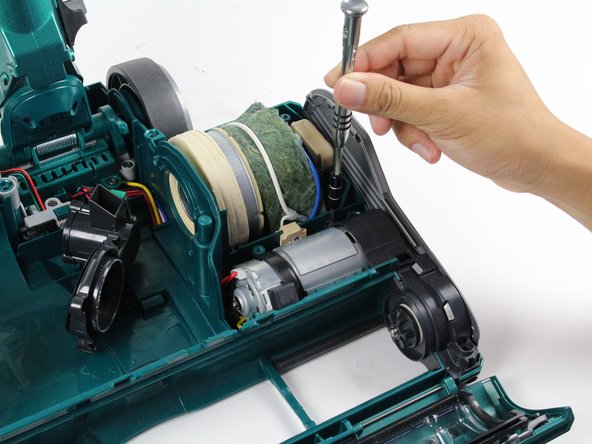
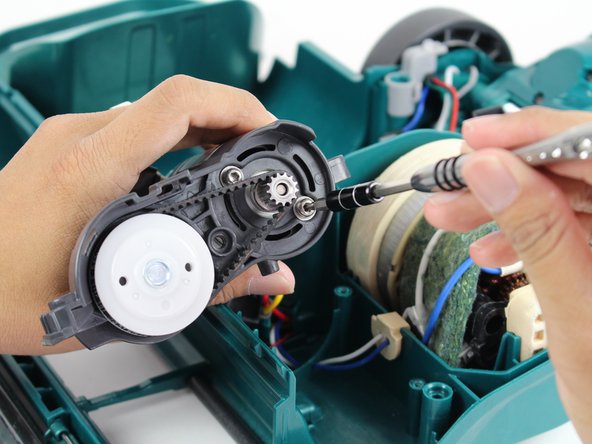
Loosen the two screws by rotating counter clockwise with a T15 Torx screwdriver.
-
-
Questo passaggio è privo di traduzione. Aiuta a tradurlo
-
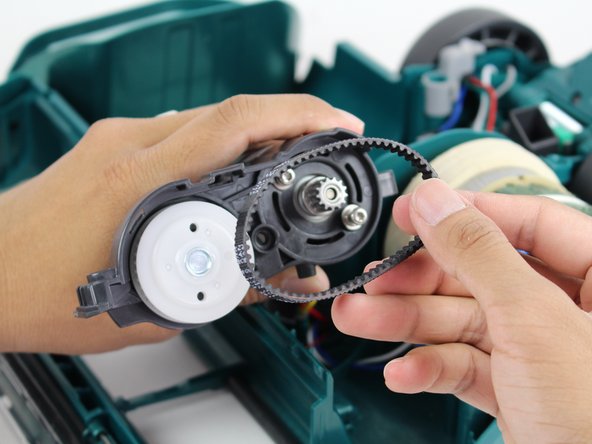
Remove the belt by pulling the belt away from the axle.
-


Annulla: non ho completato questa guida.
Altre 10 persone hanno completato questa guida.
Team

Cal Poly, Team S19-G3, Livingston Winter 2018 Membro di Cal Poly, Team S19-G3, Livingston Winter 2018
CPSU-LIVINGSTON-W18S19G3
4 Membri
18 Guide realizzate
15 Commenti
These instructions were fantastic accept for one section. On Step 9 you never mention to first remove the Motor Compartment Panel before removing the airpath grille. The picture just shows the panel already removed. Otherwise, I followed the directions forwards and backwards and I was successful!! I went to the local vacuum repair store to purchase a new belt. They did not have the Shark belt so I purchased the Bissell BIBL, BELT geared 80R4, 47A2 for $3.50 and it worked perfectly!!
there is a hidden screw on the outside of the compartment/ motor side where the handle mets the motor compartment panel / in the corner iif i could leave a pic i would.
nm1hart -
is the Shark 400 and 401 the same in changing the dive belt?
What is the replacement belt part#? Did I miss that somewhere here? I can’t find it on their web site or anywhere else on line using the AH401 model #, thanks
I have an AH452 and the belt number is 4315 SC or Gates # 192-3GT6-SAR