Salta al contenuto principale

Shark Rocket HV301 Fan Replacement

Cosa ti serve

  1. Shark Rocket HV301 Fan Replacement, Fan: passo 1, immagine 1 di 3 Shark Rocket HV301 Fan Replacement, Fan: passo 1, immagine 2 di 3 Shark Rocket HV301 Fan Replacement, Fan: passo 1, immagine 3 di 3
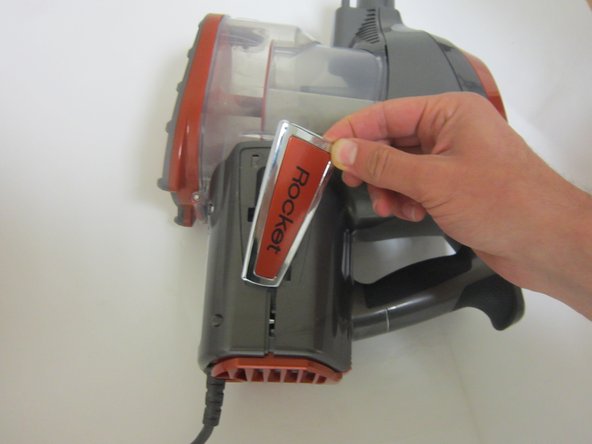
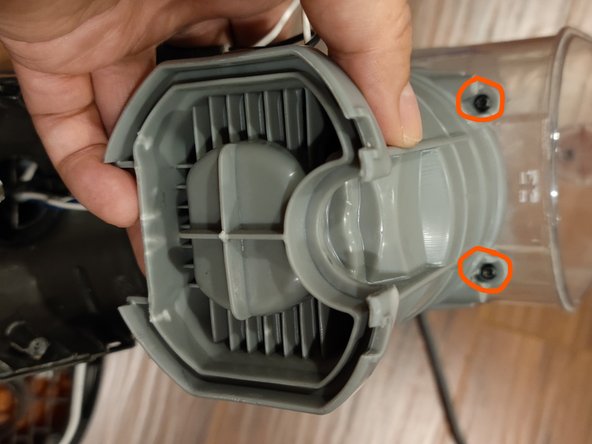
    • Locate the orange panel at the top of the vacuum.

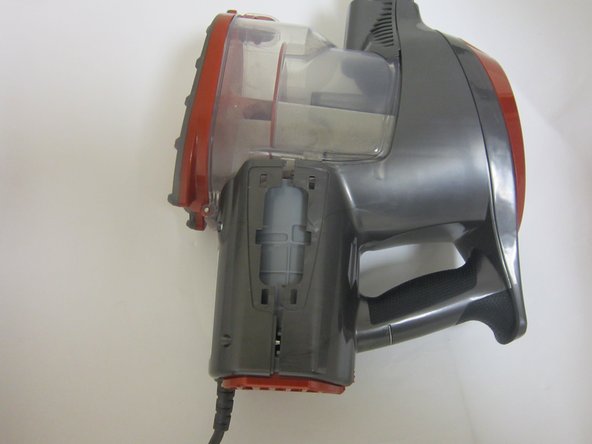
    • Remove the orange panel by pressing down on the button below the panel.

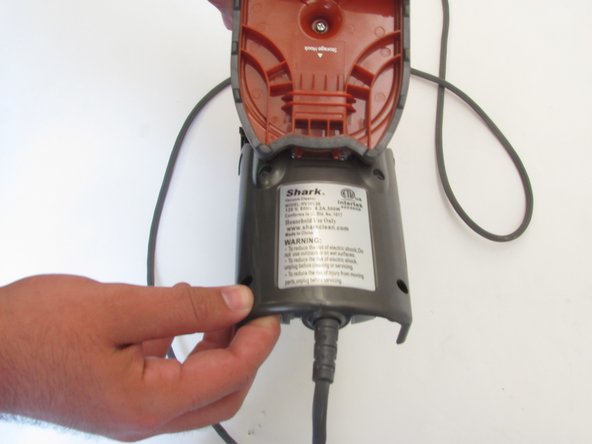
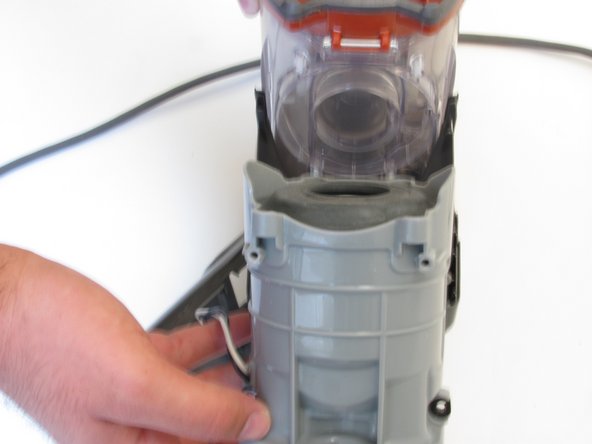
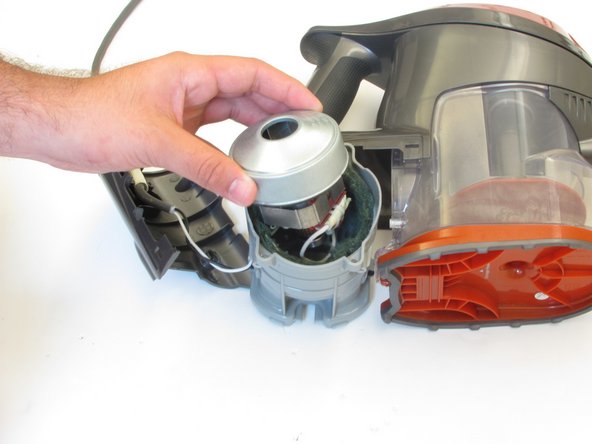
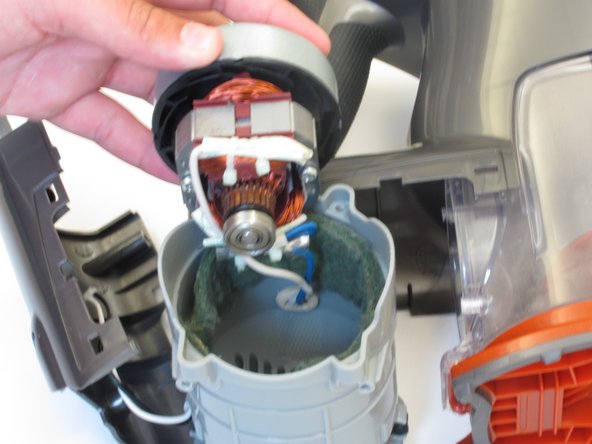
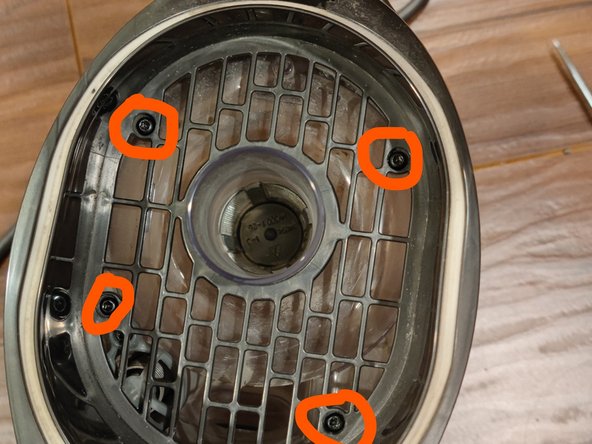
    • Pinch and pull away the engine filter to expose the inner chamber.

  2. Shark Rocket HV301 Fan Replacement: passo 2, immagine 1 di 2 Shark Rocket HV301 Fan Replacement: passo 2, immagine 2 di 2
    • Place the vacuum on the ground with the filter side away you.

    • Use a Phillips #2 screwdriver to remove the four screws on the gray panel.

  3. Shark Rocket HV301 Fan Replacement: passo 3, immagine 1 di 3 Shark Rocket HV301 Fan Replacement: passo 3, immagine 2 di 3 Shark Rocket HV301 Fan Replacement: passo 3, immagine 3 di 3
    • Place the vacuum on its side and locate the orange clips that say "Rocket" on each side of the vacuum.

    • Remove the orange clips on each side by pulling them off their hinges.

  4. Shark Rocket HV301 Fan Replacement: passo 4, immagine 1 di 3 Shark Rocket HV301 Fan Replacement: passo 4, immagine 2 di 3 Shark Rocket HV301 Fan Replacement: passo 4, immagine 3 di 3
    • Removing the gray panel reveals the wiring to the fan and motor, be careful not to pull to hard on the wires to break or disrupted them.

    • Remove the top half of the gray panel to reveal the light gray fan compartment.

  5. Shark Rocket HV301 Fan Replacement: passo 5, immagine 1 di 1
    • Locate two screws above the fan compartment and remove the screws with a Phillips #2 screwdriver.

  6. Shark Rocket HV301 Fan Replacement: passo 6, immagine 1 di 3 Shark Rocket HV301 Fan Replacement: passo 6, immagine 2 di 3 Shark Rocket HV301 Fan Replacement: passo 6, immagine 3 di 3
    • Remove the fan compartment by carefully pulling it away from the bottom half of the gray panel.

    • Do not pull out or remove any wires.

  7. Shark Rocket HV301 Fan Replacement: passo 7, immagine 1 di 3 Shark Rocket HV301 Fan Replacement: passo 7, immagine 2 di 3 Shark Rocket HV301 Fan Replacement: passo 7, immagine 3 di 3
    • Pull the fan out of the compartment by pulling gently on the metal ring.

  8. Shark Rocket HV301 Fan Replacement: passo 8, immagine 1 di 3 Shark Rocket HV301 Fan Replacement: passo 8, immagine 2 di 3 Shark Rocket HV301 Fan Replacement: passo 8, immagine 3 di 3
    • Locate the two long screws holding the fan together and remove the screws with a Phillips #2 screwdriver.

  9. Shark Rocket HV301 Fan Replacement: passo 9, immagine 1 di 2 Shark Rocket HV301 Fan Replacement: passo 9, immagine 2 di 2
    • Remove the rubber ring from the top of the fan compartment.

  10. Shark Rocket HV301 Fan Replacement: passo 10, immagine 1 di 2 Shark Rocket HV301 Fan Replacement: passo 10, immagine 2 di 2
    • Remove the fan from the plate once the screws are removed by pulling gently.

    • The fan can be removed from the motor by unscrewing the bolt using a socket wrench. The bolt is inside the fan.

  11. Shark Rocket HV301 Fan Replacement: passo 11, immagine 1 di 2 Shark Rocket HV301 Fan Replacement: passo 11, immagine 2 di 2
    • 4 screws(top 2 bottom 2) to hold the motor/fan assembly

    • In order to reach the bottom two, you need to remove 2 major parts: 1. switch and lid covers the filter; 2. dust container

  12. Shark Rocket HV301 Fan Replacement: passo 12, immagine 1 di 3 Shark Rocket HV301 Fan Replacement: passo 12, immagine 2 di 3 Shark Rocket HV301 Fan Replacement: passo 12, immagine 3 di 3
    • 5 screws to remove the switch and lid that covers the foam filter

  13. Shark Rocket HV301 Fan Replacement: passo 13, immagine 1 di 3 Shark Rocket HV301 Fan Replacement: passo 13, immagine 2 di 3 Shark Rocket HV301 Fan Replacement: passo 13, immagine 3 di 3
    • Dust container, 5 screws. One under a foam sticker, peel the sticker to reach the screw.

    • The last photo is a highlight of the one under the foam sticker.

  14. Shark Rocket HV301 Fan Replacement: passo 14, immagine 1 di 2 Shark Rocket HV301 Fan Replacement: passo 14, immagine 2 di 2
    • Additional images for the one screw under the switch.

Conclusione

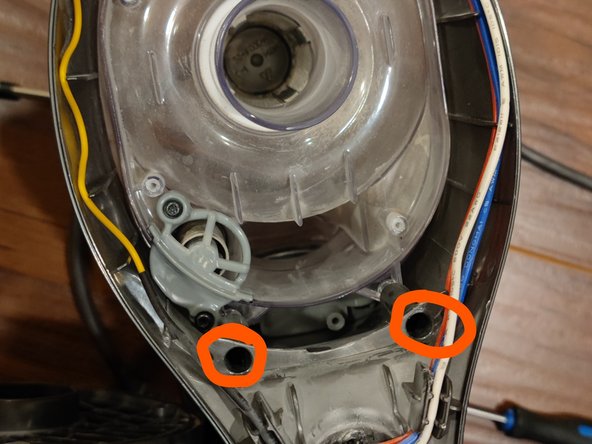
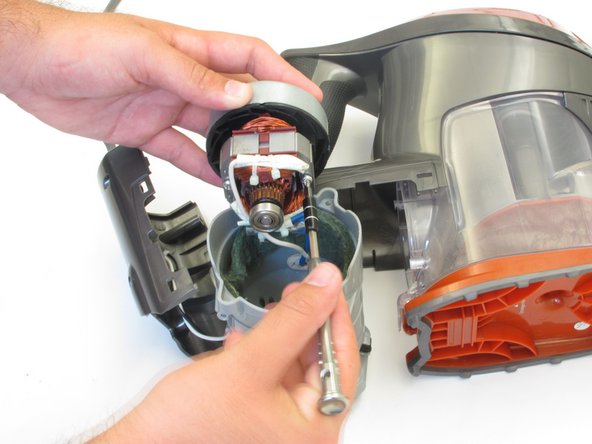
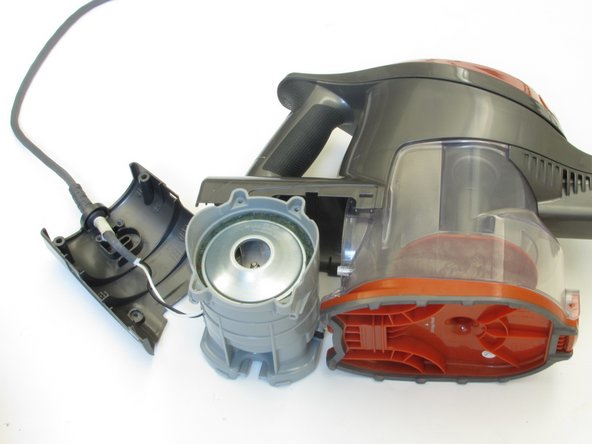
To reassemble your device, follow these instructions in reverse order.

Altre 6 persone hanno completato questa guida.

Christian

Membro da: 10/06/16

433 Reputazione

2 Guide realizzate

Team

Cal Poly, Team 10-5, Livingston Fall 2016 Membro di Cal Poly, Team 10-5, Livingston Fall 2016

CPSU-LIVINGSTON-F16S10G5

4 Membri

14 Guide realizzate

8 Commenti

I can’t get the fan compartment off of the vacuum. It looks like there are two hidden screws at the bottom of it when I look inside the vacuum. How do you get those additional screws off so I can remove the compartment?

Krissy Owens - Replica

I agree with the @Krissy Owens. I made it as far as Step 5, however, there is no way to remove the ‘fan compartment’ using the method described and illustrated above. I have given up for now until I have time to explore on my own.

Darcy Patterson - Replica

There are actually 4 screws on the fan compartment, as shown by the 4 screw holes on the compartment visible in the second photo of step 7. These two extra screws are located behind the handle, and require quite a bit more work. Remove the 4 screws underneath the top dust filter and cap, then remove the hidden screw under the power button by sliding the power button to on, and then removing the small clip underneath followed by the screw below. This will allow you to access the top of the dust cup, where there are 6 more screws to be removed before you can lift the handle. Finally once you can lift the handle, you can access the two remaining screws on the fan compartment.

Michael - Replica

Holy $@$*. So I just managed to get the fan out and yea basically follow the above comments and every screw you see. Remove it. I wish I could provide pics to show all of them but there literally every where and I’m pretty sure the only reason I managed to pull this off was because my bf has a kobalt tool kit that comes with everything. So don’t attempt this if you don’t have a variety of tools because I was having to use precision flatheads on some due to the screws not being shaped perfectly.

Kathleen John - Replica

I was intended to clean the motor contacts, this is the most relevant info I can find. However, as the first 2 posts mentioned, there is no way to open it only by following the info in the original doc.

I managed to open the motor by following what Michael said. The steps in the original doc is not even half way.

There are 4 screws in total to hold the motor/fan part. To reach the bottom 2, there are about 10 additional screws to remove, 2 of them are hidden, 1 under the switch(you need to pry off a cover piece), the other a foam sticker and need to peel that foam first. I took some photos but don’t know how can I post them.

Tool wise, they are not Philips, they are T10 and T15, and with a center hole in them, plus, there are certain screws(2) are deep in holes and you have to have a thin extension stick to reach. == > Don’t bother if you don’t have them.

I was trying to fix the motor that sparks too much, however can get rotor part out of the housing, the fix wasn’t a success. Anyways,

Ying Chen - Replica

Aggiungi Commento

Visualizza Statistiche:

Ultime 24 Ore: 3

Ultimi 7 Giorni: 15

Ultimi 30 Giorni: 62

Tutti i Tempi: 8,644