Salta al contenuto principale

Shark Matrix RV2310 Brushroll Replacement

Cosa ti serve

  1. Shark Matrix RV2310 Brushroll Replacement, Battery: passo 1, immagine 1 di 3 Shark Matrix RV2310 Brushroll Replacement, Battery: passo 1, immagine 2 di 3 Shark Matrix RV2310 Brushroll Replacement, Battery: passo 1, immagine 3 di 3
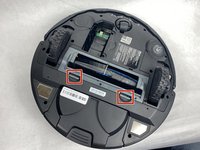
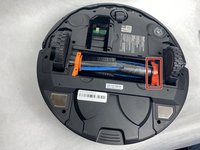
    • Remove the two 11 mm Phillips screws holding the battery plate in place.

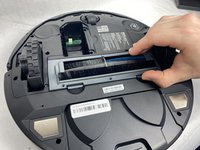
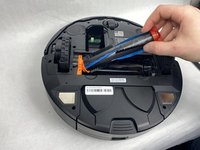
    • Remove the battery plate.

  2. Shark Matrix RV2310 Brushroll Replacement: passo 2, immagine 1 di 3 Shark Matrix RV2310 Brushroll Replacement: passo 2, immagine 2 di 3 Shark Matrix RV2310 Brushroll Replacement: passo 2, immagine 3 di 3
    • Remove the battery from the compartment.

    • Disconnect the electrical cable connection from the battery to the robot.

  3. Shark Matrix RV2310 Brushroll Replacement, Brushroll: passo 3, immagine 1 di 2 Shark Matrix RV2310 Brushroll Replacement, Brushroll: passo 3, immagine 2 di 2
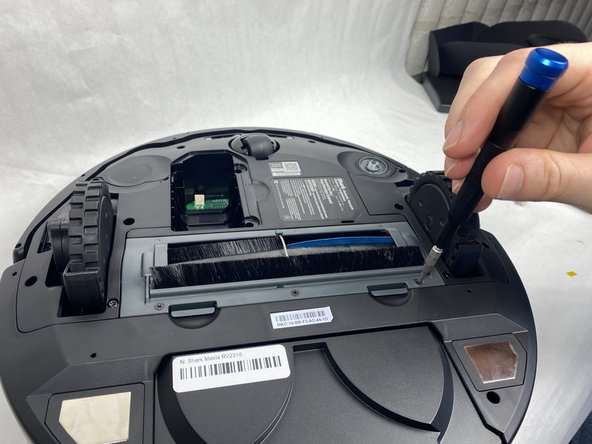
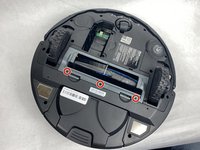
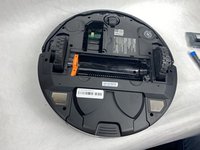
    • Remove the three 8 mm Phillips screws from the plastic plate holding the brushroll in.

    • Make sure the device's battery has been fully removed from the device before proceeding. Failure to do so could potentially result in minor/moderate injuries.

  4. Shark Matrix RV2310 Brushroll Replacement: passo 4, immagine 1 di 3 Shark Matrix RV2310 Brushroll Replacement: passo 4, immagine 2 di 3 Shark Matrix RV2310 Brushroll Replacement: passo 4, immagine 3 di 3
    • Press in the two tabs on the side of the plate and pull upward to remove it.

  5. Shark Matrix RV2310 Brushroll Replacement: passo 5, immagine 1 di 3 Shark Matrix RV2310 Brushroll Replacement: passo 5, immagine 2 di 3 Shark Matrix RV2310 Brushroll Replacement: passo 5, immagine 3 di 3
    • Pull up on the darker orange side of the brushroll to remove it.

Conclusione

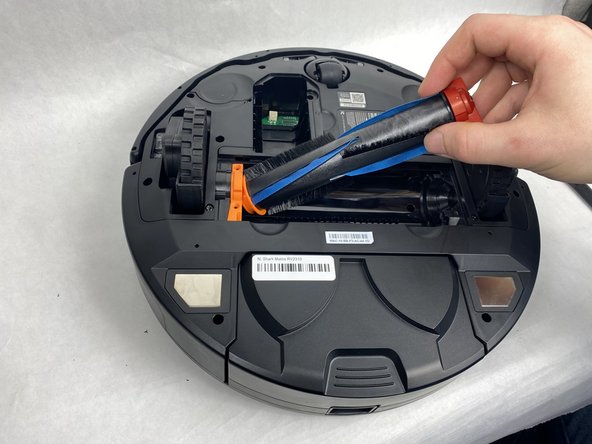
To reassemble your device, follow these instructions in reverse order.

Team

0Commenti sulla guida

Aggiungi Commento

Visualizza Statistiche:

Ultime 24 Ore: 0

Ultimi 7 Giorni: 1

Ultimi 30 Giorni: 21

Tutti i Tempi: 287