Introduzione
Se la cinghia di trasmissione è uscita dalla guida o è incastrata, segui questa guida per sostituirla. Ti serviranno dei cacciaviti Torx T10 e T20.
Cosa ti serve
-
-
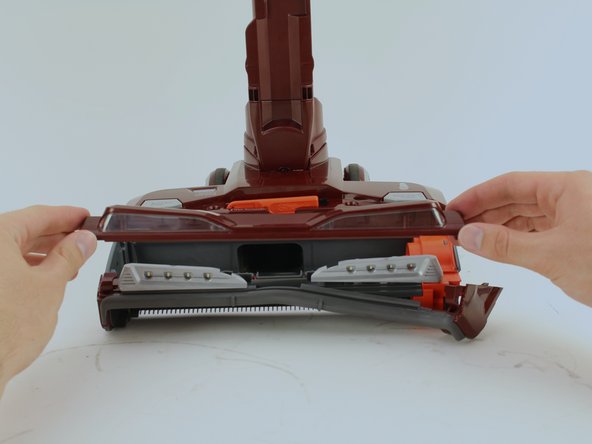
Premi insieme i due tasti per l'accesso alle spazzole rotanti per sganciare la copertura.
-
Tira via la copertura dall'aspirapolvere sollevandola.
-
-
-
Tira l'aletta verso l'alto per rimuovere la spazzola rotante più grande.
-
-
-
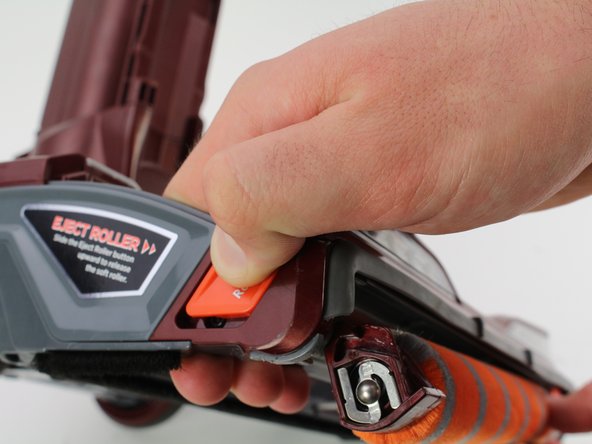
Premi il tasto di eiezione della spazzola per sganciare la spazzola più piccola.
-
Tira via la spazzola dall'aspirapolvere per rimuoverla.
I can’t find any pull tab to pull out big rollet
Hola nesecito comprar toda esta parte
hello… no tab to pull, this is not right, my belt broke and cant figure it out.. how do i change belt?
-
-
-
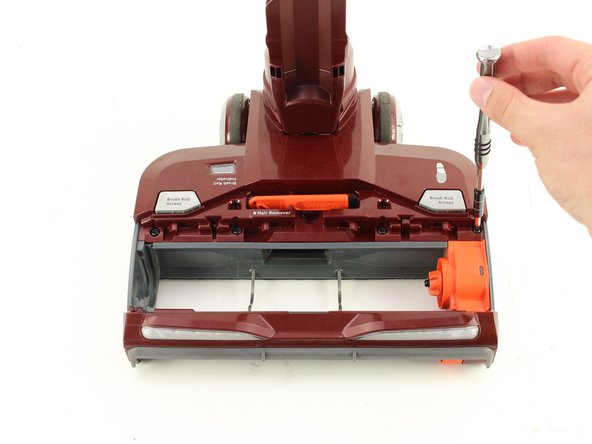
Usa il cacciavite Torx T20 per svitare le quattro viti da 17 mm.
-
-
-
-
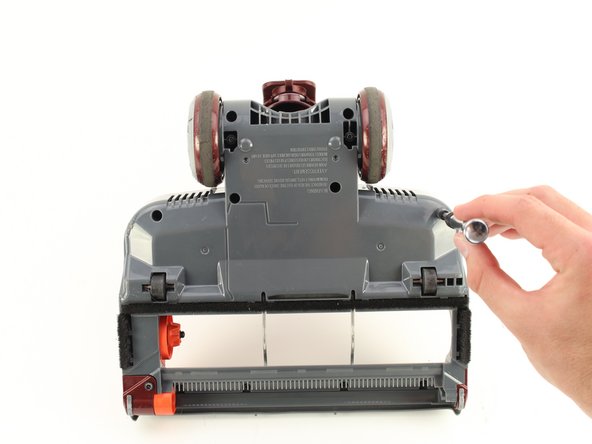
Usa il cacciavite Torx T20 per svitare le sei viti da 19 mm.
-
Usa il cacciavite Torx T20 per svitare la vite da 12 mm.
-
Usa il cacciavite Torx T20 per svitare le quattro viti da 14 mm.
The 12mm screw on my model has a Torx Security head. Thanks for that, Shark. Never again
-
-
-
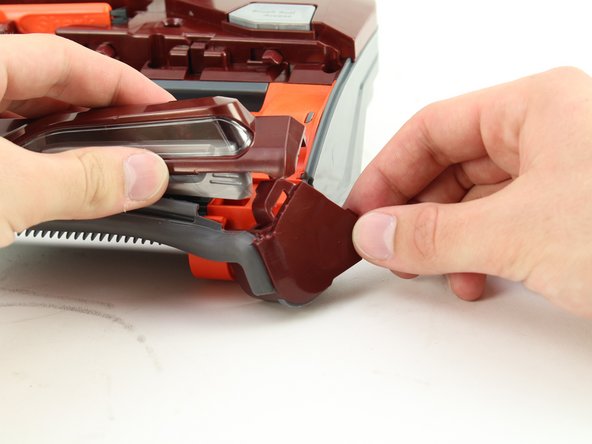
Usa lo spudger per sganciare il compartimento arancione della cinghia di trasmissione dall'aspirapolvere.
-
Rimuovi il compartimento arancione dall'aspirapolvere tirandolo verso l'alto.
-
-
-
Tira la cinghia di trasmissione più piccola verso l'esterno per rimuoverla.
-
Tira la cinghia di trasmissione più grande verso l'esterno per rimuoverla.
You need to make a correction…the T20 that you specify to use is incorrect. I just bought a Husky T30, T25, T20, T15 and T10 Torx Screwdriver Set and where you indicate to use a T20, it's actually a T15. Not only is this an issue, another issue is that the screws on this vacuum has a raised dot in the center of it, or however you would call it which creates a problem to even seat the screwdriver in properly to turn. If you have another suggestion or different screwdrivers to use, I'm open to suggestions.
This is ridiculous! Why do you have to dissect a vacuum to change a simple belt? Also, why is every vacuum made have a belt in a store but this one you have to order. I love my Shark Duo but this is
I agree with the comments about the misinformation about the T20 it is the T15 screwdriver and there is a tiny pip in the bottom of the screw hole. I had to get a set of screwdrivers which had the hole allowing the driver to fit correctly in the screwhole. My problem is how to replace a broken belt in my Shark duoclean flexology HV390UK model, I’ve checked the how to utube site but there’s no mention of this model. Frustrating or what
You could disassemble a space craft in less time. Unbelievably frustrating that they would use screws with a nipple in the center, that would prevent the driver from fully sitting in the head. T15 as stated in the above comments, not a T20. Just an absolute nightmare to work with. Managed to get all but two screws out, (cracked the plastic) and oddly enough, this unit is equally as difficult to put back together. Still not sure of the issue. Belts are fine, but brush still won't spin. Great vacuum, but now I have PTSD from trying to fix it. Thanks
I have the nv803 model and Shark claims this vacuum has lifetime belts that NEVER need changing so they've made it nearly impossible to do so by using the torx security screws and not making the belts widely available. The nv800 series is so powerful it will suck a lightweight rug right up. In my case it ended up cracking the wheel that spins the brushroll. I haven't disassembled it yet but I know that wheel has the plastic brushroll gear on the other side so maybe it has broken some of the teeth off of the gear in addition to cracking the wheel on my unit. Anyway, when any amount of pressure is put on the brushroll it stops spinning. From what I've found in researching this, Shark has solved the problem with the newer duoclean models by putting in an automatic stop sensor. If anything gets lodged in the brushrolls, it shuts down the roller gears until you clear the brushroll & softroll. I'm also finding it impossible to get a new or used gear to repair my unit or a whole nozzle to replace it.
"Could disassemble a space craft in less time!". Love it. Disassembly was frustrating for me too. It's easer with a set of security bits, you need a T15 and I think a T10 security bits. The deep holes on the bottom of the unit make it difficult to use bits with a multi-bit screw driver because the head of the multi-bit screw driver is too fat to fit down the holes. I put some tissue in the hole of my multi-bit screw driver, then put in the bit, this tiny difference allowed the bit to reach the bottom of the shallower holes. For the deeper holes, I used a T15 screw driver (not security, didn't have one) and cursed while trying to get the screw out. My Brushroll drive belt gear wheel (the red one in the last picture) broke (the white spinning thing disconnected from the red body). $90 on eBay, whereas a replacement for the whole bottom is $70.
-


Per rimontare il dispositivo, segui le istruzioni in ordine inverso.
Per rimontare il dispositivo, segui le istruzioni in ordine inverso.
Annulla: non ho completato questa guida.
Altre 15 persone hanno completato questa guida.
Un ringraziamento speciale a questi traduttori:
100%
Daniele Carminati ci sta aiutando ad aggiustare il mondo! Vuoi partecipare?
Inizia a tradurre ›
Team

Cal Poly, Team S17-G4, White Fall 2018 Membro di Cal Poly, Team S17-G4, White Fall 2018
CPSU-WHITE-F18S17G4
4 Membri
16 Guide realizzate
38 Commenti
What a pain in the ***! The star bit wouldn't fit on one of the screws and had to use a small reg. screwdriver to get it out. This is a very poor design. I've only used the sweeper a few times too. Hope the belts don't come off or break often because if they do it's going in the dumpster and never buying another one. Do not recommend this sweeper!!! Very disappointed.
What size belt I need for this vacuum
Very bad design will stick to our dyson will not recommend it go any one
It’s really not bad. This vacuum has out performed and lived many Dysons. I’ll never go back! They are half the price and accept coupons too
This product is the biggest load of $@$* i have ever bought, stayclear of it
Thanks for the help! You did a great job. However, Shark's design for a normally consumer-replaceable part is insane. 1.5 hrs only to find the belts are fine and will have to go to a shop. I will take it in disassembled and save that much on labor. Crazy.
I agree with all the negatives above I have a vacuum I bought in May 2018 which does not work as the drive belt doesn’t work, they do not have any service place to attend if like me a full time carer of an 87 year old husband the service on the phone spoke too fast with an American accent I had to ask him to repeat, I found myself taking the vacuum to pieces for analysis whilst on the phone they have nowhere to take it if you cannot go to such lengths.
200.00 a complete waste of money, if you can’t d I y with special tools don’t buy one no satisfaction given whatsoever yes back to dyson at least I can get it serviced
Where do I get belts for this. Mine is NV771Q?
Excellent instruction and pictures. It is real pain to take apart, but we paid a lot $ and it works great on our floors.
I have the shark apex with duoclean and zeroM the next month the belt broke off, very dissapointed, im switching to dyson.
Mine too. I regret buying this vaccum
Shari -
Helpful instructions only to find the belts are fine, so now what can it be? The motor???
I love how you try and teach people how to fit their shark duo clean hv380 but you don't let us know where to buy the belts? And no Shark doesn't sell them on their overpriced joke of a website!
A simple google search showed me many places to get belt. One of the first was the shark website. You just have scrolled past.
I fixed mine and I’m a chick. Did you even try ?
Excellent instructions, thanks! I got it apart and back together fine. Shark seems to go out of the way to make it difficult for a consumer to repair their product. Mine had security-type Torx with the post in the middle of the screw; requiring special drivers with a matching hole. Why wouldn’t they just use phillips heads?
Are the belts for DuoClean models interchangable?
I have a UV810 and I am unable to find a belt for that specific model.
Thanks.
Where can I buy the belts for this vacuum?
Try Walmart??
What are the specs/ part numbers for the belts please nv801ukt model
Brilliant instructions helped me get the shark up n running again today. I found the large drive belt replacement Vega EPH205 for £18 on ebay. Expensive but cheaper than £70 to replace the full head nozzle unit.
Best vacuum I've ever had hands down. If it broke today I would buy another one just like it. I've had it a couple years and have not had to change the belt yet but if I had to do it standing on my head I would say it was still worth it. I love this vacuum.
Mine needs the actual speed drive as the bearing has seized, can’t get a replacement anywhere. absolute rubbish
Brushes stopped turning. Granddaughter kept using the vacuum not realizing what had happened. Melted the white larger wheel in brush drive unit. Bearings have seized. Now I have to find a drive unit or a whole nozzle head assembly. Any suggestions?
This is a very easily understood guide. I was flummoxed by the pip in the torx screws, SHARK do not make home repairs easy. however, I sourced a set of torx drivers with a hollow head that will accommodate the stupid pip on Amazon UK… Mesee Torx driver set £6.99.
I stupidly ran the Shark duo liftaway over a shoulder bag strap which has jammed the drive. I will post again if I manage to effect a repair. It will be back to Dyson next for next cleaner.
Great guide. Had it apart and back together in 30 minutes. The belts were fine but the act of taking it apart must have fixed the problem 'cause it's running again. Who knows?.
You forgot to document a screw ( T-10). It is under the red plastic corner cap (step 6). It secures the the front of the belt compartment to the body of the sweeper head. The empty hole for it is visible in the lower center portion of the first photo in step 9. You'll have a hard time releasing the belt compartment with that still in place, lol.
This is a great guide to getting it apart - I thought my belts were broke, only to find out it must be the brush motor that has failed. Wish I knew where to get one.
Excellent instructions. Years ago we decided to go to Taiwan to outsource bench top woodworking machines. We ordered one half of container of machines and the other half parts. Our company's reputation was built on the availability of replacement parts. The Taiwanese manufacturers thought we were crazy. They advocated the Dempster warranty, as in Dempster Dumpster. No fix; Throw away; Negotiate scrap discount on total price. Chinese manufacturers no better. If you lie down with dogs, you will get fleas.
Norm Carrick, Virginia Beach, VA
Had to track down the tamper resistant torx bits at lowe’s but they are too short for the deep access holes on the vacuum. Made it work; finally was able to tear it down. However, the belts are ok. The power head still doesn’t run. What else could be the problem?
I bought the tamper resistant Torx bits and finally managed to disassemble the power head only to realize the belts were okay. The vacuum suction is also okay, but the brushes do not run and the “Brush Roll Indicator” light does not come on. What could be the problem? Could it be the circuit board or any of the switches or the motor?
Other guides suggest a micoswitch goes bad. This switch turns off the rollers when the handle is upright.
Steve B -
Where can I buy belt drive replacement assembly,,
Mike Abdoo - Replica