Questa versione può contenere modifiche errate. Passa all'ultima istantanea verificata.
Cosa ti serve
-
Questo passaggio è privo di traduzione. Aiuta a tradurlo
-
Remove the battery compartment cover.
-
Remove the battery.
-
-
Questo passaggio è privo di traduzione. Aiuta a tradurlo
-
Locate and remove the screw next to the battery compartment lid.
-
-
Questo passaggio è privo di traduzione. Aiuta a tradurlo
-
Locate the interlocking pegs along the seam of the device's casings.
-
Gently pry the pegs apart one at a time, working your way around the case.
-
-
Questo passaggio è privo di traduzione. Aiuta a tradurlo
-
The battery contact springs may prevent the case from separating.
-
Push the battery contact springs down through the hole in the case.
-
-
Questo passaggio è privo di traduzione. Aiuta a tradurlo
-
The casing protecting the USB and headphone jacks must be removed.
-
Locate and gently pry apart the two interlocking clips holding it in place.
-
The outer casings may now be removed and the MP3 player should separate.
-
-
-
Questo passaggio è privo di traduzione. Aiuta a tradurlo
-
You now have access to all components found on the inside of the device!
-
-
Questo passaggio è privo di traduzione. Aiuta a tradurlo
-
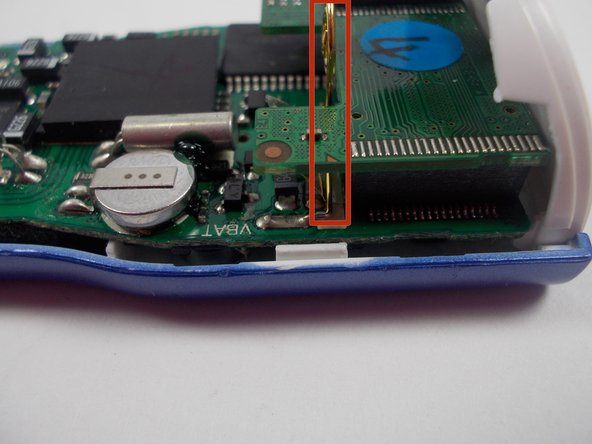
Locate both battery spring contacts, if necessary, on the motherboard.
-
-
Questo passaggio è privo di traduzione. Aiuta a tradurlo
-
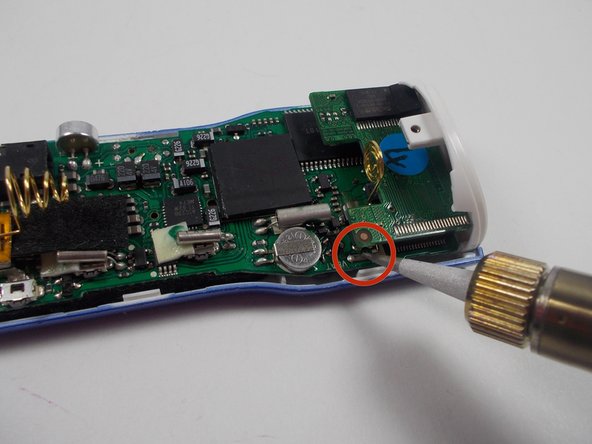
Apply heated soldering iron to points where the contacts are soldered to the motherboard.
-
-
Questo passaggio è privo di traduzione. Aiuta a tradurlo
-
Be sure to always elevate the hot end of the soldering iron on a metal stand to prevent incidental burns.
-
-
Questo passaggio è privo di traduzione. Aiuta a tradurlo
-
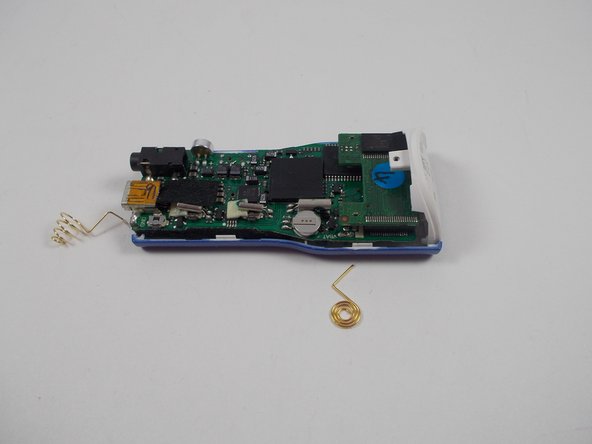
With solder melted, remove battery spring contacts from the motherboard.
-
-
Questo passaggio è privo di traduzione. Aiuta a tradurlo
-
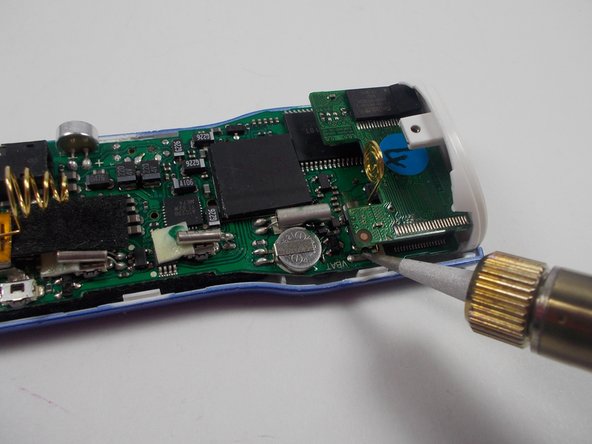
With the new battery spring contacts in place, use the soldering iron to apply new solder to the connection points.
-
Be sure to allow the new solder to cool and harden.
-


