Questa versione può contenere modifiche errate. Passa all'ultima istantanea verificata.
Cosa ti serve
-
Questo passaggio è privo di traduzione. Aiuta a tradurlo
-
Remove the battery compartment cover.
-
Remove the battery.
-
-
Questo passaggio è privo di traduzione. Aiuta a tradurlo
-
Locate and remove the screw next to the battery compartment lid.
-
-
Questo passaggio è privo di traduzione. Aiuta a tradurlo
-
Locate the interlocking pegs along the seam of the device's casings.
-
Gently pry the pegs apart one at a time, working your way around the case.
-
-
Questo passaggio è privo di traduzione. Aiuta a tradurlo
-
The battery contact springs may prevent the case from separating.
-
Push the battery contact springs down through the hole in the case.
-
-
-
Questo passaggio è privo di traduzione. Aiuta a tradurlo
-
The casing protecting the USB and headphone jacks must be removed.
-
Locate and gently pry apart the two interlocking clips holding it in place.
-
The outer casings may now be removed and the MP3 player should separate.
-
-
Questo passaggio è privo di traduzione. Aiuta a tradurlo
-
You now have access to all components found on the inside of the device!
-
-
Questo passaggio è privo di traduzione. Aiuta a tradurlo
-
Locate the headphone jack on the motherboard.
-
-
Questo passaggio è privo di traduzione. Aiuta a tradurlo
-
Ensure the hot end of the soldering iron is elevated on a metal stand when not in use to prevent burns.
-
-
Questo passaggio è privo di traduzione. Aiuta a tradurlo
-
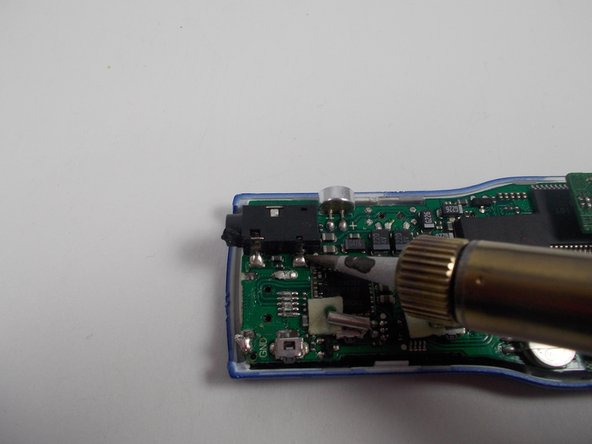
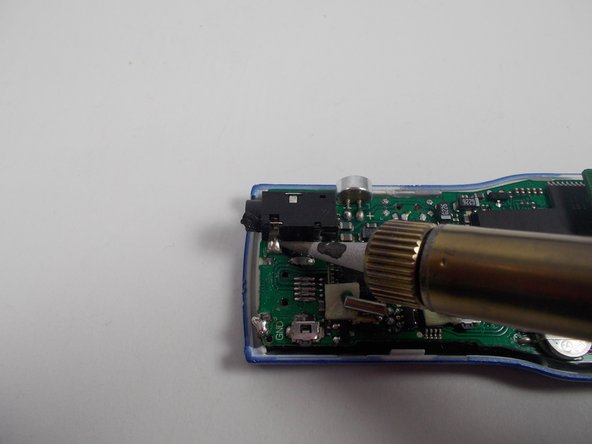
Use soldering iron to melt the existing solder at the three headphone jack connections.
-
-
Questo passaggio è privo di traduzione. Aiuta a tradurlo
-
Remove the faulty headphone jack from the motherboard.
-
-
Questo passaggio è privo di traduzione. Aiuta a tradurlo
-
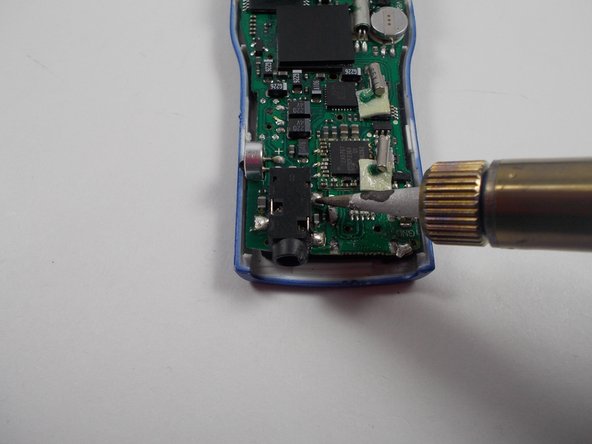
Align the new headphone jack appropriately on the motherboard for soldering.
-
-
Questo passaggio è privo di traduzione. Aiuta a tradurlo
-
Use the soldering iron and solder to create three stable connections between the motherboard and the headphone jack.
-
Allow the new solder to cool and harden before reassembling the MP3 player.
-


Team

UMass Dartmouth, Team 1-8, Shastany Fall 2013 Membro di UMass Dartmouth, Team 1-8, Shastany Fall 2013
UMASSD-SHASTANY-F13S1G8
3 Membri
6 Guide realizzate