Salta al contenuto principale

Samsung UBD-KM85C Motherboard Replacement

Cosa ti serve

  1. Samsung UBD-KM85C Motherboard Replacement, Outer Shell: passo 1, immagine 1 di 1
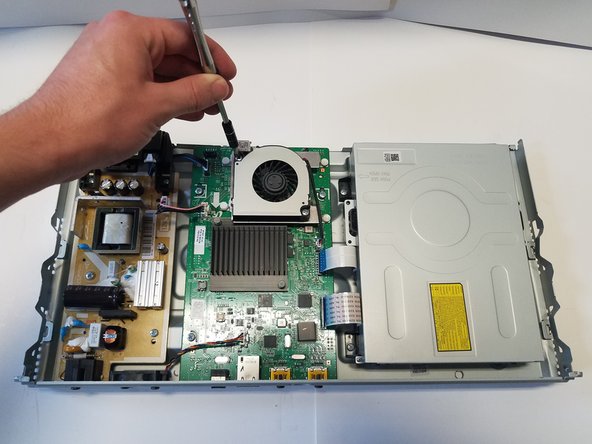
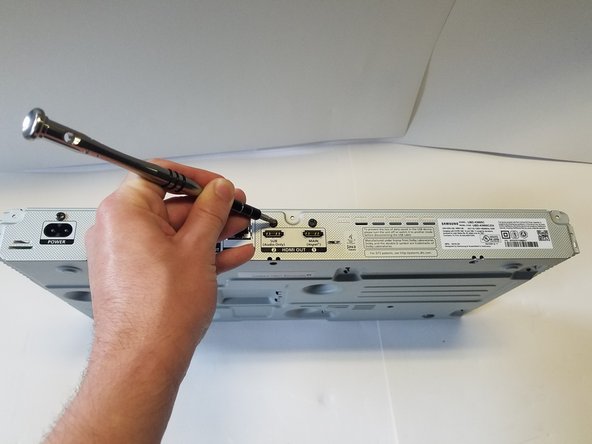
    • On the back side of the unit, remove the three 8.1mm screws marked with a Phillips #1 screwdriver.

  2. Samsung UBD-KM85C Motherboard Replacement: passo 2, immagine 1 di 2 Samsung UBD-KM85C Motherboard Replacement: passo 2, immagine 2 di 2
    • From the back, lift the case upwards away from the unit then forwards, releasing the prongs on the front.

  3. Samsung UBD-KM85C Motherboard Replacement: passo 3, immagine 1 di 3 Samsung UBD-KM85C Motherboard Replacement: passo 3, immagine 2 di 3 Samsung UBD-KM85C Motherboard Replacement: passo 3, immagine 3 di 3
    • There is one group of wires located towards the front of the case and attached directly to the motherboard and the case. Using two fingers in a pinching motion, release the wire from the clip and disconnect it.

  4. Samsung UBD-KM85C Motherboard Replacement: passo 4, immagine 1 di 1
    • Remove the cover from the device.

  5. Samsung UBD-KM85C Motherboard Replacement, Fan A: passo 5, immagine 1 di 1
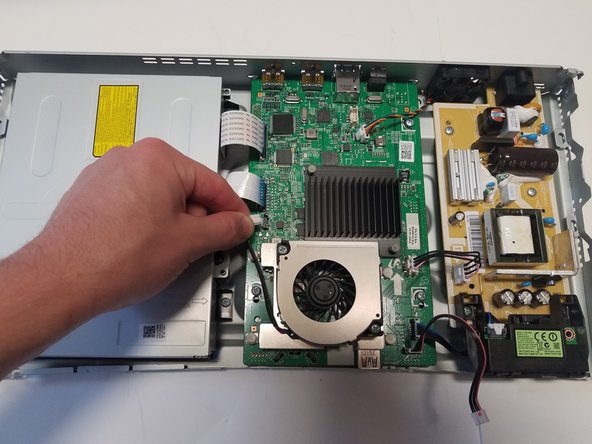
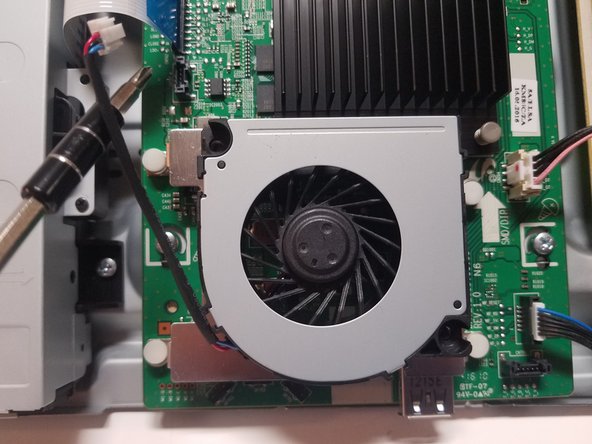
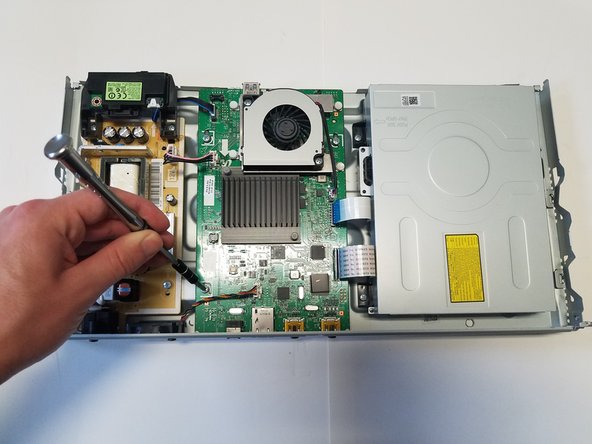
    • Fan A is located on top of the motherboard and is screwed into a stand by two 6.5mm screws. The stand is also connected to the motherboard.

  6. Samsung UBD-KM85C Motherboard Replacement: passo 6, immagine 1 di 2 Samsung UBD-KM85C Motherboard Replacement: passo 6, immagine 2 di 2
    • The two 6.5mm screws holding the fan in place on opposing corners must be removed with a #1 Phillips head screwdriver to change the fan.

  7. Samsung UBD-KM85C Motherboard Replacement: passo 7, immagine 1 di 3 Samsung UBD-KM85C Motherboard Replacement: passo 7, immagine 2 di 3 Samsung UBD-KM85C Motherboard Replacement: passo 7, immagine 3 di 3
    • There is one wire connecting the fan to the motherboard that must be unplugged in order to release it. To unplug, use your fingers to pinch the white clip at the end and gently pull upwards to release.

  8. Samsung UBD-KM85C Motherboard Replacement: passo 8, immagine 1 di 1
    • The fan can now be lifted from the stand.

  9. Samsung UBD-KM85C Motherboard Replacement, Motherboard: passo 9, immagine 1 di 1
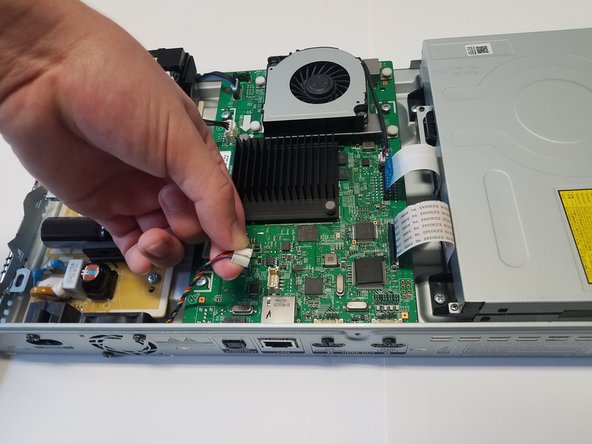
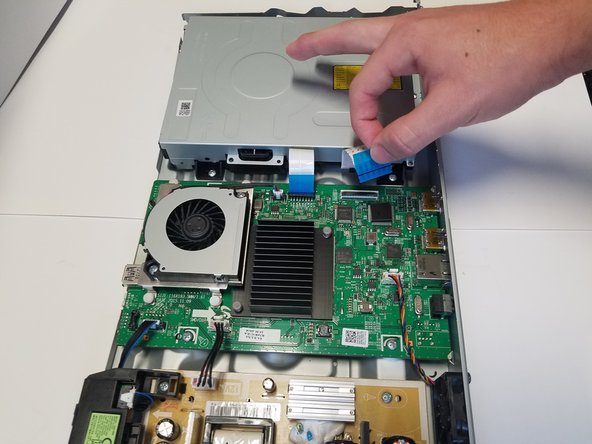
    • The motherboard is in the middle of the device and has all wires and connections of the device components running to it. The fan identified as fan A is located on top of it and must be removed first.

  10. Samsung UBD-KM85C Motherboard Replacement: passo 10, immagine 1 di 3 Samsung UBD-KM85C Motherboard Replacement: passo 10, immagine 2 di 3 Samsung UBD-KM85C Motherboard Replacement: passo 10, immagine 3 di 3
    • Once the fan is removed, the wires should be disconnected from the motherboard, as shown.

  11. Samsung UBD-KM85C Motherboard Replacement: passo 11, immagine 1 di 2 Samsung UBD-KM85C Motherboard Replacement: passo 11, immagine 2 di 2
    • Two outer 8.1mm screws located above the HDMI ports hold the motherboard in place and must be removed. Remove these with a #1 Phillips head screwdriver.

  12. Samsung UBD-KM85C Motherboard Replacement: passo 12, immagine 1 di 2 Samsung UBD-KM85C Motherboard Replacement: passo 12, immagine 2 di 2
    • Three inner 6.5mm Phillips #1 screws hold the motherboard to the base of the frame, and must be unscrewed next.

  13. Samsung UBD-KM85C Motherboard Replacement: passo 13, immagine 1 di 1
    • After the final screw is removed, the motherboard can be easily lifted out of the case without disturbing any of the other device components.

Conclusione

To reassemble your device, follow these instructions in reverse order.

Un'altra persona ha completato questa guida.

James Edwards

Membro da: 02/01/18

627 Reputazione

5 Guide realizzate

Team

Baylor, Team S2-G1, Johnson Spring 2018 Membro di Baylor, Team S2-G1, Johnson Spring 2018

BU-JOHNSON-S18S2G1

3 Membri

6 Guide realizzate

0 Commenti

Aggiungi Commento

Visualizza Statistiche:

Ultime 24 Ore: 0

Ultimi 7 Giorni: 3

Ultimi 30 Giorni: 6

Tutti i Tempi: 301