Salta al contenuto principale
Unisciti alla Community delle riparazioni - Crea un account

Samsung SGH-A137 Keypad Replacement

Cosa ti serve

  1. Samsung SGH-A137 Keypad Replacement, Battery: passo 1, immagine 1 di 1
    • Use your thumbs to pull down on the back cover to remove it and expose the battery.

  2. Samsung SGH-A137 Keypad Replacement: passo 2, immagine 1 di 1
    • Locate the indent in the case below the battery. (see red square)

    • Place your finger at the indent and pull up on the battery to remove it.

  3. Samsung SGH-A137 Keypad Replacement, Motherboard: passo 3, immagine 1 di 3 Samsung SGH-A137 Keypad Replacement, Motherboard: passo 3, immagine 2 di 3 Samsung SGH-A137 Keypad Replacement, Motherboard: passo 3, immagine 3 di 3
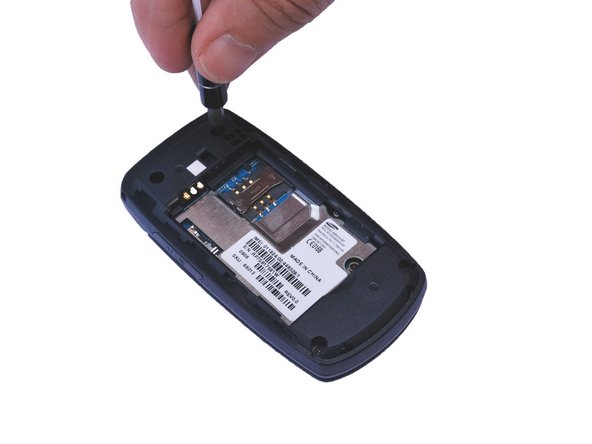
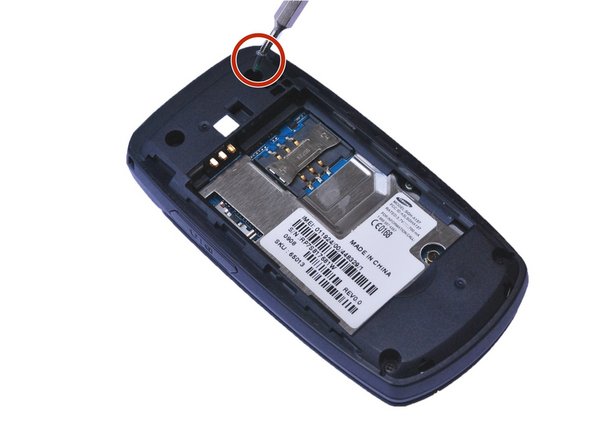
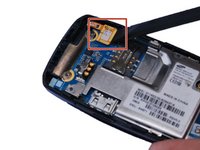
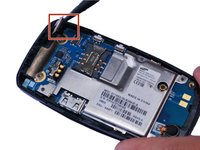
    • Locate the 4 screw holes and remove the 0.4 mm Phillips head screws using a #000 Phillips head screwdriver. (See red circles)

  4. Samsung SGH-A137 Keypad Replacement: passo 4, immagine 1 di 1
    • Using a plastic opening tool, gently pry open the back of the phone at the seam.

    • Carefully work the tool all the way around the opening while prying up to avoid breaking the plastic retaining clips.

  5. Samsung SGH-A137 Keypad Replacement: passo 5, immagine 1 di 2 Samsung SGH-A137 Keypad Replacement: passo 5, immagine 2 di 2
    • Smaller press-fit connectors may require a simple flick with a plastic opening tool or spudger.

    • Place the flat edge of a spudger under the edge of the press-fit connector and , gently pry the connector straight up from its socket. (Highlighted by the red square)

  6. Samsung SGH-A137 Keypad Replacement: passo 6, immagine 1 di 1
    • Using a plastic opening tool, gently pry up the motherboard.

    • You might need to pry from several different locations to get the motherboard loose enough to remove.

  7. Samsung SGH-A137 Keypad Replacement, Keypad: passo 7, immagine 1 di 1
    • Gently push the keypad out toward the back.

  8. Samsung SGH-A137 Keypad Replacement: passo 8, immagine 1 di 1
    • Replace the defective keypad and reassemble the phone.

Conclusione

To reassemble your device, follow these instructions in reverse order.

Un'altra persona ha completato questa guida.

0Commenti sulla guida

Aggiungi Commento

Visualizza Statistiche:

Ultime 24 Ore: 0

Ultimi 7 Giorni: 3

Ultimi 30 Giorni: 46

Tutti i Tempi: 571