Questa versione può contenere modifiche errate. Passa all'ultima istantanea verificata.
Cosa ti serve
-
Questo passaggio è privo di traduzione. Aiuta a tradurlo
-
Flip the device so that the bottom of the device is facing you. Remove these feet with a pair of tweezers.
-
Remove the four 10mm long screws with the Phillips #1 screwdriver.
-
-
-
Questo passaggio è privo di traduzione. Aiuta a tradurlo
-
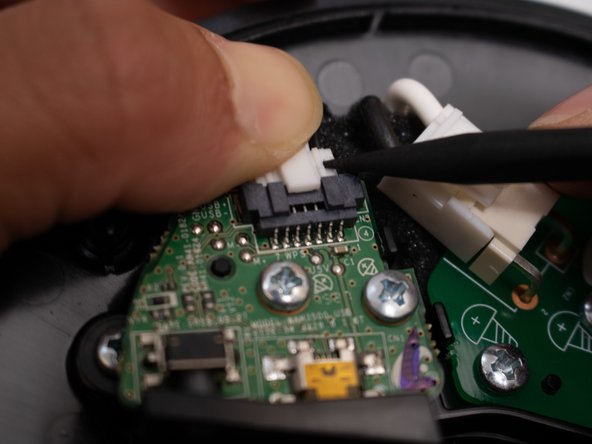
Remove the connector from the board by pressing down on the center tab while nudging the connector away with a spudger.
-
-
Questo passaggio è privo di traduzione. Aiuta a tradurlo
-
Remove the two 10mm long screws from the board utilizing the Phillips #1 screwdriver.
-
-
Questo passaggio è privo di traduzione. Aiuta a tradurlo
-
Use a spudger to press the plastic tab away from the board until the board pops up.
-
Remove the board with the USB module from the device.
-
Annulla: non ho completato questa guida.
Un'altra persona ha completato questa guida.


