Salta al contenuto principale

Samsung NX500 Screen Side Encasement Replacement

Cosa ti serve

  1. Samsung NX500 Screen Side Encasement Replacement, Battery: passo 1, immagine 1 di 2 Samsung NX500 Screen Side Encasement Replacement, Battery: passo 1, immagine 2 di 2
    • Pull the switch on the bottom of the camera back with your thumb.

  2. Samsung NX500 Screen Side Encasement Replacement: passo 2, immagine 1 di 2 Samsung NX500 Screen Side Encasement Replacement: passo 2, immagine 2 di 2
    • Push second switch(blue) forward with your thumb.

  3. Samsung NX500 Screen Side Encasement Replacement: passo 3, immagine 1 di 1
    • Pull out battery.

  4. Samsung NX500 Screen Side Encasement Replacement, Screen Side Encasement: passo 4, immagine 1 di 3 Samsung NX500 Screen Side Encasement Replacement, Screen Side Encasement: passo 4, immagine 2 di 3 Samsung NX500 Screen Side Encasement Replacement, Screen Side Encasement: passo 4, immagine 3 di 3
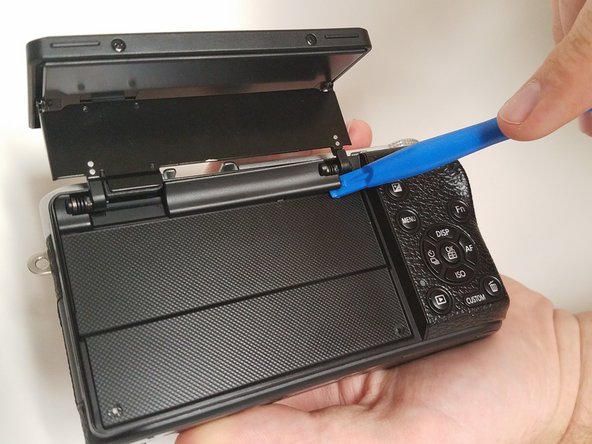
    • Open the screen exposing the hinge cover and place the plastic opening tool inside.

    • Pry the hinge cover up by moving the plastic opening tool in a downward motion.

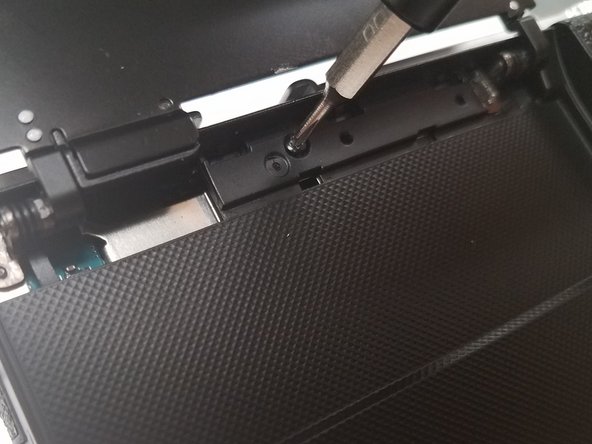
    • Remove the black 4mm Phillips #000 screw that is revealed once the hinge cover is removed.

  5. Samsung NX500 Screen Side Encasement Replacement: passo 5, immagine 1 di 3 Samsung NX500 Screen Side Encasement Replacement: passo 5, immagine 2 di 3 Samsung NX500 Screen Side Encasement Replacement: passo 5, immagine 3 di 3
    • Unscrew the two 4 mm Phillips #000 screws on the right hand side of the camera using the screwdriver.

    • Unscrew five more 4 mm Phillips #000 screws that are located at the bottom of the camera with the screwdriver.

    • In the second step, do not the remove the two 4 mm Phillips #000 screen on the screen.

    • Remove the last exterior 4 mm Phillips #000 screws on the left hand side of the camera with the scredriver.

  6. Samsung NX500 Screen Side Encasement Replacement: passo 6, immagine 1 di 2 Samsung NX500 Screen Side Encasement Replacement: passo 6, immagine 2 di 2
    • Use the plastic opening tool in a downward motion around each side of the camera to pry the casing open.

    • The casing should be removed easily; you shouldn't have to use much force.

  7. Samsung NX500 Screen Side Encasement Replacement: passo 7, immagine 1 di 2 Samsung NX500 Screen Side Encasement Replacement: passo 7, immagine 2 di 2
    • Locate the black ribbon at the bottom left of the camera's interior.

    • Place the plastic opening tool under the black ribbon connector.

    • Remove the cable by moving your plastic opening tool in a downward motion.

    • There is zero to little force needed to remove this ribbon.

Conclusione

To reassemble your device, follow these instructions in reverse order.

Team

USF Tampa, Team 18-5, Blackwell Fall 2016 Membro di USF Tampa, Team 18-5, Blackwell Fall 2016

USFT-BLACKWELL-F16S18G5

3 Membri

12 Guide realizzate

Un commento

your dumb. idot

Nick Furio - Replica

Aggiungi Commento

Visualizza Statistiche:

Ultime 24 Ore: 0

Ultimi 7 Giorni: 0

Ultimi 30 Giorni: 2

Tutti i Tempi: 931