Salta al contenuto principale

Questa guida ha delle modifiche più recenti. Passa all'ultima versione non verificata.

Samsung ML2510 Side Cooling Fan Replacement

Cosa ti serve

  1. Samsung ML2510 Side Cooling Fan Replacement, Removing Samsung ML2510 Back Panel: passo 1, immagine 1 di 3 Samsung ML2510 Side Cooling Fan Replacement, Removing Samsung ML2510 Back Panel: passo 1, immagine 2 di 3 Samsung ML2510 Side Cooling Fan Replacement, Removing Samsung ML2510 Back Panel: passo 1, immagine 3 di 3
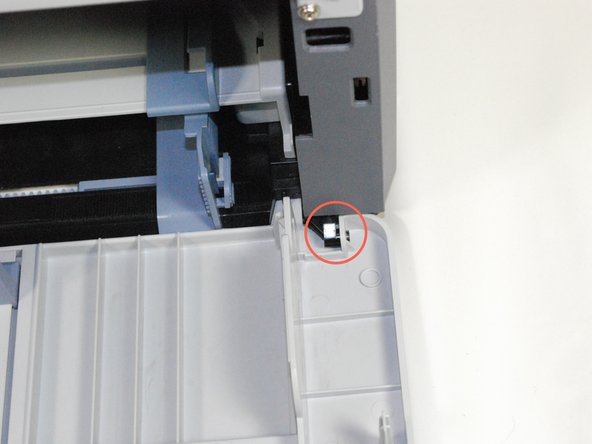
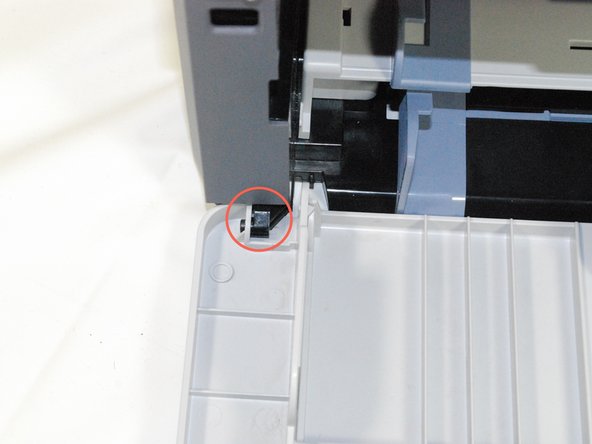
    • Remove the top hinged panel by taking out the pins at the bottom of this panel.

  2. Samsung ML2510 Side Cooling Fan Replacement: passo 2, immagine 1 di 1
    • Using a Phillips #2 screwdriver, remove the four screws on the back of the printer.

  3. Samsung ML2510 Side Cooling Fan Replacement: passo 3, immagine 1 di 3 Samsung ML2510 Side Cooling Fan Replacement: passo 3, immagine 2 di 3 Samsung ML2510 Side Cooling Fan Replacement: passo 3, immagine 3 di 3
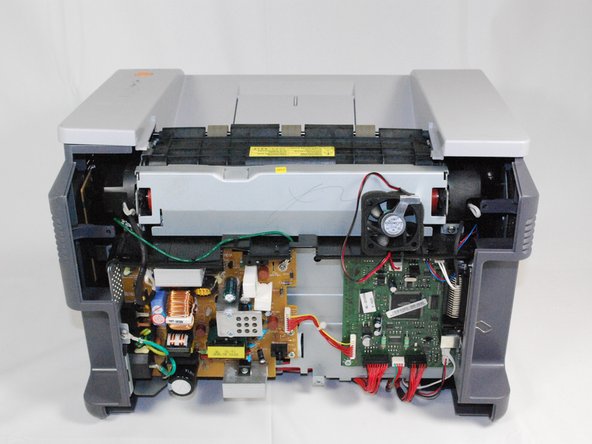
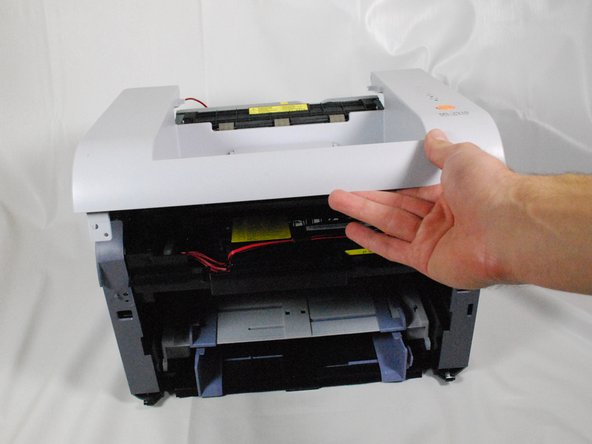
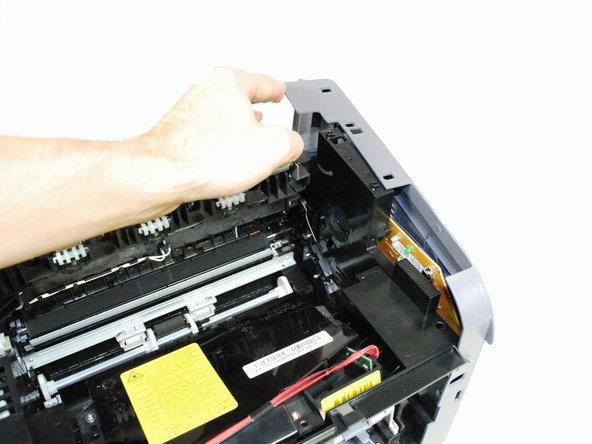
    • Gently lift the top panel while simultaneously pulling off the back panel.

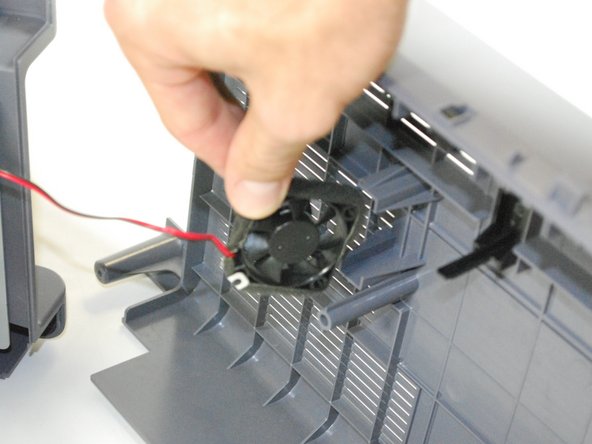
    • Before pulling out the back panel entirely, make sure to remove the rear cooling fan from its slot.

  4. Samsung ML2510 Side Cooling Fan Replacement, Side Cooling Fan: passo 4, immagine 1 di 3 Samsung ML2510 Side Cooling Fan Replacement, Side Cooling Fan: passo 4, immagine 2 di 3 Samsung ML2510 Side Cooling Fan Replacement, Side Cooling Fan: passo 4, immagine 3 di 3
    • Locate the holes on the panel that are attached to the main body.

    • Remove the front panel by gently moving the holes from the pegs one by one.

  5. Samsung ML2510 Side Cooling Fan Replacement: passo 5, immagine 1 di 1
    • Using a Phillips #2 screwdriver, remove the two 1" screws on the front face of the printer.

  6. Samsung ML2510 Side Cooling Fan Replacement: passo 6, immagine 1 di 3 Samsung ML2510 Side Cooling Fan Replacement: passo 6, immagine 2 di 3 Samsung ML2510 Side Cooling Fan Replacement: passo 6, immagine 3 di 3
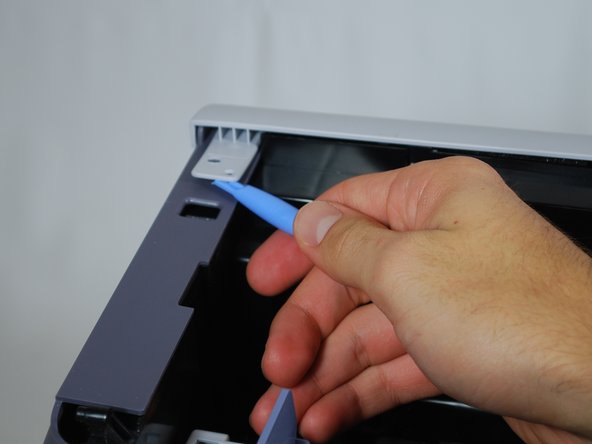
    • Using a plastic opening tool, gently lift one side of the top panel from its peg.

    • Repeat process for the other side.

    • Lift the top panel from the front to remove it entirely.

  7. Samsung ML2510 Side Cooling Fan Replacement: passo 7, immagine 1 di 3 Samsung ML2510 Side Cooling Fan Replacement: passo 7, immagine 2 di 3 Samsung ML2510 Side Cooling Fan Replacement: passo 7, immagine 3 di 3
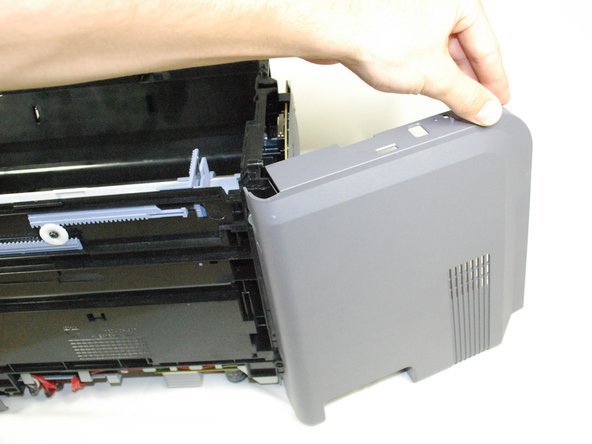
    • Lift the right side-panel up from the raised stops.

    • Gently rotate the panel as indicated in the picture to remove the panel entirely.

  8. Samsung ML2510 Side Cooling Fan Replacement: passo 8, immagine 1 di 1
    • Poke out the side fan from the inside of the printer.

  9. Samsung ML2510 Side Cooling Fan Replacement: passo 9, immagine 1 di 1
    • Unplug the fan's wires from the side circuit board.

    • Replace the fan and reassemble the printer using reverse procedures.

Conclusione

To reassemble your device, follow these instructions in reverse order.

Altre 2 persone hanno completato questa guida.

bbaustin

Membro da: 10/12/11

268 Reputazione

6 Guide realizzate

Team

Cal Poly, Team 17-18, Regan Fall 2011 Membro di Cal Poly, Team 17-18, Regan Fall 2011

CPSU-REGAN-F11S17G18

4 Membri

12 Guide realizzate

0 Commenti

Aggiungi Commento

Visualizza Statistiche:

Ultime 24 Ore: 0

Ultimi 7 Giorni: 5

Ultimi 30 Giorni: 11

Tutti i Tempi: 2,525