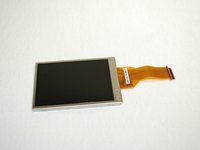
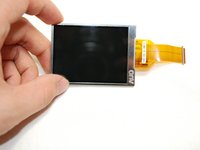
Salta al contenuto principale

Samsung L100 LCD Screen Replacement

Cosa ti serve

  1. Samsung L100 LCD Screen Replacement, Removing Back Cover: passo 1, immagine 1 di 3 Samsung L100 LCD Screen Replacement, Removing Back Cover: passo 1, immagine 2 di 3 Samsung L100 LCD Screen Replacement, Removing Back Cover: passo 1, immagine 3 di 3
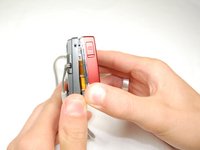
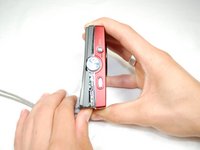
    • Remove the six external screws from the camera using a Phillips #0 screwdriver.

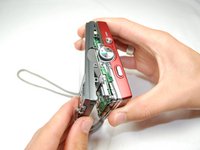
    • After the screws has been removed, the bottom of the back half of the external case should be loosened from the camera.

    • Be careful, make sure you don't lose the screws.

  2. Samsung L100 LCD Screen Replacement: passo 2, immagine 1 di 2 Samsung L100 LCD Screen Replacement: passo 2, immagine 2 di 2
    • Open the battery cover that's located on the bottom right side of the camera and carefully remove the battery.

  3. Samsung L100 LCD Screen Replacement: passo 3, immagine 1 di 3 Samsung L100 LCD Screen Replacement: passo 3, immagine 2 di 3 Samsung L100 LCD Screen Replacement: passo 3, immagine 3 di 3
    • Slide your fingernail or a plastic spudger in the groove from the bottom to the top right side of the camera.

  4. Samsung L100 LCD Screen Replacement: passo 4, immagine 1 di 1
    • Carefully squeeze the top right corner of the camera and pry off the external cover.

    • If you hear a "cracking" sound. This is normal.

    • Continue to pull the external cover and it will come off cleanly.

    • Be cautious of the flash capacitor. It carries an electrical charge, that may give you an unpleasant shock.

  5. Samsung L100 LCD Screen Replacement: passo 5, immagine 1 di 1
    • Carefully pull off the back cover, parts behind the back of the case might fall out.

  6. Samsung L100 LCD Screen Replacement, LCD Screen: passo 6, immagine 1 di 2 Samsung L100 LCD Screen Replacement, LCD Screen: passo 6, immagine 2 di 2
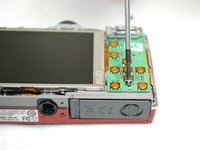
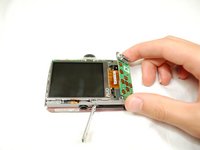
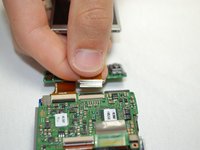
    • Remove the screws holding the circuit board.

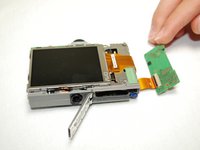
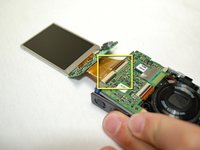
    • Carefully remove the circuit board.

  7. Samsung L100 LCD Screen Replacement: passo 7, immagine 1 di 2 Samsung L100 LCD Screen Replacement: passo 7, immagine 2 di 2
    • Carefully lift circuit board from camera.

    • Circuit board still attached to camera by ribbon.

  8. Samsung L100 LCD Screen Replacement: passo 8, immagine 1 di 1
    • Remove the front cover. It should come off easily.

    • Buttons might fall out when you remove the front cover.

  9. Samsung L100 LCD Screen Replacement: passo 9, immagine 1 di 2 Samsung L100 LCD Screen Replacement: passo 9, immagine 2 di 2
    • Remove the green tape that holds the LCD screen.

    • Carefully lift the LCD Screen.

  10. Samsung L100 LCD Screen Replacement: passo 10, immagine 1 di 3 Samsung L100 LCD Screen Replacement: passo 10, immagine 2 di 3 Samsung L100 LCD Screen Replacement: passo 10, immagine 3 di 3
    • Flip the camera over to the other side.

    • Lift the black strip and the ribbon should easily come out.

    • The LCD Screen should be completely separated from the camera now.

  11. Samsung L100 LCD Screen Replacement: passo 11, immagine 1 di 2 Samsung L100 LCD Screen Replacement: passo 11, immagine 2 di 2
    • Insert the new LCD Screen by pushing the ribbon into the slot.

    • Flip the black strip back down to lock the ribbon in.

    • Your new LCD Screen should be connected to the camera now.

Conclusione

To reassemble your device, follow these instructions in reverse order.

Un'altra persona ha completato questa guida.

Hasit

Membro da: 04/15/10

195 Reputazione

2 Guide realizzate

Team

Cal Poly, Team 6-17, Maness Spring 2010 Membro di Cal Poly, Team 6-17, Maness Spring 2010

CPSU-MANESS-S10S6G17

4 Membri

10 Guide realizzate

0 Commenti

Aggiungi Commento

Visualizza Statistiche:

Ultime 24 Ore: 0

Ultimi 7 Giorni: 1

Ultimi 30 Giorni: 7

Tutti i Tempi: 6,056