Salta al contenuto principale
Unisciti alla Community delle riparazioni - Crea un account
Samsung Impression LCD Replacement

Samsung Impression LCD Replacement

Saul Villatoro

Saul Villatoro e 6 altri collaboratori

Ultimo aggiornamento il 20 gen 2025

30 minuti
Moderato
Foto Azione
Necessarie Immagini Migliori
Inconveniente Markup
Pallini!
Introduzione Migliore

Introduzione

Vai al passo 1

How to remove & replace the phone's LCD screen.

Cosa ti serve

Strumenti

  1. Samsung Impression LCD Replacement, Battery: passo 1, immagine 1 di 1
    • Orient the phone with the screen facing downward.

    • Slide the panel away from the camera using your thumb. This will expose the battery.

  2. Samsung Impression LCD Replacement: passo 2, immagine 1 di 2 Samsung Impression LCD Replacement: passo 2, immagine 2 di 2
    • Insert the tip of the spudger on the left side of the battery.

    • Pry the battery out. It will pivot in the direction of the white arrow.

  3. Samsung Impression LCD Replacement, Back Cover: passo 3, immagine 1 di 1
    • Remove the six 3.5 mm screws using a Phillips #000 screwdriver. Unscrew in a counterclockwise direction.

  4. Samsung Impression LCD Replacement: passo 4, immagine 1 di 1
    • Gently pry around the edges with the spudger to remove back panel.

    • It may help to slide the touchscreen upwards when removing the back panel.

    • The side buttons will become loose and will fall out, so put these in a safe place.

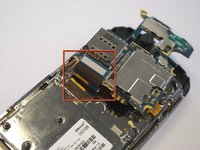
  5. Samsung Impression LCD Replacement, Circuit Board: passo 5, immagine 1 di 1
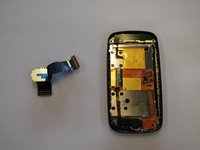
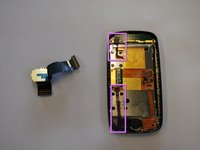
    • Gently remove the black wire to free the circuit board.

    • Remove the wire by gently prying up the gold terminator attached to the green circuit board.

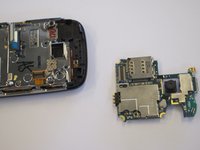
  6. Samsung Impression LCD Replacement: passo 6, immagine 1 di 2 Samsung Impression LCD Replacement: passo 6, immagine 2 di 2
    • Gently tug the black and blue ribbon upwards to release the circuit board.

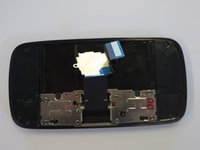
  7. Samsung Impression LCD Replacement, Keyboard: passo 7, immagine 1 di 1
    • Remove the two base screws along the edge of the silver piece, where you just removed the black end piece.

    • The screws are 2.7mm in length.

    • The bottom black end cap will snap out.

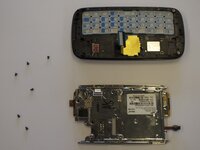
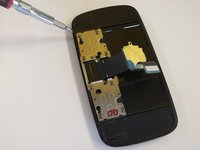
  8. Samsung Impression LCD Replacement: passo 8, immagine 1 di 2 Samsung Impression LCD Replacement: passo 8, immagine 2 di 2
    • Remove 6 screws holding the silver plate on.

    • 2.7mm in length

    • The keys will peel right out of the screen side of the phone.

  9. Samsung Impression LCD Replacement: passo 9, immagine 1 di 1
    • The silver piece you are left with is the physical keyboard assembly.

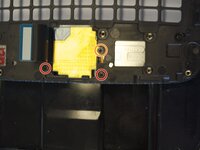
  10. Samsung Impression LCD Replacement, LCD Flex Cable: passo 10, immagine 1 di 2 Samsung Impression LCD Replacement, LCD Flex Cable: passo 10, immagine 2 di 2
    • Remove the 3 screws holding down the flex cable.

    • The screws are 2.0 mm in length.

    • The screw that goes through the circle port on the flex cable is longer at 2.3mm long.

    • The keyboard slider frame will come off and the flex cable exposed, but not free.

  11. Samsung Impression LCD Replacement: passo 11, immagine 1 di 1
    • Remove 4 outer screws.

    • The screws are 3.5mm in length.

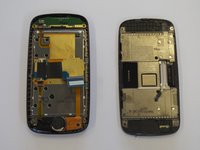
  12. Samsung Impression LCD Replacement: passo 12, immagine 1 di 3 Samsung Impression LCD Replacement: passo 12, immagine 2 di 3 Samsung Impression LCD Replacement: passo 12, immagine 3 di 3
    • Slide the phone apart, and remove a 5th screw (3.5 mm).

    • Remove the outer shell by prying the edges off with your fingers, or a small screwdriver. (second image, taken before the image for above instruction)

    • The device will now be in two pieces

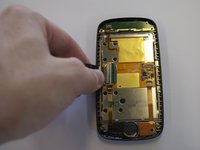
  13. Samsung Impression LCD Replacement: passo 13, immagine 1 di 2 Samsung Impression LCD Replacement: passo 13, immagine 2 di 2
    • Lift the tab underneath the blue tape and gently pull the flex cable.

    • The flex cable will now be completely free.

  14. Samsung Impression LCD Replacement, Ear Speaker: passo 14, immagine 1 di 1
    • Remove the single screw.

    • This screw is 2.25 mm in length.

    • Lift the black tab at the end of the ribbon.

    • Gently pull the speaker and ribbon free.

  15. Samsung Impression LCD Replacement, LCD: passo 15, immagine 1 di 2 Samsung Impression LCD Replacement, LCD: passo 15, immagine 2 di 2
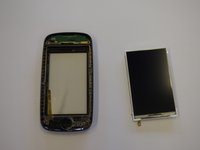
    • Lift the remaining two tabs and free their respective ribbon cables.

    • Gently pry the screen away from the housing.

    • Be careful with this step as you are in direct contact with the LCD screen.

Conclusione

To reassemble your device, follow these instructions in reverse order.

Preparati per le riparazioni future

Acquista tutti

Team

Cal Poly, Team 8-10, Regan Spring 2011 Membro di Cal Poly, Team 8-10, Regan Spring 2011

CPSU-REGAN-S11S8G10

4 Membri

22 Guide realizzate

0Commenti sulla guida

Aggiungi Commento

Visualizza Statistiche:

Ultime 24 Ore: 0

Ultimi 7 Giorni: 0

Ultimi 30 Giorni: 1

Tutti i Tempi: 4,445