Salta al contenuto principale

Samsung Gear VR with Controller Motherboard Replacement

Cosa ti serve

  1. Samsung Gear VR with Controller Motherboard Replacement, Controller Batteries: passo 1, immagine 1 di 3 Samsung Gear VR with Controller Motherboard Replacement, Controller Batteries: passo 1, immagine 2 di 3 Samsung Gear VR with Controller Motherboard Replacement, Controller Batteries: passo 1, immagine 3 di 3
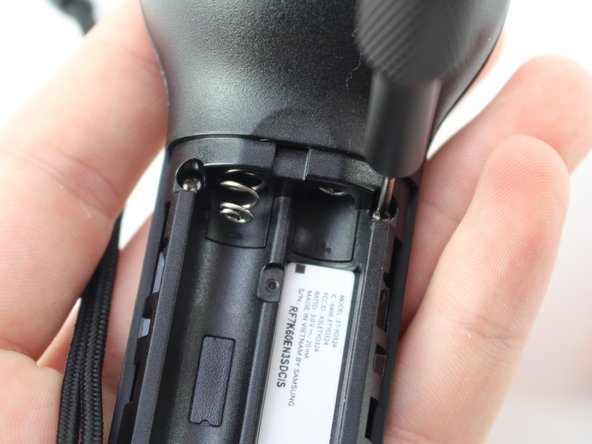
    • Turn the controller upside down to access the battery compartment.

    • The battery compartment is located on the opposite side of the buttons.

    • Press on the top of the battery plate and slide down to remove the cover.

  2. Samsung Gear VR with Controller Motherboard Replacement: passo 2, immagine 1 di 3 Samsung Gear VR with Controller Motherboard Replacement: passo 2, immagine 2 di 3 Samsung Gear VR with Controller Motherboard Replacement: passo 2, immagine 3 di 3
    • Remove the AAA batteries using your fingers.

  3. Samsung Gear VR with Controller Motherboard Replacement, Controller Motherboard: passo 3, immagine 1 di 2 Samsung Gear VR with Controller Motherboard Replacement, Controller Motherboard: passo 3, immagine 2 di 2
    • Remove the four 5mm Phillips #000 screws.

  4. Samsung Gear VR with Controller Motherboard Replacement: passo 4, immagine 1 di 1
    • Use the metal spudger to pry the back side of the controller apart from the front.

    • You will have to use the spudger in many different spots along the divide before trying to separate the pieces.

  5. Samsung Gear VR with Controller Motherboard Replacement: passo 5, immagine 1 di 2 Samsung Gear VR with Controller Motherboard Replacement: passo 5, immagine 2 di 2
    • Pull apart the two halves of the controller to access the motherboard.

  6. Samsung Gear VR with Controller Motherboard Replacement: passo 6, immagine 1 di 3 Samsung Gear VR with Controller Motherboard Replacement: passo 6, immagine 2 di 3 Samsung Gear VR with Controller Motherboard Replacement: passo 6, immagine 3 di 3
    • Pry on the two pop connectors with the plastic opening tool to detach the motherboard.

    • Separate the motherboard and trackpad from the rear part of the controller.

Conclusione

To reassemble your device, follow these instructions in reverse order.

Altre 2 persone hanno completato questa guida.

Team

Cal Poly, Team S18-G3, White Winter 2019 Membro di Cal Poly, Team S18-G3, White Winter 2019

CPSU-WHITE-W19S18G3

4 Membri

7 Guide realizzate

0 Commenti

Aggiungi Commento

Visualizza Statistiche:

Ultime 24 Ore: 2

Ultimi 7 Giorni: 3

Ultimi 30 Giorni: 13

Tutti i Tempi: 957