Salta al contenuto principale

Samsung Gear S3 Frontier Speaker Replacement

Cosa ti serve

  1. Samsung Gear S3 Frontier Speaker Replacement, Back Cover: passo 1, immagine 1 di 1
    • Place the watch screen-down so that its back cover is showing.

  2. Samsung Gear S3 Frontier Speaker Replacement: passo 2, immagine 1 di 2 Samsung Gear S3 Frontier Speaker Replacement: passo 2, immagine 2 di 2
    • Remove the four 4.2mm screws with a Y00 screwdriver.

  3. Samsung Gear S3 Frontier Speaker Replacement: passo 3, immagine 1 di 3 Samsung Gear S3 Frontier Speaker Replacement: passo 3, immagine 2 di 3 Samsung Gear S3 Frontier Speaker Replacement: passo 3, immagine 3 di 3
    • This step will ruin the water-proof seal.

    • Wedge the metal spudger in between the back cover and the frame along the seam.

    • Use force to pry the back cover away from the main watch frame.

    • This step requires a lot of force. You can use a Jimmy in place of a metal spudger to make the process easier.

  4. Samsung Gear S3 Frontier Speaker Replacement, Front Screen Assembly: passo 4, immagine 1 di 3 Samsung Gear S3 Frontier Speaker Replacement, Front Screen Assembly: passo 4, immagine 2 di 3 Samsung Gear S3 Frontier Speaker Replacement, Front Screen Assembly: passo 4, immagine 3 di 3
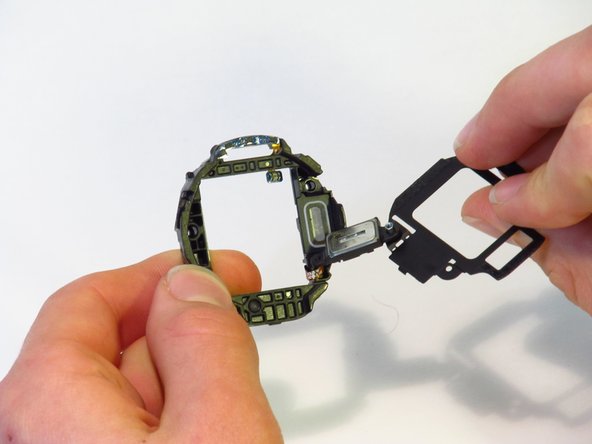
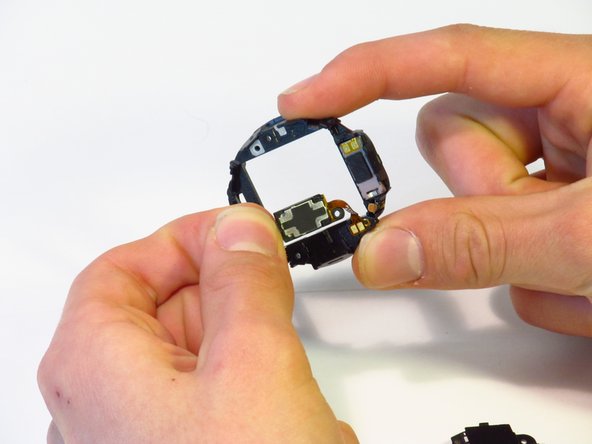
    • Detach the three connectors on the motherboard using your fingernail.

    • The connectors are easy to pop off. Minimal force is necessary.

  5. Samsung Gear S3 Frontier Speaker Replacement: passo 5, immagine 1 di 3 Samsung Gear S3 Frontier Speaker Replacement: passo 5, immagine 2 di 3 Samsung Gear S3 Frontier Speaker Replacement: passo 5, immagine 3 di 3
    • Separate the motherboard and front screen assembly using a spudger.

  6. Samsung Gear S3 Frontier Speaker Replacement, Battery: passo 6, immagine 1 di 2 Samsung Gear S3 Frontier Speaker Replacement, Battery: passo 6, immagine 2 di 2
    • Using a JIS #00 screwdriver, remove the two 4.5 mm screws.

  7. Samsung Gear S3 Frontier Speaker Replacement: passo 7, immagine 1 di 3 Samsung Gear S3 Frontier Speaker Replacement: passo 7, immagine 2 di 3 Samsung Gear S3 Frontier Speaker Replacement: passo 7, immagine 3 di 3
    • Disconnect the battery ribbon cable from bracket.

    • Be careful with the battery ribbon cable and motherboard cable (located on the side opposite the battery cable, highlighted with the orange box), as they are very easy to break (ours did when disassembling).

    • Note how the end of the ribbon cable seats in the plastic chassis. Look for the plastic pin on the chassis when re-seating during re-assembly.

    • Separate the chassis from the motherboard.

  8. Samsung Gear S3 Frontier Speaker Replacement: passo 8, immagine 1 di 2 Samsung Gear S3 Frontier Speaker Replacement: passo 8, immagine 2 di 2
    • Separate the battery from the motherboard.

    • The battery and the motherboard are secured with adhesive; some force is needed.

    • Lithium-ion batteries are potentially dangerous. Handle with extreme care and do not puncture the battery.

  9. Samsung Gear S3 Frontier Speaker Replacement: passo 9, immagine 1 di 2 Samsung Gear S3 Frontier Speaker Replacement: passo 9, immagine 2 di 2
    • When reassembling, place the battery into the plastic assembly first. Don’t stick it to the adhesive first. This way, it’s easy to position the battery cable.

    • When securing the battery cable, make sure the hole that the peg goes through is round. The hole on your replacement battery’s cable could be malformed. You may want to widen the hole before securing the cable.

    • To widen the hole, use the Pro Tech Toolkit’s SIM tool, a small paperclip or similar fine-tipped tool. The tool can also be used to gently press the battery cable into the correct position. Do this carefully to avoid damage.

    • Follow steps 8-1 in reverse order to reassmble.

  10. Samsung Gear S3 Frontier Speaker Replacement, Motherboard: passo 10, immagine 1 di 3 Samsung Gear S3 Frontier Speaker Replacement, Motherboard: passo 10, immagine 2 di 3 Samsung Gear S3 Frontier Speaker Replacement, Motherboard: passo 10, immagine 3 di 3
    • Remove the battery's cable from the chassis using tweezers.

  11. Samsung Gear S3 Frontier Speaker Replacement, Speaker: passo 11, immagine 1 di 2 Samsung Gear S3 Frontier Speaker Replacement, Speaker: passo 11, immagine 2 di 2
    • Remove the single 3.9mm screw with a JIS #000 screwdriver.

  12. Samsung Gear S3 Frontier Speaker Replacement: passo 12, immagine 1 di 3 Samsung Gear S3 Frontier Speaker Replacement: passo 12, immagine 2 di 3 Samsung Gear S3 Frontier Speaker Replacement: passo 12, immagine 3 di 3
    • Separate the two parts of the chassis.

    • The speaker is located on the bulkier half of the chassis (see third image).

  13. Samsung Gear S3 Frontier Speaker Replacement: passo 13, immagine 1 di 2 Samsung Gear S3 Frontier Speaker Replacement: passo 13, immagine 2 di 2
    • Remove the connection from the chassis with tweezers.

    • Attempting to remove the connection by grabbing the speaker itself may result in damage to the speaker and it's connection.

    • Separate the speaker from the chassis.

Conclusione

To reassemble your device, follow these instructions in reverse order.

Un'altra persona ha completato questa guida.

Jimmy Algeo

Membro da: 10/08/18

831 Reputazione

2 Guide realizzate

Team

Cal Poly, Team S15-G2, White Fall 2018 Membro di Cal Poly, Team S15-G2, White Fall 2018

CPSU-WHITE-F18S15G2

4 Membri

34 Guide realizzate

3 Commenti

Bonjour où peut-on trouver une pièce merci

Voodress - Replica

For step 3, you should be able to also remove the rubber rectangle at the base of the back plate exposing that connector area… stick the spudger in there and lift off the back plate. I assume there may be a reason why you didn’t use this method.. but I just did and it opened the back part enough where I could separate the rest by hand.

Still, excellent tear down… it made my speaker repair that much easier!

Lauren Glenn - Replica

i successfully accomplished the task, but did manage to damage the soft button while prying the mainboard from the frame. Be careful to pry on the upper layer of MB rather than deeper down towards the display face. i am now searching a way to replace this small button/ribbon, so my repaired watch will work properly again.

dogzilla - Replica

Aggiungi Commento

Visualizza Statistiche:

Ultime 24 Ore: 0

Ultimi 7 Giorni: 3

Ultimi 30 Giorni: 29

Tutti i Tempi: 6,521