Questa versione può contenere modifiche errate. Passa all'ultima istantanea verificata.
Cosa ti serve
-
Questo passaggio è privo di traduzione. Aiuta a tradurlo
-
Heat the iOpeners in a microwave for 1-2 minutes.
-
Place heated iOpeners on screen edges to heat the adhesive.
-
-
Questo passaggio è privo di traduzione. Aiuta a tradurlo
-
Separate the screen assembly from the back by wedging the picks between the two components.
-
Slide the picks along the edge and leave them holding the device open all around the edges.
-
-
Questo passaggio è privo di traduzione. Aiuta a tradurlo
-
Place suctioning device near the corner of the screen and gently lift up to create a gap between the front panel assembly and the back.
-
Insert the picks to hold the two components apart once a gap is created.
-
-
Questo passaggio è privo di traduzione. Aiuta a tradurlo
-
Once all edges have been disconnected, carefully lift the screen off by pulling one side up.
-
-
Questo passaggio è privo di traduzione. Aiuta a tradurlo
-
Using the tweezers, gently peel up on the silver tape covering the connector.
-
-
-
Questo passaggio è privo di traduzione. Aiuta a tradurlo
-
Use the plastic opening tool to get under the connector piece. This will allow you to remove the front panel assembly from the rest of the device.
-
-
Questo passaggio è privo di traduzione. Aiuta a tradurlo
-
Detach the connecter from the inside of the device.
-
Lift the screen to separate the front panel assembly from the rest of the device.
-
-
Questo passaggio è privo di traduzione. Aiuta a tradurlo
-
Remove the 17 silver 3.0 mm Phillips head screws located around the edge of the device using the screwdriver.
-
-
Questo passaggio è privo di traduzione. Aiuta a tradurlo
-
Remove the 2 centrally-located black 3.0 mm Phillips head screws using the screwdriver.
-
-
Questo passaggio è privo di traduzione. Aiuta a tradurlo
-
Use the plastic opening tools to gently separate the middle panel from the rest of the device.
-
Move the tool around under the edges until you can remove the panel by hand.
-
-
Questo passaggio è privo di traduzione. Aiuta a tradurlo
-
Lift up the central panel starting from one corner to separate it from the rest of the device.
-
Pull towards the top of the device as you lift out to ensure that the charging port connection is not damaged.
-
-
Questo passaggio è privo di traduzione. Aiuta a tradurlo
-
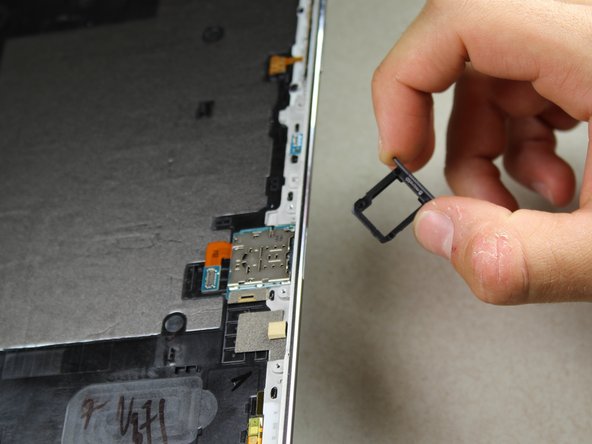
Insert the pointed end of the black spudger into the hole located on the right side of the device.
-
Use the spudger as a lever to remover the SD Card plastic piece from the reader.
-
-
Questo passaggio è privo di traduzione. Aiuta a tradurlo
-
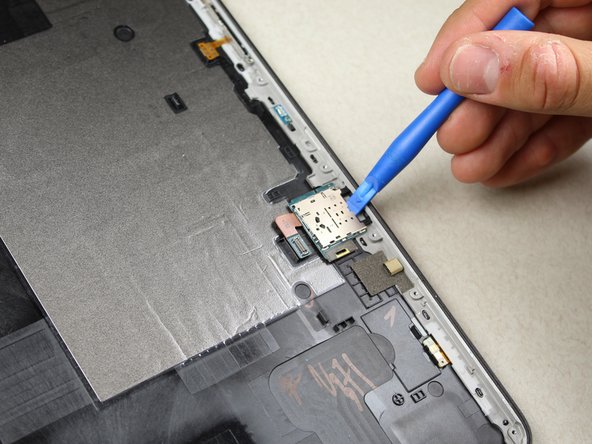
Use the plastic opening tool to unlock the SD card reader from the back panel.
-
Wedge the tool under the reader and gently lift up to pop it out.
-
-
Questo passaggio è privo di traduzione. Aiuta a tradurlo
-
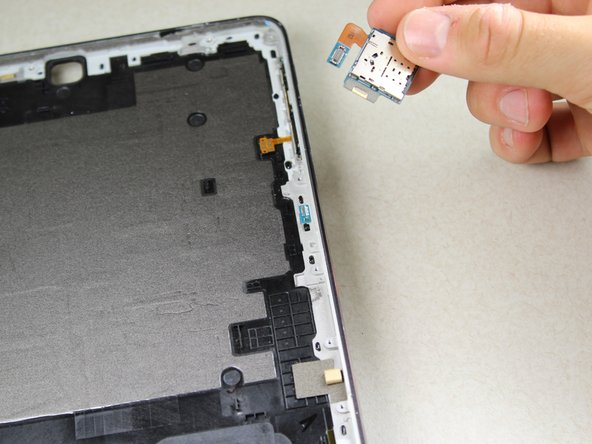
Pick up the SD card reader with your fingers. There is no adhesive, so the reader will come off easily.
-


Annulla: non ho completato questa guida.
Un'altra persona ha completato questa guida.

Team

Cal Poly, Team S16-G5, Livingston Spring 2018 Membro di Cal Poly, Team S16-G5, Livingston Spring 2018
CPSU-LIVINGSTON-S18S16G5
5 Membri
12 Guide realizzate