Questa versione può contenere modifiche errate. Passa all'ultima istantanea verificata.
Cosa ti serve
-
Questo passaggio è privo di traduzione. Aiuta a tradurlo
-
Insert a plastic opening tool between the back cover and the screen of the Samsung Galaxy Tab 8.9.
-
-
Questo passaggio è privo di traduzione. Aiuta a tradurlo
-
6 cm [2 in] away from the first plastic opening tool, insert a second plastic opening tool between the back cover and the screen.
-
-
Questo passaggio è privo di traduzione. Aiuta a tradurlo
-
Slide the second plastic opening tool along the edge of the device to separate the back cover from the screen.
-
-
Questo passaggio è privo di traduzione. Aiuta a tradurlo
-
Use tweezers to peel up the green tape located on top of the two flexible ribbon cables.
-
-
-
Questo passaggio è privo di traduzione. Aiuta a tradurlo
-
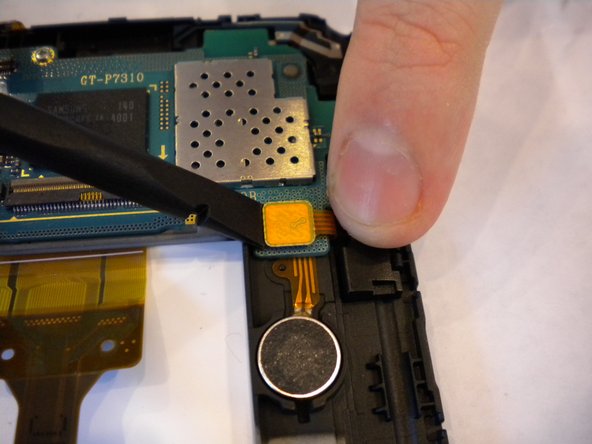
Insert a spudger under the orange tab.
-
Gently pry up the tab to disconnect the black flexible ribbon cable from the motherboard.
-
-
Questo passaggio è privo di traduzione. Aiuta a tradurlo
-
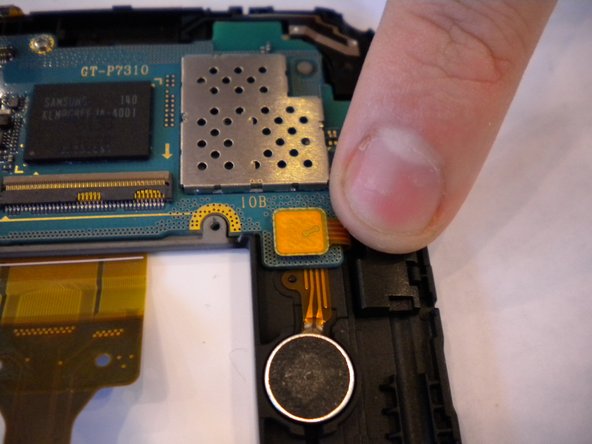
Carefully pull out the yellow flexible ribbon cable to disconnect it from the motherboard.
-
-
Questo passaggio è privo di traduzione. Aiuta a tradurlo
-
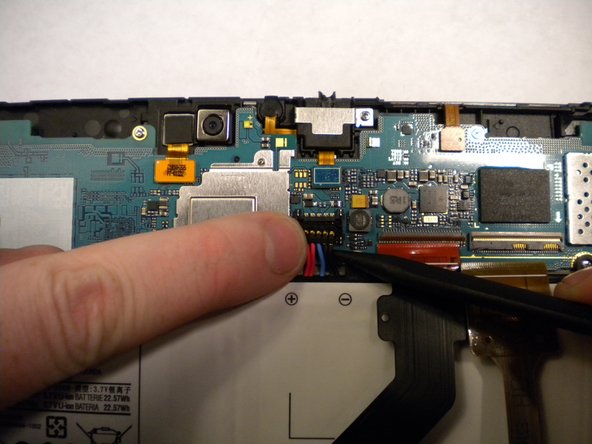
Insert the spudger under the red, black, and white cables.
-
Pry up and detach the battery from the motherboard.
-
-
Questo passaggio è privo di traduzione. Aiuta a tradurlo
-
Use a Phillips #00 screwdriver to remove the nine 1 mm screws located around the battery.
-
-
Questo passaggio è privo di traduzione. Aiuta a tradurlo
-
Use a spudger to lift up and separate the battery from its housing.
-
-
Questo passaggio è privo di traduzione. Aiuta a tradurlo
-
Locate the motherboard and 5 connectors on it.
-
Pry up and detach the connector from the motherboard using the flat edge of the spudger.
-
Repeat for the 4 remaining connectors.
-
-
Questo passaggio è privo di traduzione. Aiuta a tradurlo
-
Using the Phillips #00 screwdriver, unscrew the 3 screws (1mm) that are located near:
-
Camera
-
Power and volume buttons
-
Tilt sensor
-
-
Questo passaggio è privo di traduzione. Aiuta a tradurlo
-
Using the flat edge of the spudger, pry and lift up the motherboard.
-
-
Questo passaggio è privo di traduzione. Aiuta a tradurlo
-
Pull away the motherboard from the housing.
-


Annulla: non ho completato questa guida.
Altre 4 persone hanno completato questa guida.

Team

USF Tampa, Team 11-4, Blackwell Fall 2014 Membro di USF Tampa, Team 11-4, Blackwell Fall 2014
USFT-BLACKWELL-F14S11G4
4 Membri
10 Guide realizzate