Salta al contenuto principale

Samsung Galaxy Tab 4 8.0 Verizon Motheboard Replacement

Cosa ti serve

  1. Samsung Galaxy Tab 4 8.0 Verizon Motheboard Replacement, Rear Case: passo 1, immagine 1 di 3 Samsung Galaxy Tab 4 8.0 Verizon Motheboard Replacement, Rear Case: passo 1, immagine 2 di 3 Samsung Galaxy Tab 4 8.0 Verizon Motheboard Replacement, Rear Case: passo 1, immagine 3 di 3
    • Before disassembling your Samsung Galaxy Tab 4 8.0, be sure it is powered off and you remove the SIM and Micro SD cards.

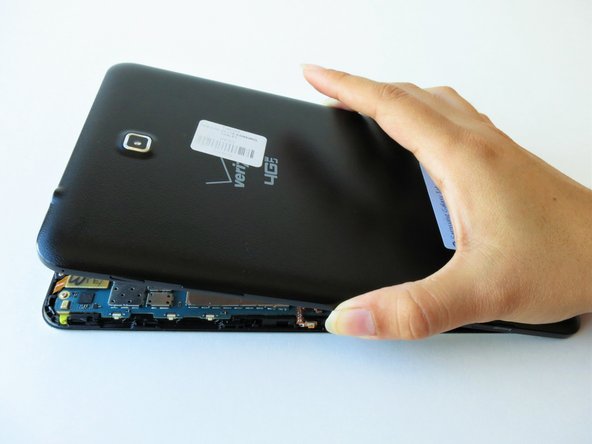
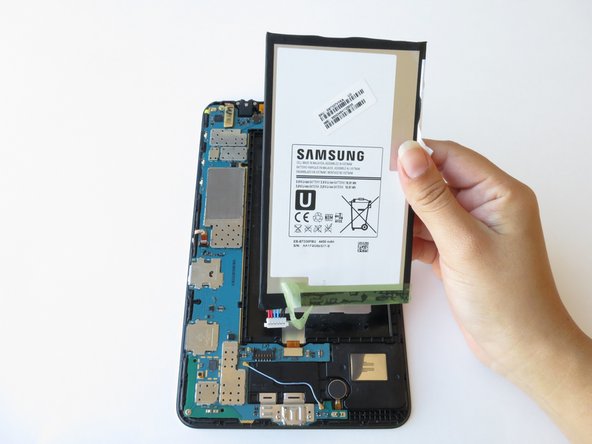
    • At the top of the tablet, nudge the blue plastic opening tool between the back plastic casing and the front panel's metal rim.

    • Do not use excessive force when prying the clips, fastening the casing together, open because they can easily break.

  2. Samsung Galaxy Tab 4 8.0 Verizon Motheboard Replacement: passo 2, immagine 1 di 2 Samsung Galaxy Tab 4 8.0 Verizon Motheboard Replacement: passo 2, immagine 2 di 2
    • Continue prying the blue plastic opening tool along the perimeter of the tablet to separate the back plastic casing from the front assembly panel.

    • As right-handers, we found it easiest to move clockwise and use more pressure around the corners to facilitate the process.

    • You might hear several popping noises caused by the plastic clips coming undone.

  3. Samsung Galaxy Tab 4 8.0 Verizon Motheboard Replacement: passo 3, immagine 1 di 2 Samsung Galaxy Tab 4 8.0 Verizon Motheboard Replacement: passo 3, immagine 2 di 2
    • To avoid damaging the screen, gently set the tablet with the LCD screen faced down.

    • Firmly grasp the back plastic casing and lift it away from the front assembly panel.

  4. Samsung Galaxy Tab 4 8.0 Verizon Motheboard Replacement, Front Facing Camera: passo 4, immagine 1 di 3 Samsung Galaxy Tab 4 8.0 Verizon Motheboard Replacement, Front Facing Camera: passo 4, immagine 2 di 3 Samsung Galaxy Tab 4 8.0 Verizon Motheboard Replacement, Front Facing Camera: passo 4, immagine 3 di 3
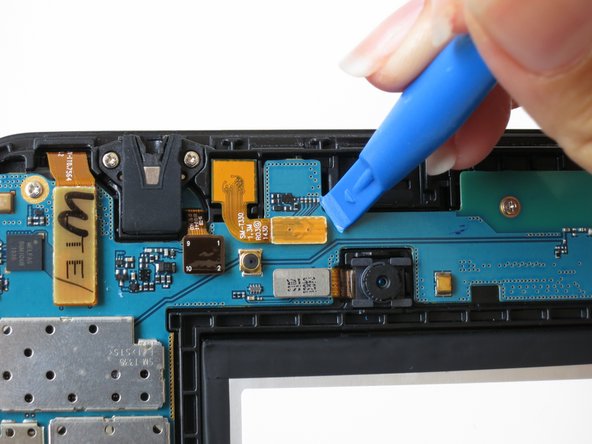
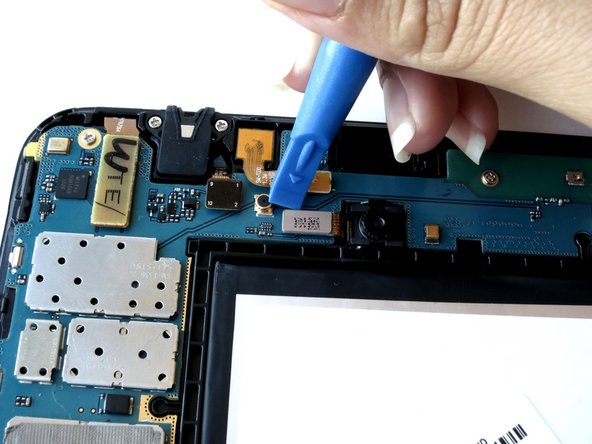
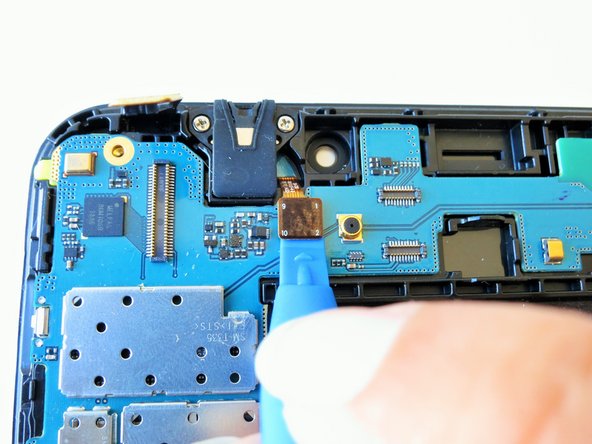
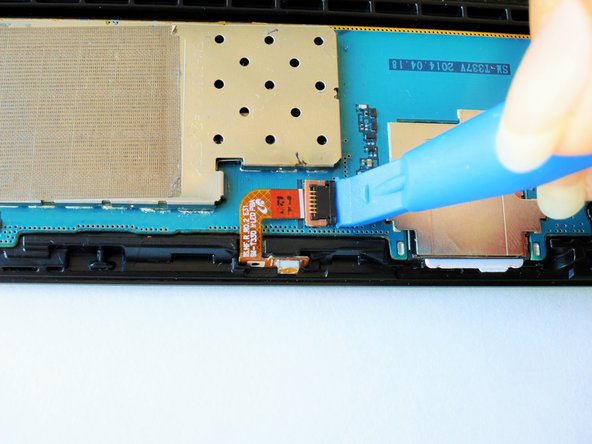
    • The front camera's ribbon cable is located just above the battery, slightly to the left.

    • Carefully insert the flat end of the blue plastic opening tool under the connector at the end of the ribbon cable.

  5. Samsung Galaxy Tab 4 8.0 Verizon Motheboard Replacement: passo 5, immagine 1 di 1
    • Slightly apply pressure and move the blue plastic opening tool downwards to pop the front camera’s gold rectangular connector from its socket on the motherboard.

  6. Samsung Galaxy Tab 4 8.0 Verizon Motheboard Replacement: passo 6, immagine 1 di 2 Samsung Galaxy Tab 4 8.0 Verizon Motheboard Replacement: passo 6, immagine 2 di 2
    • Squeeze the gold rectangular piece with the tweezers to gently lift it from its pit.

  7. Samsung Galaxy Tab 4 8.0 Verizon Motheboard Replacement, Rear Facing Camera: passo 7, immagine 1 di 2 Samsung Galaxy Tab 4 8.0 Verizon Motheboard Replacement, Rear Facing Camera: passo 7, immagine 2 di 2
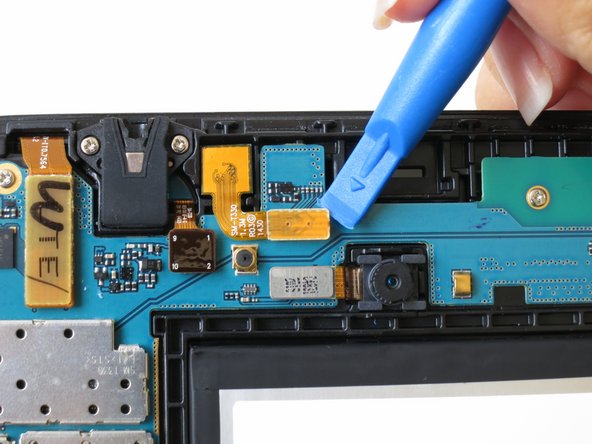
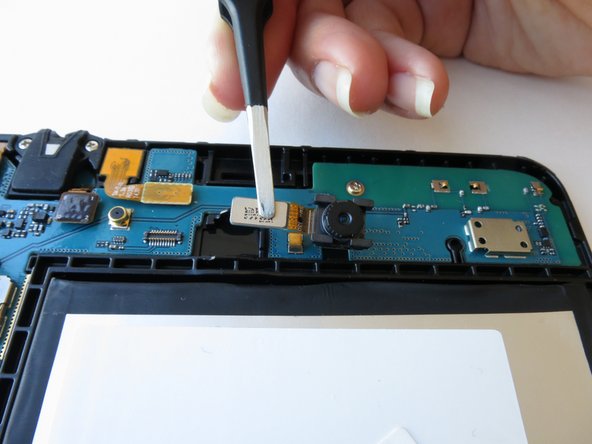
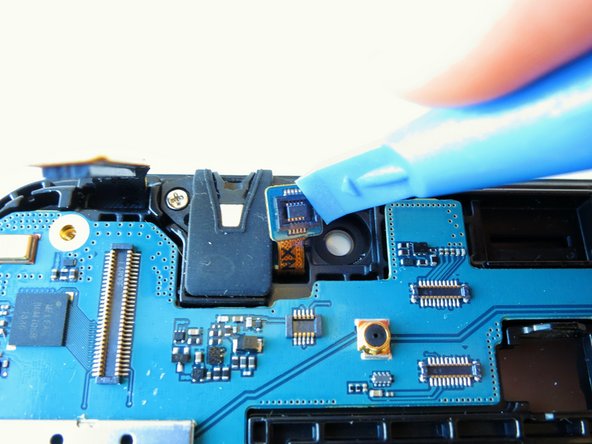
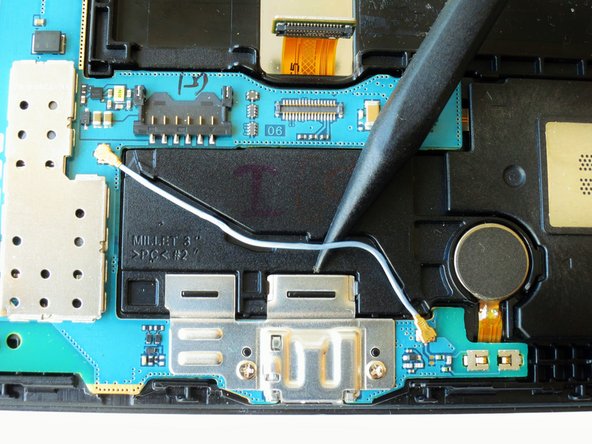
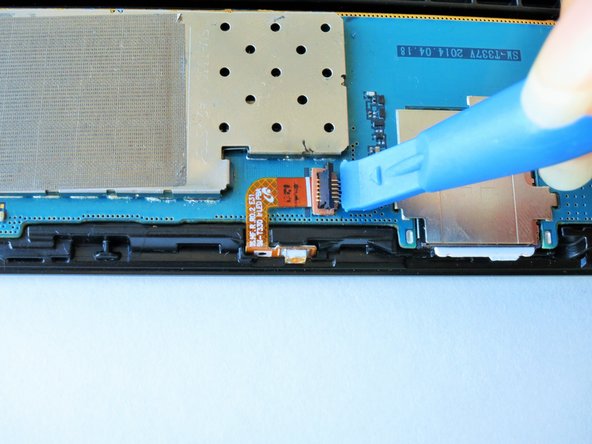
    • The back camera will be located near the top of the tablet in the center above the battery.

    • Carefully insert the flat end of the blue plastic opening tool under the metal rectangular end of the back camera’s cable connector.

  8. Samsung Galaxy Tab 4 8.0 Verizon Motheboard Replacement: passo 8, immagine 1 di 1
    • Slightly apply pressure and move the blue plastic opening tool downwards to pop the back camera’s metallic rectangular connector from its socket on the logic board.

  9. Samsung Galaxy Tab 4 8.0 Verizon Motheboard Replacement: passo 9, immagine 1 di 2 Samsung Galaxy Tab 4 8.0 Verizon Motheboard Replacement: passo 9, immagine 2 di 2
    • Squeeze the metallic rectangular piece with the tweezers to gently lift it from it's pit.

  10. Samsung Galaxy Tab 4 8.0 Verizon Motheboard Replacement, Battery: passo 10, immagine 1 di 3 Samsung Galaxy Tab 4 8.0 Verizon Motheboard Replacement, Battery: passo 10, immagine 2 di 3 Samsung Galaxy Tab 4 8.0 Verizon Motheboard Replacement, Battery: passo 10, immagine 3 di 3
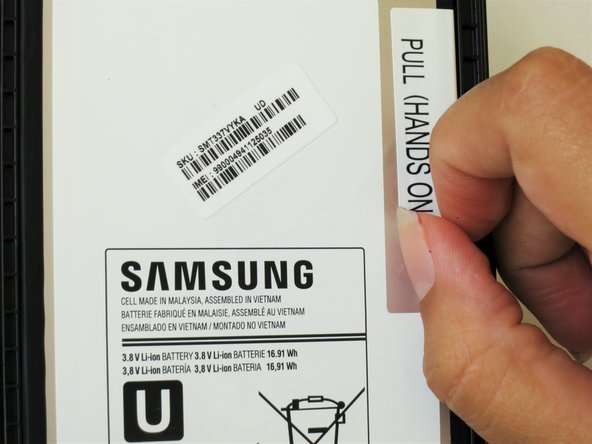
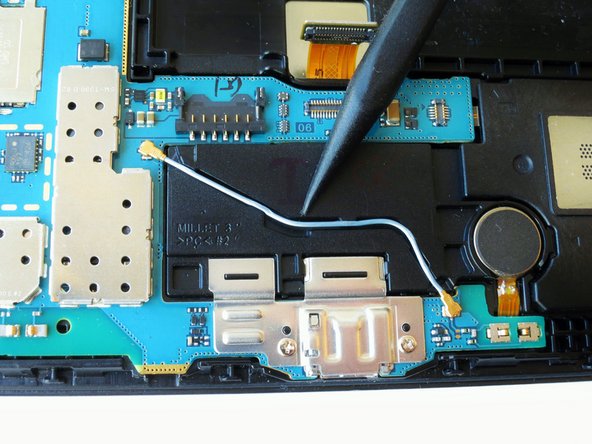
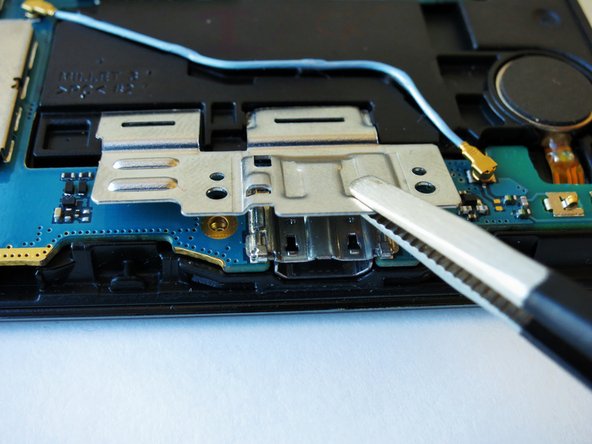
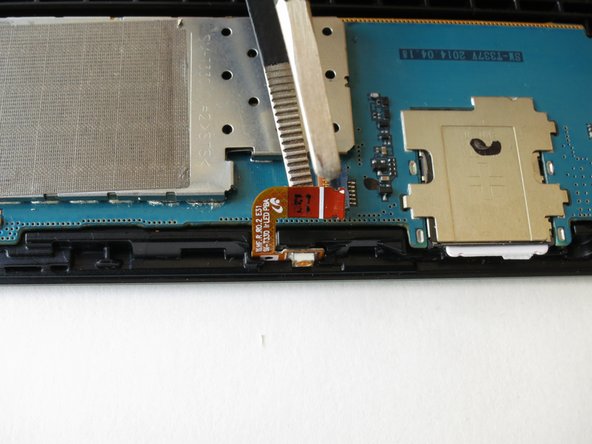
    • Peel up the detachable corner of the white plastic sticker that reads “pull (hands only).”

    • Remove the sticker to form a tab.

  11. Samsung Galaxy Tab 4 8.0 Verizon Motheboard Replacement: passo 11, immagine 1 di 1
    • Using your thumb and index finger, pinch the tab and pull it up to remove the top right corner of the battery from the front panel assembly.

    • If battery resistance is encountered due to adhesive, use the flat end of a spudger to run in between the battery and the front panel assembly.

    • Do not completely detach the battery just yet, doing so can cause damage to the red and blue cables loacted at the bottom of the battery.

  12. Samsung Galaxy Tab 4 8.0 Verizon Motheboard Replacement: passo 12, immagine 1 di 2 Samsung Galaxy Tab 4 8.0 Verizon Motheboard Replacement: passo 12, immagine 2 di 2
    • Starting at the bottom left side of the battery, gently remove the green tape.

    • Salvage the green tape if the replacement battery does not include one.

  13. Samsung Galaxy Tab 4 8.0 Verizon Motheboard Replacement: passo 13, immagine 1 di 3 Samsung Galaxy Tab 4 8.0 Verizon Motheboard Replacement: passo 13, immagine 2 di 3 Samsung Galaxy Tab 4 8.0 Verizon Motheboard Replacement: passo 13, immagine 3 di 3
    • Run the spudger under the battery to disconnect the red and blue cable connector from the circuit.

    • Lift the battery towards you, away from the front panel.

  14. Samsung Galaxy Tab 4 8.0 Verizon Motheboard Replacement, Motherboard: passo 14, immagine 1 di 3 Samsung Galaxy Tab 4 8.0 Verizon Motheboard Replacement, Motherboard: passo 14, immagine 2 di 3 Samsung Galaxy Tab 4 8.0 Verizon Motheboard Replacement, Motherboard: passo 14, immagine 3 di 3
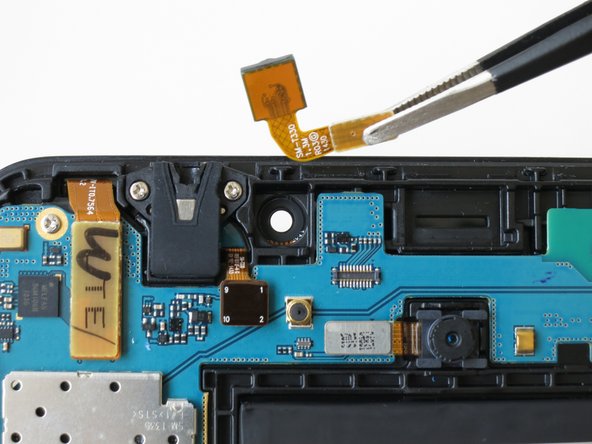
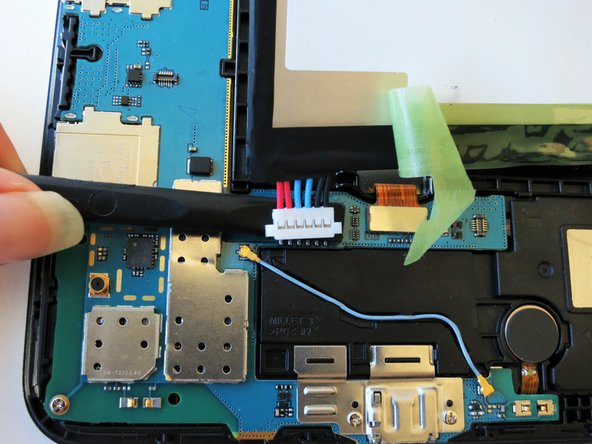
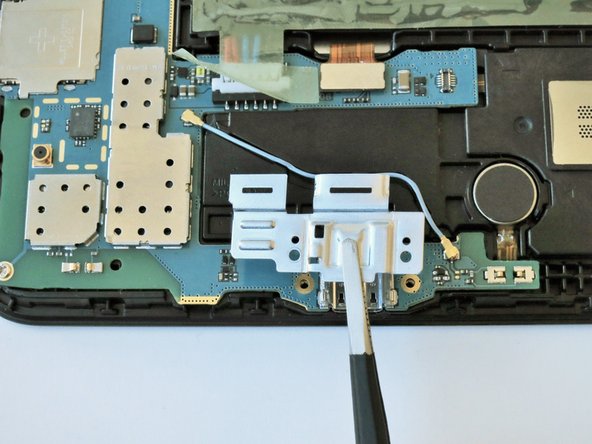
    • Slightly apply pressure and move the blue plastic opening tool downwards to pop the metallic rectangular connector from its socket on the mother board.

  15. Samsung Galaxy Tab 4 8.0 Verizon Motheboard Replacement: passo 15, immagine 1 di 3 Samsung Galaxy Tab 4 8.0 Verizon Motheboard Replacement: passo 15, immagine 2 di 3 Samsung Galaxy Tab 4 8.0 Verizon Motheboard Replacement: passo 15, immagine 3 di 3
    • Slightly apply pressure and move the blue plastic opening tool downwards to pop the gold rectangular connector from its socket on the mother board.

  16. Samsung Galaxy Tab 4 8.0 Verizon Motheboard Replacement: passo 16, immagine 1 di 3 Samsung Galaxy Tab 4 8.0 Verizon Motheboard Replacement: passo 16, immagine 2 di 3 Samsung Galaxy Tab 4 8.0 Verizon Motheboard Replacement: passo 16, immagine 3 di 3
    • Slightly apply pressure and move the blue plastic opening tool downwards to pop the gold square connector from its socket on the mother board.

  17. Samsung Galaxy Tab 4 8.0 Verizon Motheboard Replacement: passo 17, immagine 1 di 3 Samsung Galaxy Tab 4 8.0 Verizon Motheboard Replacement: passo 17, immagine 2 di 3 Samsung Galaxy Tab 4 8.0 Verizon Motheboard Replacement: passo 17, immagine 3 di 3
    • Using the spudger gently wedge the blue wire out of its compartment.

  18. Samsung Galaxy Tab 4 8.0 Verizon Motheboard Replacement: passo 18, immagine 1 di 1
    • Remove two 2 mm #000 Phillips screws securing the metallic charger port cover to both the logic board and the front panel.

  19. Samsung Galaxy Tab 4 8.0 Verizon Motheboard Replacement: passo 19, immagine 1 di 3 Samsung Galaxy Tab 4 8.0 Verizon Motheboard Replacement: passo 19, immagine 2 di 3 Samsung Galaxy Tab 4 8.0 Verizon Motheboard Replacement: passo 19, immagine 3 di 3
    • Squeeze the metal charger port cover piece with the tweezers to gently lift it from it's place.

  20. Samsung Galaxy Tab 4 8.0 Verizon Motheboard Replacement: passo 20, immagine 1 di 3 Samsung Galaxy Tab 4 8.0 Verizon Motheboard Replacement: passo 20, immagine 2 di 3 Samsung Galaxy Tab 4 8.0 Verizon Motheboard Replacement: passo 20, immagine 3 di 3
    • Carefully insert the flat end of the blue plastic opening tool under the black plastic fastener and lift.

    • Rotate your tablet counter clockwise to facilitate the process.

  21. Samsung Galaxy Tab 4 8.0 Verizon Motheboard Replacement: passo 21, immagine 1 di 2 Samsung Galaxy Tab 4 8.0 Verizon Motheboard Replacement: passo 21, immagine 2 di 2
    • Squeeze the golden cable with the tweezers and gently pull the cable to the left to free the end of the golden cable.

    • The golden cable is delicate so use gentle force.

  22. Samsung Galaxy Tab 4 8.0 Verizon Motheboard Replacement: passo 22, immagine 1 di 1
    • Remove three 2 mm #000 Phillips screws securing the mother board to the front panel.

  23. Samsung Galaxy Tab 4 8.0 Verizon Motheboard Replacement: passo 23, immagine 1 di 2 Samsung Galaxy Tab 4 8.0 Verizon Motheboard Replacement: passo 23, immagine 2 di 2
    • Using your hands, hold the opposite ends of the mother board corners, and lift.

Conclusione

To reassemble your device, follow these instructions in reverse order.

Altre 3 persone hanno completato questa guida.

Ofelia Cruz

Membro da: 09/14/15

1.119 Reputazione

5 Guide realizzate

Team

CSU Fullerton, Team 1-3, Bruce Fall 2015 Membro di CSU Fullerton, Team 1-3, Bruce Fall 2015

CSUF-BRUCE-F15S1G3

4 Membri

12 Guide realizzate

0 Commenti

Aggiungi Commento

Visualizza Statistiche:

Ultime 24 Ore: 0

Ultimi 7 Giorni: 3

Ultimi 30 Giorni: 6

Tutti i Tempi: 2,707