Salta al contenuto principale

Samsung Galaxy Tab 3 8.0 Proximity Sensor Replacement

Cosa ti serve

  1. Samsung Galaxy Tab 3 8.0 Proximity Sensor Replacement, Battery - Open up the tablet: passo 1, immagine 1 di 2 Samsung Galaxy Tab 3 8.0 Proximity Sensor Replacement, Battery - Open up the tablet: passo 1, immagine 2 di 2
    • Start out by separating the screen from the back cover using the larger plastic opening tool to pry them apart.

    • Be careful when removing the screen as negligence can cause damage.

  2. Samsung Galaxy Tab 3 8.0 Proximity Sensor Replacement, Remove Back Cover: passo 2, immagine 1 di 2 Samsung Galaxy Tab 3 8.0 Proximity Sensor Replacement, Remove Back Cover: passo 2, immagine 2 di 2
    • Once every part of the screen is separated from the back cover, you should be able to fully remove it with your hands.

  3. Samsung Galaxy Tab 3 8.0 Proximity Sensor Replacement, Disconnect Battery: passo 3, immagine 1 di 2 Samsung Galaxy Tab 3 8.0 Proximity Sensor Replacement, Disconnect Battery: passo 3, immagine 2 di 2
    • To remove the battery you must use something small, such as tweezers, to disconnect the battery from its port.

    • Note: the connection lifts up to remove.

  4. Samsung Galaxy Tab 3 8.0 Proximity Sensor Replacement, Remove Battery: passo 4, immagine 1 di 1
    • After the battery is disconnected, use the pulling tab to safely remove the battery.

  5. Samsung Galaxy Tab 3 8.0 Proximity Sensor Replacement, Disconnect from Motherboard: passo 5, immagine 1 di 1
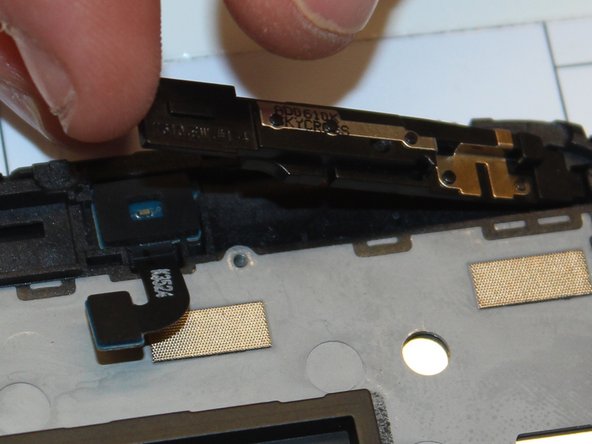
    • With a plastic remover tool, gently unseat the connection of the proximity sensor to the motherboard.

  6. Samsung Galaxy Tab 3 8.0 Proximity Sensor Replacement, Remove Proximity Sensor: passo 6, immagine 1 di 3 Samsung Galaxy Tab 3 8.0 Proximity Sensor Replacement, Remove Proximity Sensor: passo 6, immagine 2 di 3 Samsung Galaxy Tab 3 8.0 Proximity Sensor Replacement, Remove Proximity Sensor: passo 6, immagine 3 di 3
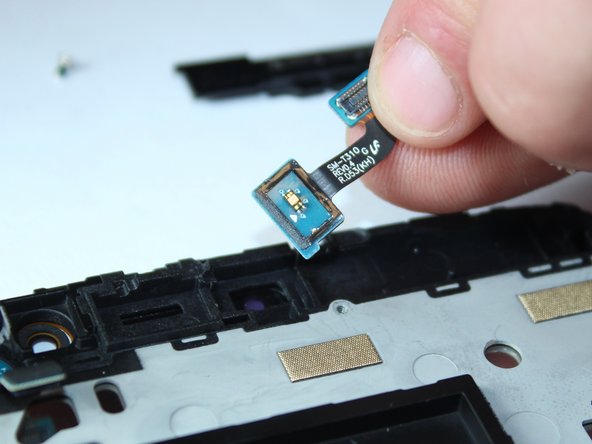
    • Gently wedge the plastic remover tool and pry antenna loose, and lift it from the proximity sensor. The Sensor can then simply lifted from the device.

Conclusione

To reassemble your device, follow these instructions in reverse order.

Un'altra persona ha completato questa guida.

Peter Paoletta

Membro da: 09/22/14

2.085 Reputazione

3 Guide realizzate

Team

USF Tampa, Team 4-2, Brown Fall 2014 Membro di USF Tampa, Team 4-2, Brown Fall 2014

USFT-BROWN-F14S4G2

3 Membri

26 Guide realizzate

0 Commenti

Aggiungi Commento

Visualizza Statistiche:

Ultime 24 Ore: 1

Ultimi 7 Giorni: 4

Ultimi 30 Giorni: 12

Tutti i Tempi: 2,215