Questa versione può contenere modifiche errate. Passa all'ultima istantanea verificata.
Cosa ti serve
-
Questo passaggio è privo di traduzione. Aiuta a tradurlo
-
Insert the plastic opening tool between the glass screen and the back cover so the curved end of the plastic opening tool is under the glass. Gently pry the back cover away from the glass screen.
-
Be sure to lift the entire display from the body and that you are not are lifting the glass from the display. You will need to reach down a little further for the correct removal.
-
Continue inserting the plastic opening tool around the whole device screen to completely separate the back cover from the glass screen.
-
-
Questo passaggio è privo di traduzione. Aiuta a tradurlo
-
Gently lift the screen up with your finger.
-
-
-
Usando le dita, rimuovi il nastro verde che copre il connettore della batteria.
-
-
Questo passaggio è privo di traduzione. Aiuta a tradurlo
-
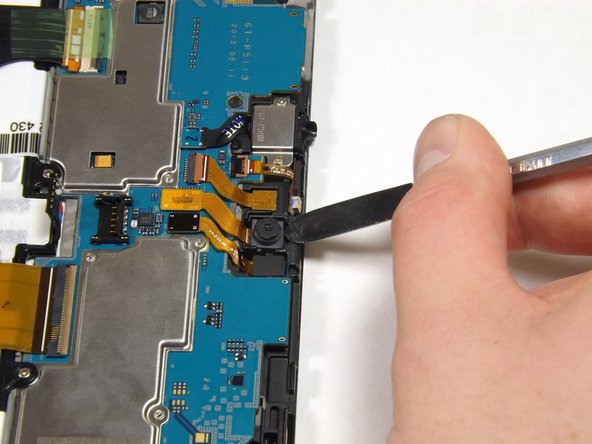
Gently lift the camera from its socket with the flat end of the heavy-duty spudger.
-
-
Questo passaggio è privo di traduzione. Aiuta a tradurlo
-
Gently lift the gold cable connector with the flat end of the heavy-duty spudger to disconnect it from the device.
-
-
Questo passaggio è privo di traduzione. Aiuta a tradurlo
-
The charging port cable is the black cable connected to the charger port. Using your fingers, peel the green tape off of the charging port cable connector.
-
-
-
Questo passaggio è privo di traduzione. Aiuta a tradurlo
-
Using the flat end of heavy-duty spudger, carefully lift the black tab that holds the charger port cable in place.
-
Slide the cable out.
-
-
Questo passaggio è privo di traduzione. Aiuta a tradurlo
-
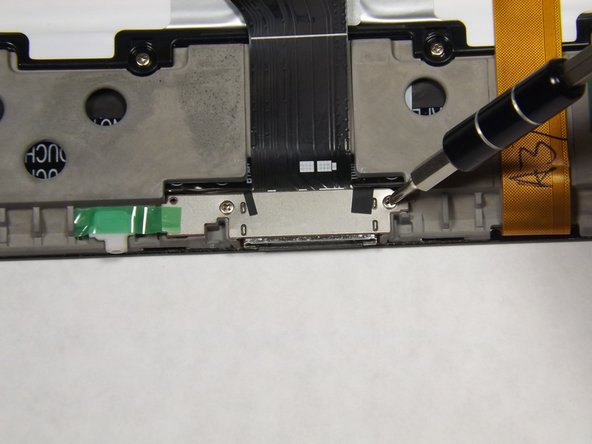
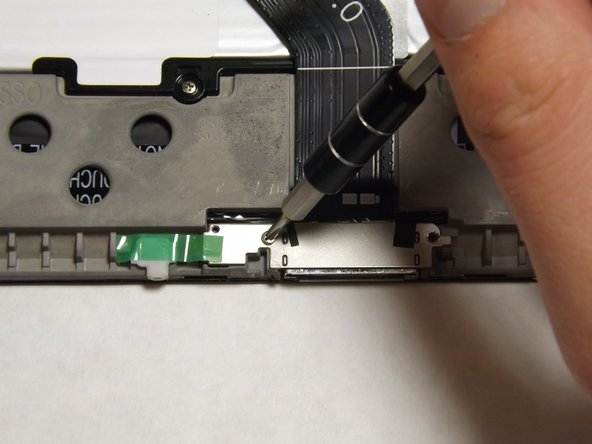
Use the Phillips 000 screwdriver to unscrew the two 3mm screws holding the charger port in place.
-
-
Questo passaggio è privo di traduzione. Aiuta a tradurlo
-
Use the flat end of the heavy-duty spudger to lift the white microphone piece until it is removed from its socket.
-
-
Questo passaggio è privo di traduzione. Aiuta a tradurlo
-
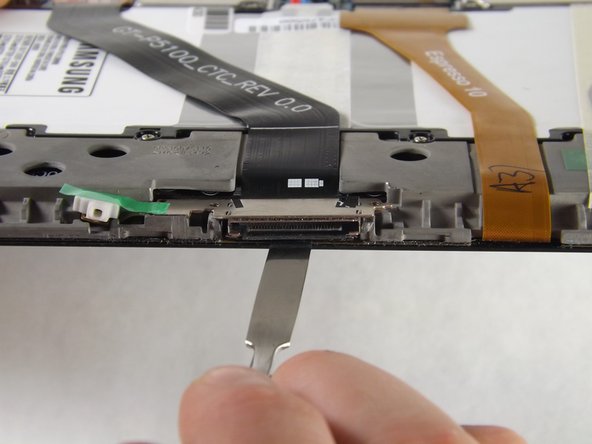
Slide the flat end of the heavy-duty spudger under the charger port.
-
Make sure the spudger is all the way to the back of the cavity and slide horizontally across the bottom to break the adhesive.
-
-
Questo passaggio è privo di traduzione. Aiuta a tradurlo
-
Lift the charger port with the flat end of the heavy-duty spudger and remove it from the device.
-
-
-
Usando le dita, rimuovi il nastro verde che tiene fermi i tre cavi piatti.
-
Usando la parte piatta dello spudger di plastica, solleva delicatamente la linguetta nera che tiene fermo il cavo piatto più a sinistra. Ripeti questo passaggio con il cavo piatto dorato e infine quello nero.
-
Usando le dita, fai scorrere delicatamente ognuno di questi cavi dai rispettivi connettori.
-
-
Questo passaggio è privo di traduzione. Aiuta a tradurlo
-
Using the flat end of the heavy-duty spudger, lift up the black ribbon lock directly left of the headphone jack from the black side.
-
After lifting up the lock, insert the heavy-duty spudger underneath the gold ribbon and slide to disconnect the gold ribbon.
-
-
Questo passaggio è privo di traduzione. Aiuta a tradurlo
-
Using the flat end of the heavy-duty spudger, gently lift up the ribbon lock directly above the one in the previous step from the brown side.
-
After lifting up the lock, remove the gold ribbon with the heavy-duty spudger as you did in the previous step.
-
-
Questo passaggio è privo di traduzione. Aiuta a tradurlo
-
Use the flat end of the heavy-duty spudger to pop off and disconnect all the marked connectors attached to the motherboard.
-
-
Questo passaggio è privo di traduzione. Aiuta a tradurlo
-
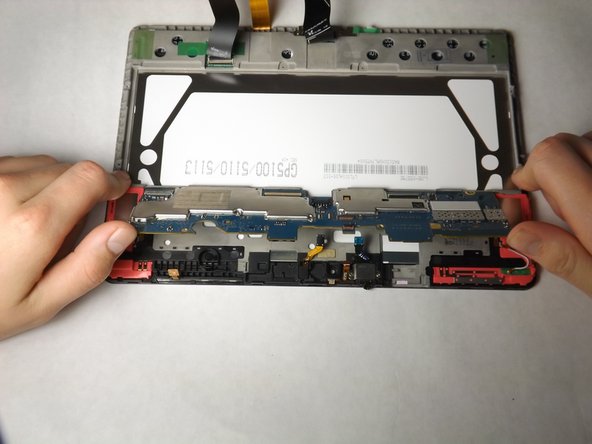
After disconnecting all of the connectors, push up on the motherboard with your thumbs to dislodge it from the tabs fastening the bottom of the motherboard. Then lift up the motherboard to carefully remove it from the device.
-
Annulla: non ho completato questa guida.
Altre 19 persone hanno completato questa guida.
5 Commenti
Is there any sodering required to install it?
All connections with other components come via cable connectors at different points on the board, but all components of the motherboard come complete already on the board, many with EMI shields.
Here is the link to the part product page which can give you pictures of the part itself which looks like the final picture of Step 19
The Instructions and illustrations were very helpful to follow and replace Motherboard for Samsung galaxy tablet S2 10.1,
I will need to purchase the part at our local elecrtonics shop and hopefully might find one and do the replacement following your instruction guide.
If not able to find at our local shops then I would place order with you and purchase part from you.
Thank you very much for kind assistance,
Regards,
Charlie Jay Klobill,
Wabag, Enga Province, PNG - 29/03/2020
i need a motherboad


