Salta al contenuto principale

Samsung Galaxy S5 Sport Rear Camera Replacement

Cosa ti serve

  1. Samsung Galaxy S5 Sport Rear Camera Replacement, Battery: passo 1, immagine 1 di 3 Samsung Galaxy S5 Sport Rear Camera Replacement, Battery: passo 1, immagine 2 di 3 Samsung Galaxy S5 Sport Rear Camera Replacement, Battery: passo 1, immagine 3 di 3
    • Remove the back casing of the phone using the notch located at the top.

  2. Samsung Galaxy S5 Sport Rear Camera Replacement: passo 2, immagine 1 di 3 Samsung Galaxy S5 Sport Rear Camera Replacement: passo 2, immagine 2 di 3 Samsung Galaxy S5 Sport Rear Camera Replacement: passo 2, immagine 3 di 3
    • Lift up the battery using a plastic spudger or fingernail.

    • Damaging the battery may result in physical injury and/or damage to the phone.

  3. Samsung Galaxy S5 Sport Rear Camera Replacement, Screen: passo 3, immagine 1 di 3 Samsung Galaxy S5 Sport Rear Camera Replacement, Screen: passo 3, immagine 2 di 3 Samsung Galaxy S5 Sport Rear Camera Replacement, Screen: passo 3, immagine 3 di 3
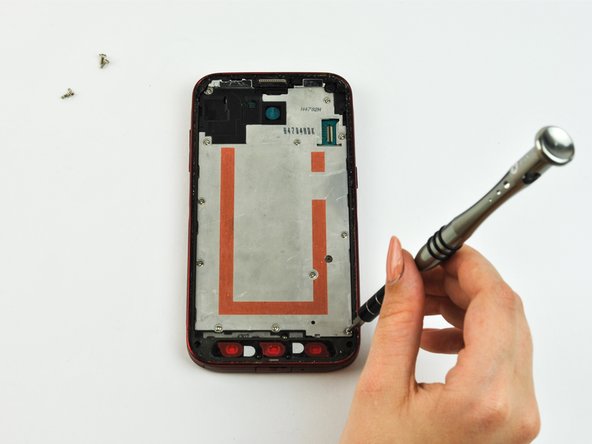
    • Using a plastic opening tool or spudger, pry up the screen after the adhesive has melted.

    • When working with electronics, it's important to choose a tool that's ESD-safe to avoid accidental damage to the device. The metal spudger is great when you need serious prying power, but the regular black nylon spudger or a plastic opening tool should be used whenever possible.

    • Because it is a water-resistant phone, the screen cannot be taken apart without breaking.

  4. Samsung Galaxy S5 Sport Rear Camera Replacement: passo 4, immagine 1 di 2 Samsung Galaxy S5 Sport Rear Camera Replacement: passo 4, immagine 2 di 2
    • The plastic cover of the phone may separate from the LCD screen. If so, also remove the LCD screen with the regular nylon spudger.

    • In the upper right area of the LCD screen, there is a connecting ribbon. Be careful not to rip its connection to the motherboard.

    • Do not hold the phone too close to your face or eyes. Small glass shards may dislodge or the metal spudger may slip.

  5. Samsung Galaxy S5 Sport Rear Camera Replacement, Rear Camera: passo 5, immagine 1 di 3 Samsung Galaxy S5 Sport Rear Camera Replacement, Rear Camera: passo 5, immagine 2 di 3 Samsung Galaxy S5 Sport Rear Camera Replacement, Rear Camera: passo 5, immagine 3 di 3
    • Remove the seventeen screws around the plate.

  6. Samsung Galaxy S5 Sport Rear Camera Replacement: passo 6, immagine 1 di 3 Samsung Galaxy S5 Sport Rear Camera Replacement: passo 6, immagine 2 di 3 Samsung Galaxy S5 Sport Rear Camera Replacement: passo 6, immagine 3 di 3
    • Push the plate out by applying pressure to the battery cavity.

  7. Samsung Galaxy S5 Sport Rear Camera Replacement: passo 7, immagine 1 di 2 Samsung Galaxy S5 Sport Rear Camera Replacement: passo 7, immagine 2 di 2
    • Remove the back facing camera from the top of the phone by first disconnecting the ribbon cable from the connector with a spudger or tweezers.

    • Apply delicate pressure.

Conclusione

To reassemble your device, follow these instructions in reverse order.

Team

USF Tampa, Team 1-6, Leahy Spring 2016 Membro di USF Tampa, Team 1-6, Leahy Spring 2016

USFT-LEAHY-S16S1G6

3 Membri

10 Guide realizzate

0 Commenti

Aggiungi Commento

Visualizza Statistiche:

Ultime 24 Ore: 0

Ultimi 7 Giorni: 0

Ultimi 30 Giorni: 2

Tutti i Tempi: 717