Questa versione può contenere modifiche errate. Passa all'ultima istantanea verificata.
Cosa ti serve
-
-
Schiaccia e tieni premuto il tasto di SPEGNIMENTO per spegnere il telefono.
-
-
-
Utilizzando le pinzette, rimuovi la scheda SIM facendola scorrere verso la parte inferiore del dispositivo.
-
-
Questo passaggio è privo di traduzione. Aiuta a tradurlo
-
Using a nylon spudger, push through the hole at the top of the memory card holder to slide it out.
-
-
Questo passaggio è privo di traduzione. Aiuta a tradurlo
-
Remove the 10 4.0 mm Phillips screws on the back of the phone using the #00 Phillips screwdriver.
-
Not needed, but Tweezers can be helpful in removing the screws from their holes, as their size makes removal a tad difficult.
-
-
Questo passaggio è privo di traduzione. Aiuta a tradurlo
-
Starting at the USB port, slide a plastic tool around the perimeter of the phone between the rear housing and frame. As you work your way around the edge you will feel the clips release.
-
-
-
Questo passaggio è privo di traduzione. Aiuta a tradurlo
-
Carefully separate the rear housing and the mid-frame to reveal the inside of the phone.
-
-
Questo passaggio è privo di traduzione. Aiuta a tradurlo
-
Remove the 2 flex cables shown that attach to the USB board, Tweezers can be especially helpful here.
-
-
Questo passaggio è privo di traduzione. Aiuta a tradurlo
-
Gently pry underneath the charging port using the plastic opening tool to separate it from the double sided tape below.
-
-
Questo passaggio è privo di traduzione. Aiuta a tradurlo
-
Once its released, gently lift the main board and remove the USB board containing the charging port.
-
-
Questo passaggio è privo di traduzione. Aiuta a tradurlo
-
Use the flat end of a nylon spudger to lift the headphone jack press-fit connector up to release the ribbon cable.
-
-
Questo passaggio è privo di traduzione. Aiuta a tradurlo
-
Use the flat end of a nylon spudger to lift the infrared sensor press-fit connector up to release the ribbon cable.
-
-
Questo passaggio è privo di traduzione. Aiuta a tradurlo
-
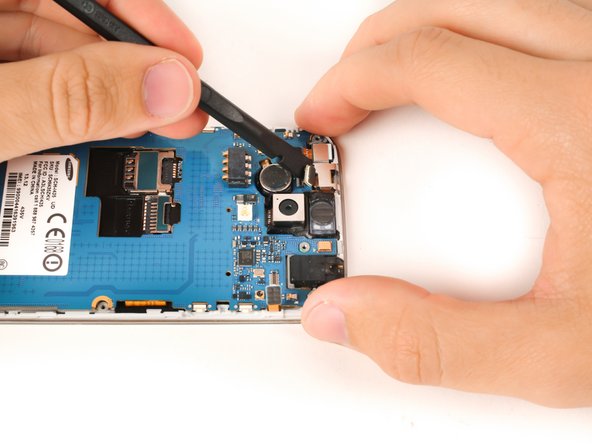
Use the flat end of a nylon spudger to lift the front-facing camera press-fit connector up to release the ribbon cable.
-
-
Questo passaggio è privo di traduzione. Aiuta a tradurlo
-
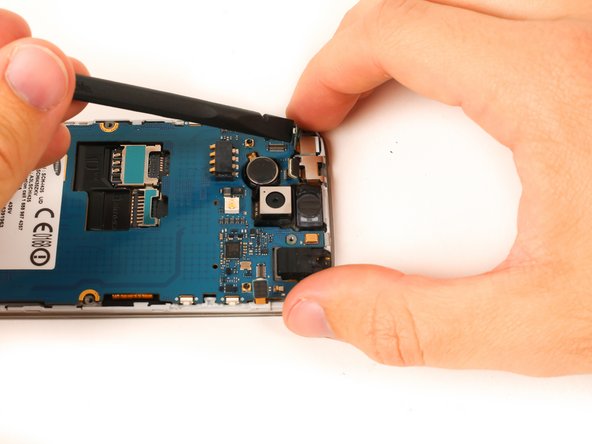
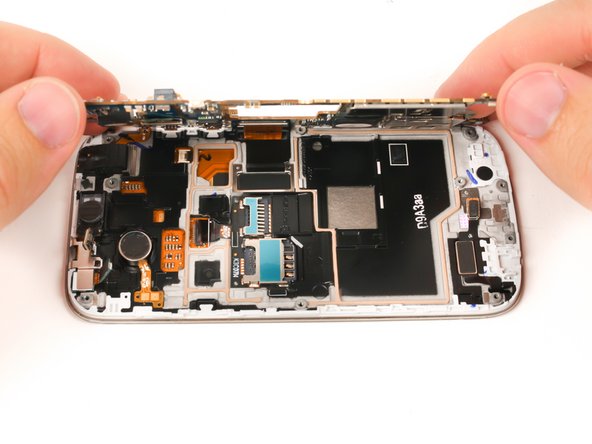
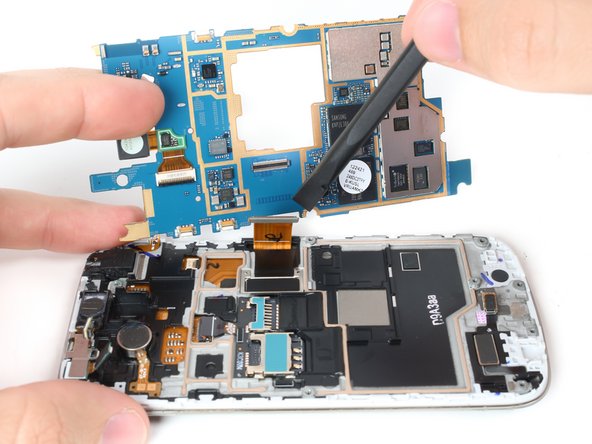
Gently lift the motherboard up and partially away from the device.
-
-
Questo passaggio è privo di traduzione. Aiuta a tradurlo
-
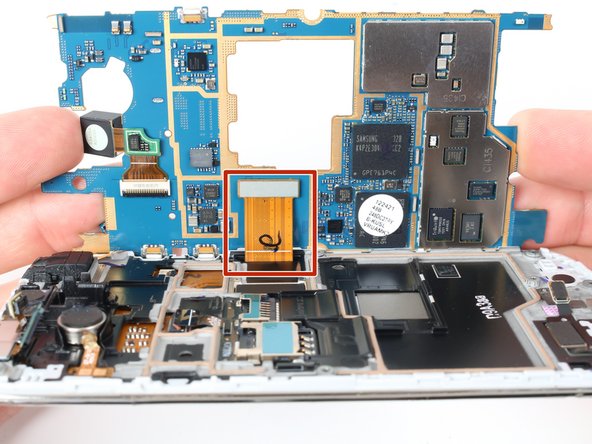
Put the flat end of a nylon spudger under the lip of the digitizer press-fit connector and lift up to release the connector and free the motherboard.
-
-
Questo passaggio è privo di traduzione. Aiuta a tradurlo
-
Use a heat gun or an iOpener to soften the adhesive underneath the perimeter of the screen.
-
-
Questo passaggio è privo di traduzione. Aiuta a tradurlo
-
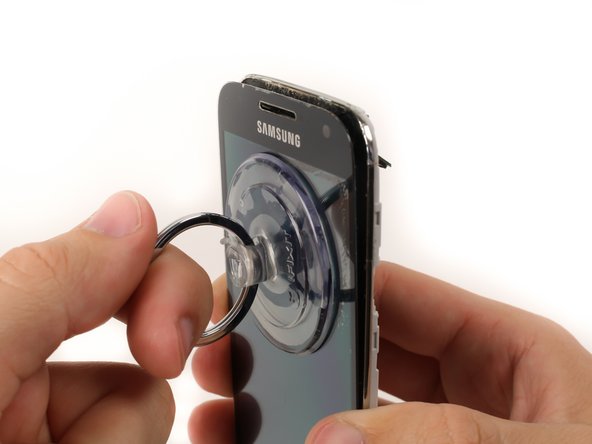
Use a suction cup to pull the screen away from the frame and create a small gap.
-
-
Questo passaggio è privo di traduzione. Aiuta a tradurlo
-
Insert a plastic opening pick into the gap between the screen and the plastic housing.
-
Slide the plastic opening pick along the edge of the screen to free the screen from the adhesive.
-
-
Questo passaggio è privo di traduzione. Aiuta a tradurlo
-
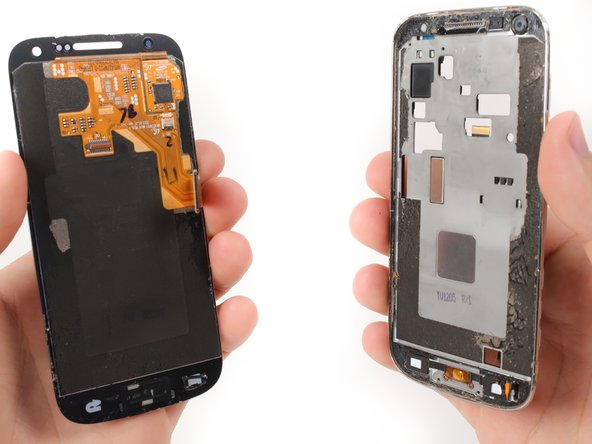
Remove the LCD screen and digitizer assembly completely.
-


Annulla: non ho completato questa guida.
Altre 18 persone hanno completato questa guida.


4 Commenti
VHAostartalomVHAostartalom köszönöm jékőinek! vagylök honlapnak!
When removing the digitizer be sure to disconnect the connector for the sim card/sd card before removing the digitizer.
Just FYI, having got this far and realised you can just replace the screen if it cracked. It looks like you just heat up the screen to soften the seal and pull off the screen without the need to replace the digitiser. It’s certainly quicker, easier and cheaper to do this is its just the screen that’s cracked. I need a digitiser now as it didn’t survive the strip down. Not sure if its economic to repair now!
Where and how to I transfer the home button????????